


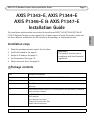

Page 10 AXIS P13-E Network Camera Series Installation Guide
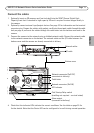
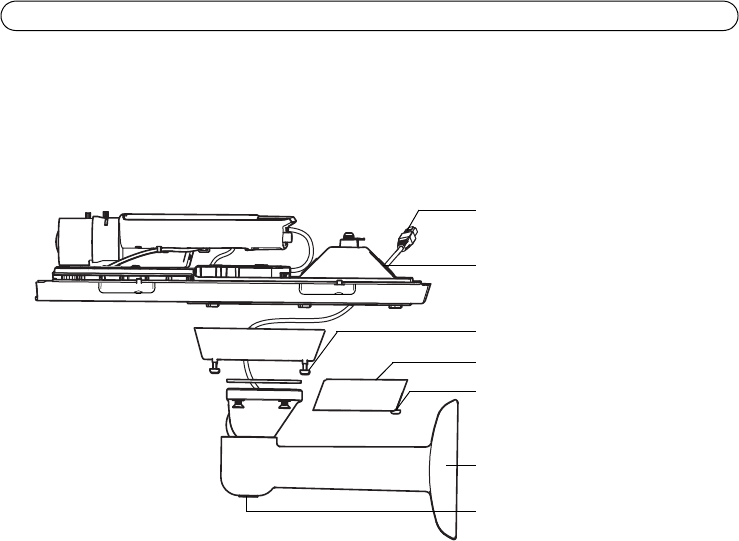
Install the camera on the bracket
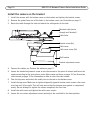
1. Install the camera with the bottom cover on the bracket and tighten the bracket screws.
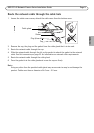
2. Remove the gasket from one of the holes in the bottom cover, see illustration on page 11.
3. Route the cable through the hole and attach the cable gasket to the hole.
4. Connect the cables, see Connect the cables, on page 11.
5. Loosen the bracket adjustment screw to aim the camera to the point of interest and focus the
camera according to the instructions under Adjust zoom and focus, on page 19. See Access the
video stream, on page 18 for information on how to view the video stream.
6. Take the top cover and attach the safety wire to the tab on the bottom cover.
7. Install the top cover. Make sure to tighten diagonally opposite bottom cover screws a few turns
at a time until all are tight. This will help ensure that the bottom cover gasket is compressed
evenly. Do not attempt to tighten the screws completely the first time.
8. Install the cable cover and tighten the cable cover screws.
9. Loosen the sun screen adjustment screws and adjust the sunshield to the front position.
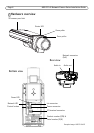
Cable cover
Bracket screw (4x)
Cable cover screw (2x)
Network cable (route
Wall bracket
Bracket adjustment screw
through wall bracket)
Cable holes