


AXIS P33/P33-V Network Camera Series Installation Guide Page 7
ENGLISH
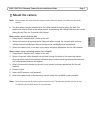
Mount the camera
Note: Please remove the rubber band for transport-safety from the camera unit before you mount the
camera.
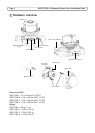
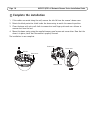
a. This Axis product can be mounted with the cables routed through or along the wall. This
product can also be fitted with a metal conduit for protecting the cabling when they are routed
along the wall. See the illustration that follows.
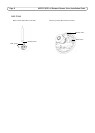
Mount camera directly onto the wall
1. Using the drill template drill 2 holes in the wall.
2. Route and connect all required cables. Required cables include the network cable and may
include external input/output devices and the active speaker/external microphone.
3. Attach the camera unit to the wall using screws and plugs appropriate for the wall material.
Mount camera using a mounting bracket (not included)
1. Using the drill template drill 2 holes in the wall.
2. Route all required cables through the wall and through the holes in the mounting bracket.
Required cables include the network cable and may include external input/output devices and
the active speaker/external microphone.
3. Attach the mounting bracket to the wall, using screws and plugs appropriate for the wall
material.
4. Connect cables.
5. Insert the SD memory card (optional).
6. Attach the camera unit to the mounting bracket using the two M4x8 screws provided.
Note:
These instructions are for mounting the camera on a wall. The mounting bracket can also be used
for mounting the network camera to a junction box.