


AXIS P5532-E/AXIS P5534-E Installation Guide Page 9
ENGLISH
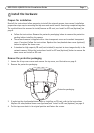
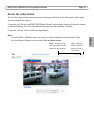
Install the network camera
1. Install the selected bracket (not included)
according to the instructions supplied with the
bracket. If drilling is required, make sure to use
drill bits, screws, and plugs that are appropriate
for the material. See www.axis.com for infor-
mation on available mounting accessories.
2. Route the network cable and attach the
supplied RJ45 connector. Refer to the
instructions provided with the connector for
information on wiring and assembly.
3. Hook the camera to the safety wire on the
bracket.
4. Connect the network cable and RJ45 connector to the network connector on the camera.
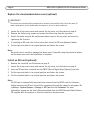
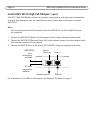
5. Install AXIS T8123, see
Install AXIS T8123 High PoE Midspan 1-port,
on page 10.
6. Check that the indicator LEDs on the midspan indicate the correct conditions, see the table on
page 11 for further details.
7. Slide the unit holders on the camera into the slots on the bracket and rotate the camera unit.
8. Secure the network camera to the mounting bracket by fastening the 3 screws (Torx T30).
!
IMPORTANT!
The supplied RJ45 connector or a compatible, IP66 rated RJ45 connector must be used in order to
comply with the IP66 rated design of the camera.
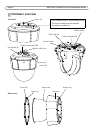
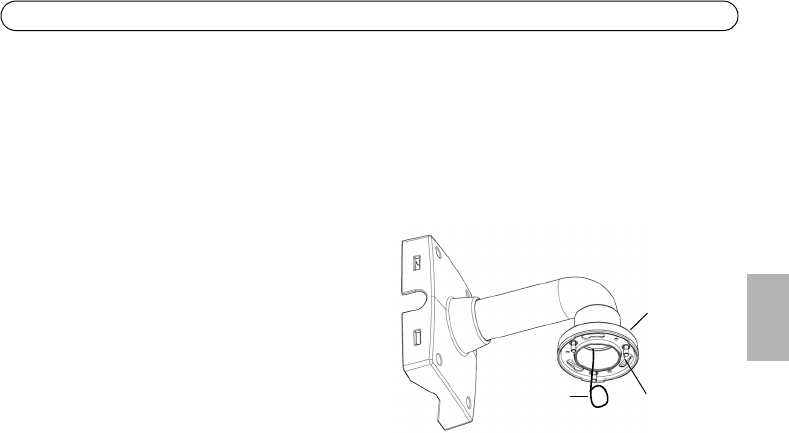
Wall bracket (mounting example, bracket not included)
Safety
wire
Slots for
Screws
Torx T30
unit holders