


Page 6 AXIS T8123-E/T8124-E Installation Guide
Install the Hardware
AXIS T8123-E/T8124-E may be wall or bench mounted using the rear side holes.
Note the following before mounting AXIS T8123-E/T8124-E to a fixed location:
• Do not cover AXIS T8123-E/T8124-E or block the airflow to the product with any foreign
object. Keep AXIS T8123-E/T8124-E away from excessive heat and humidity, and free from
vibration and dust.
• Ensure that the cable length from the Ethernet network source to your Axis video product
does not exceed 100 meters (333 ft). AXIS T8123-E/T8124-E is not a repeater and does not
amplify the Ethernet data signal.
• There is no "on-off" switch; simply plug AXIS T8123-E/T8124-E into an AC power outlet
installed near the equipment and easily accessible. For the international version of
AXIS T8123-E/T8124-E AC power line shall also be connected via an external 2-pole circuit
breaker to the normal building installation wiring.
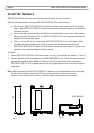
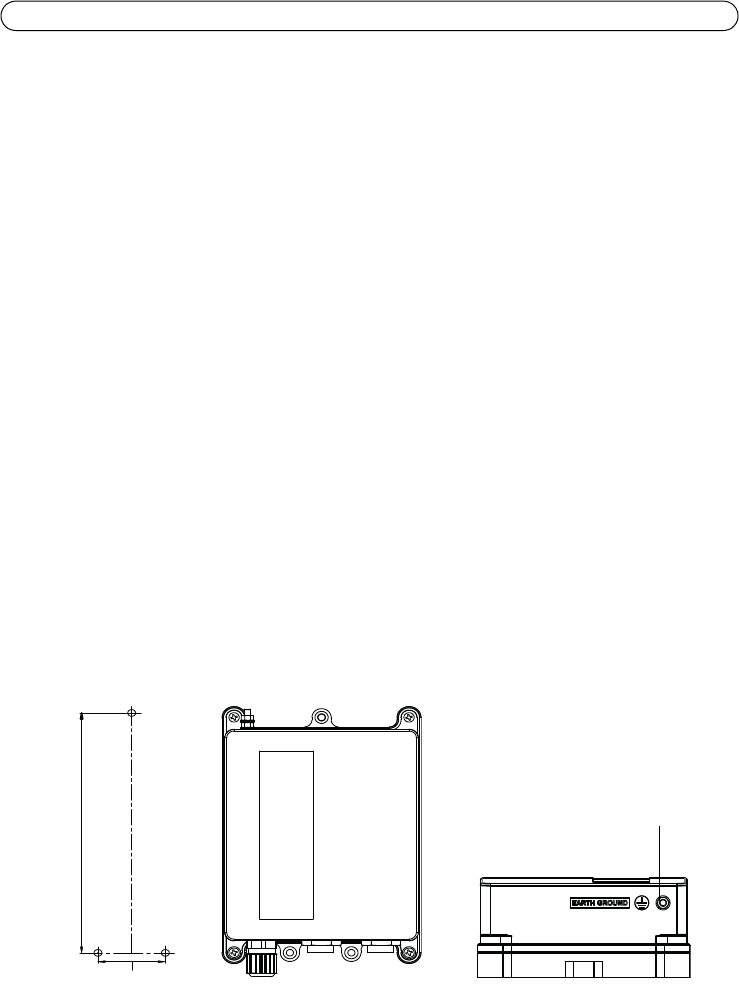
To mount:
1. Fasten AXIS T8123-E/T8124-E with three screws. See Fig 1 (screw holes are marked 1, 2 and 3).
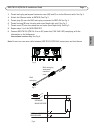
2. Connect one end of the grounding wire to EARTH GROUND (see fig 1b) and the other end to an
appropriate ground location. Make sure that this step (2) is performed before connecting
AXIS T8123-E/T8124-E to its power source! Use the supplied ground wire or a wire of equal or
larger area.
Note: When mounting the AXIS T8123-E/T8124-E make sure to use appropriate screws and plugs
for the surface (wood, concrete etc.). Do not unscrew the four pre-mounted screws
located in every corner of the product, since this violate the warranty of the product.
46.36
196
Fig 1
Fig 1b
1
EARTH GROUND
2 3