


Page 10 AXIS T95A00/T95A10 Dome Housing
Mount the housing to the bracket
Notes:
• Ensure that the bracket is securely fastened, and cables are pulled through it before mounting the
camera housing. Ensure that no power is connected to the cables.
• It is recommended that you place a soft, clean cloth (not included) into the dome to ensure it
remains clean until the time when you need to mount the camera.
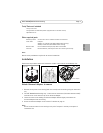
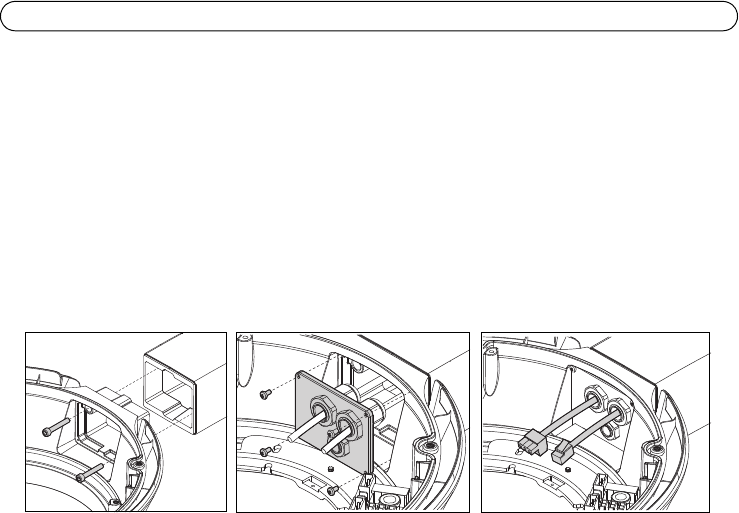
1. If the top cover of the housing was attached to facilitate transportation, detach it again at this
point.
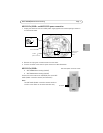
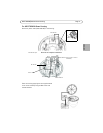
2. Position the AXIS T95A00/T95A10 Dome Housing against the bracket, making sure to pull the
cables (power, Ethernet, and I/O cables if applicable) into the housing, and tighten the two
25mm M5 allen key screws (included with the bracket).
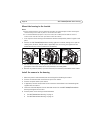
3. Pull the cables through the cable glands, and secure the hole in the bracket with the cable
gland plate. Ensure the cables are securely fastened in the cable glands.
4. Remove the protective cloth (if you have used one) from the dome, and remove traces of dust.
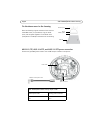
Install the camera in the housing
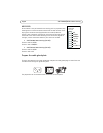
1. Make sure power is disconnected from the housing before installing the camera.
2. Connect the network cable to the Ethernet port in the camera.
3. Connect the power cable to the camera.
4. If applicable, connect the I/O cables to the connectors as described in the installation guide
supplied with the camera.
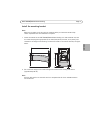
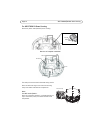
5. Lower the Universal Adaptor with the attached camera into the AXIS T95A00/T95A10 Dome
Housing and tighten the 3 screws.
6. Connect power to the housing as described below.
• “For AXIS T95A00 Dome Housing” on page 11
• “For AXIS T95A10 Dome Housing” on page 12