EN
|
7
Bosch Security Systems | 23 July 2004
LTC 9365 Series | Instruction Manual | Unpacking
1UNPACKING
This electronic equipment should be unpacked and
handled carefully.
Check for the following items:
•LTC 9365/00 Housing:
1 Housing Top
1 Housing Bottom
• Hardware Kit:
1 Camera Bracket
2 1/4-20 x 5/8in. Bolts
2 Flat Washers
2 Split-ring Washers
1 1/4-20 x 3/8in. Bolt
1 O-ring
2 10-32 x 1/2in. Security Screws
1 Right Angle BNC Connector
1 Security Tool
• Installation Instructions (This Manual)
If an item appears to have been damaged in shipment,
replace it properly in its carton and notify the shipper.
If any items are missing, notify your Bosch Security
Systems Inc. Sales Representative or Customer Service.
The shipping carton is the safest container in which the
unit may be transported. Save it for possible future use.
2SERVICE
If the unit ever needs repair service, the customer
should contact the nearest Bosch Security Systems, Inc.
Service Center for return authorization and shipping
instructions.
Service Centers
USA
Phone: 800-366-2283 or 717-735-6638
fax: 800-366-1329 or 717-735-6639
CCTV Spare Parts
Phone: 800-894-5215 or 408-956-3853 or 3854
fax: 408-957-3198
e-mail: BoschCCTVparts@ca.slr.com
Canada
Phone: 514-738-2434
Europe, Middle East & Asia Pacific Region
Phone: 32-1-440-0711
For additional information, see
www
.boschsecuritysystems.com.
3 CARE AND MAINTENANCE
Regularly scheduled maintenance will help prolong the
operation life of this unit. Clean the viewing window as
needed with a mild, nonabrasive detergent in water and
a soft cloth.
4DESCRIPTION
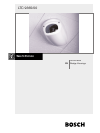
The LTC 9365/00 Wedge Ceiling Housings are smart
stylized housings for indoor use. These housings meet
customers' demands for an attractive housing that is
both cost competitive and easy to install.
5INSTALLATION
This installation should be made by qualified service
personnel and conform to the National Electrical Code
and applicable local codes.
1. Carefully remove the unit from the box.
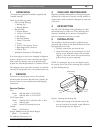
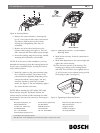
2. Open the housing top by loosening the (2) 10-32
security screws using the security tool provided
(Figure 1). Once the screws have been loosened,
pull on the top to open completely.
NOTE: In opening the top, it may be helpful to place
the security tool in one of the mounting holes and pull
up while holding the top.
Figure 1 Opening the Housing Top
3. Position the housing in the desired location. Be
sure the location is structurally sound. Mark the
four mounting holes (see Figure 2).
Security
Tool
Housing
Top
10-32 Security
Screw


