


calumetphoto.com4
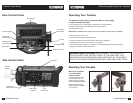
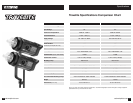
Control Panel Guide
Carry handle
Photocell On/Off
AC / Battery
Power Select
Model Lamp
Full/Proportional
AC Inlet
Modeling Lamp
Control Switch
Fuse
(and Spare Fuse)
Sync Socket
Reflector
Release
Photocell
Flash Power/
Model Lamp Control
Flash-Ready
Indicator
Test/
Open Flash
Side Control Panel
calumetphoto.com
Rear Control Panel
Battery Power Inlet
Connecting and Using Your Travelite
5
The Calumet Travelite may be operated either on an AC supply
or with a Calumet Travel-Pak
For AC operation, the AC switch (page 4) should be in the upper position I.
For battery operation the switch should be in the lower position II.
The center position is off.
NOTE: When operated from a battery source, the modeling functions are not available.
• Ensur
e the power source is off.
• Connect the unit using the appropriate cable.
• If using the Travel-Pak, ensure the connector locks are fully tightened.
• Switch the power source on, then switch on the Travelite.
• The unit will charge and indicate it is ready for use by illuminating the green flash-ready light.
• Press the test button to check the unit fires.
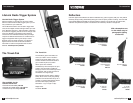
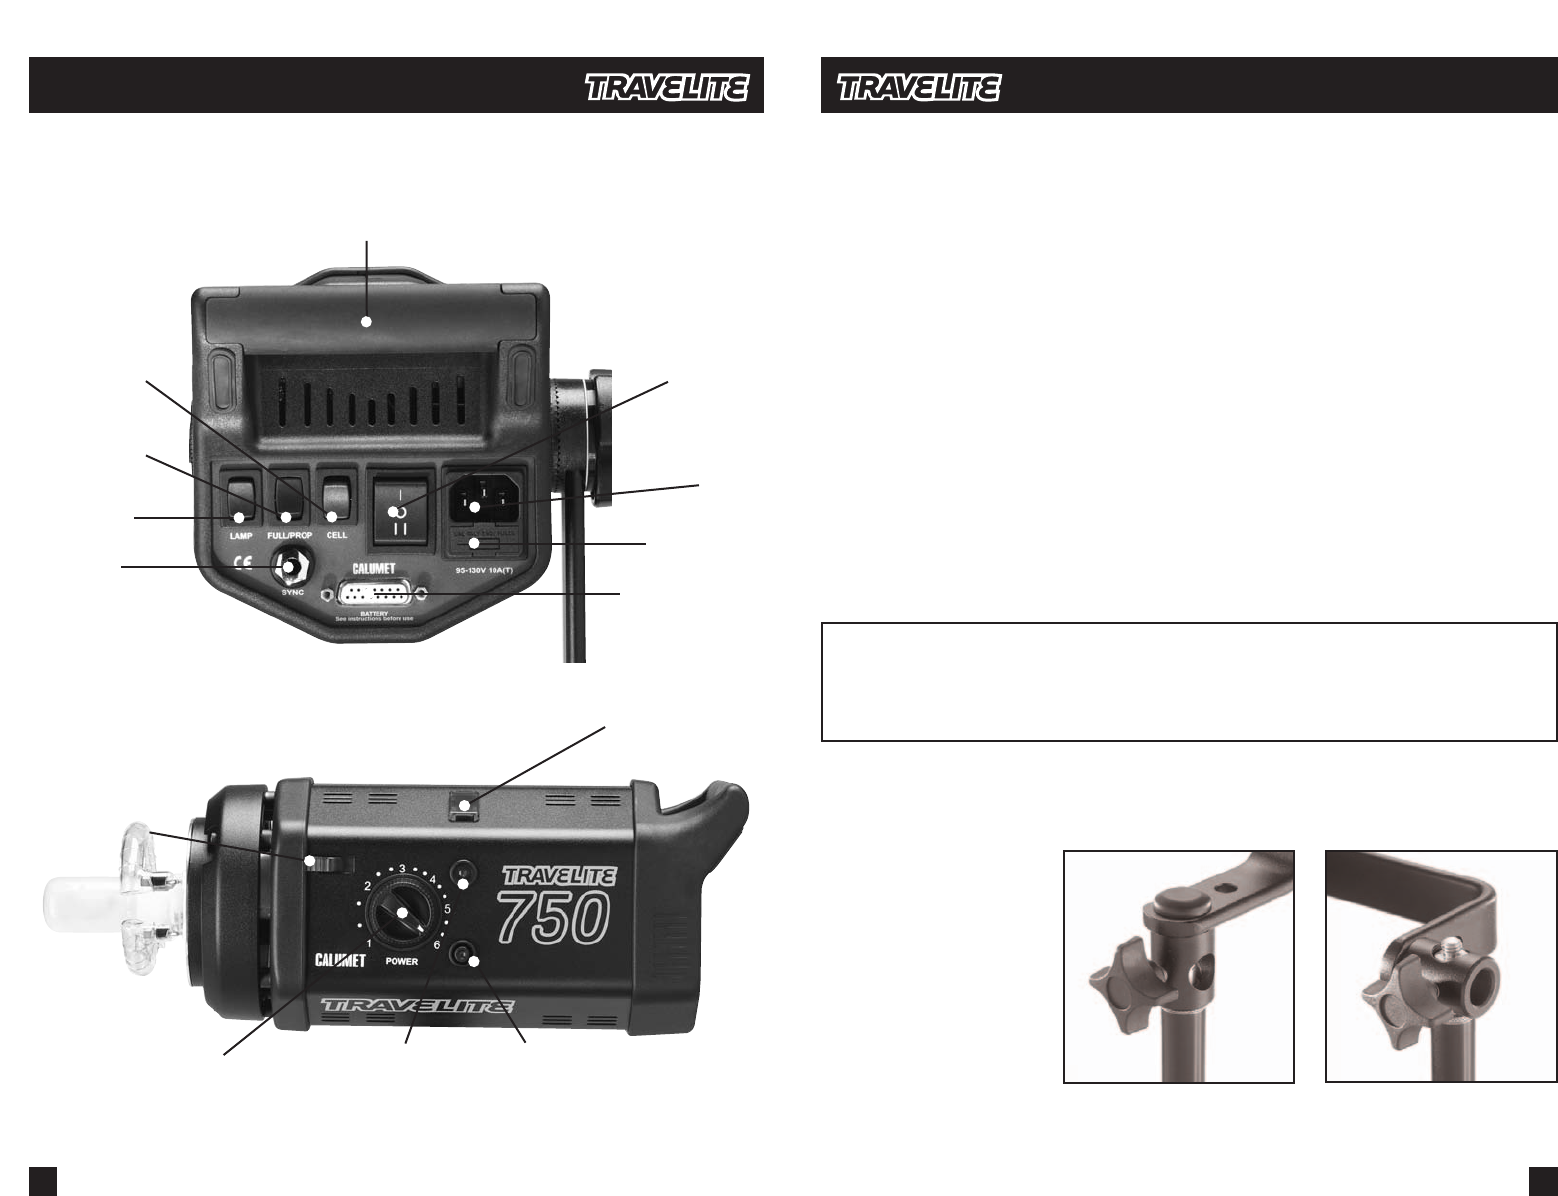
Mounting Your Travelite
Operating Your Travelite
Mount your Travelite
on a dependable
support system
The mount bushing on the
L-bracket allows for two
possible ways of mounting
to the stand/support (RIGHT).
Method B may be found
useful if the light is required
to point down.
WARNING HIGH VOLTAGE! NEVER CONNECT THE TRAVELITE TO
BOTH AC SUPPLY AND BATTERY SUPPLY AT THE SAME TIME. THIS
APPLIANCE MUST BE GROUNDED WHEN USED WITH AC. DISCONNECT
THE AC PLUG WHEN CHANGING MODELING LAMPS AND FLASH TUBES.
A
B