


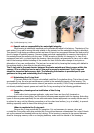
thoroughly toweled dry before opening up. After removing the lid and servicing the camera, replace the lid
straight away, rather than leaving it lying around. Before replacing the lid, make sure that no
contamination such as dust, hair, salt, sand etc. has fallen onto the O-ring or O-ring recess, as a
precaution we recommend to inspect the O-ring every time the lid is opened and to carry out the
maintenance if necessary.
Procedure:
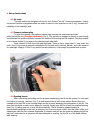
• Place the lid on a firm non-slip level surface.
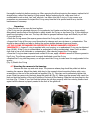
• The O-ring can be extracted using an O-ring extractor tool (make sure the tool as no sharp edges).
Alternatively use the flats of the thumbs to gently stretch the O-ring on two faces (Fig. 4) thus making a
small loop protruding a few mm. The loop can then be grasped between finger and thumb, to pull the
O-ring over the lip.
• Clean the O-ring recess (the square groove where the O-ring sits) with a cotton bud.
• Inspect the O-ring all the way round its surface for damage such as cuts tears or contamination. This
should be done visually and also by feeling the surface texture between finger and thumb.
• IF THE O-RING IS DAMAGED OR SUSPECTED OF BEING DAMAGED, DISCARD IT
IMMEDIATELY. A spare O -ring is supplied with your housing, or a replacement O-ring can be obtained
from 10 BAR. If the O-ring is contaminated or suspected of being contaminated, clean it with a cotton
cloth that is free of all chemicals or contamination. After cleaning inspect the O-ring again.
• Once the O-ring has been inspected and verified fit for use, apply a SMALL amount of Silicone grease to
the O-ring. The silicone grease must be evenly distributed round the O-ring
• Replace the O-ring into the groove; run a finger round the O-ring, to make sure it is snugly seated in the
groove.
(Fig. 4) Stretch the O-ring
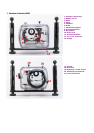
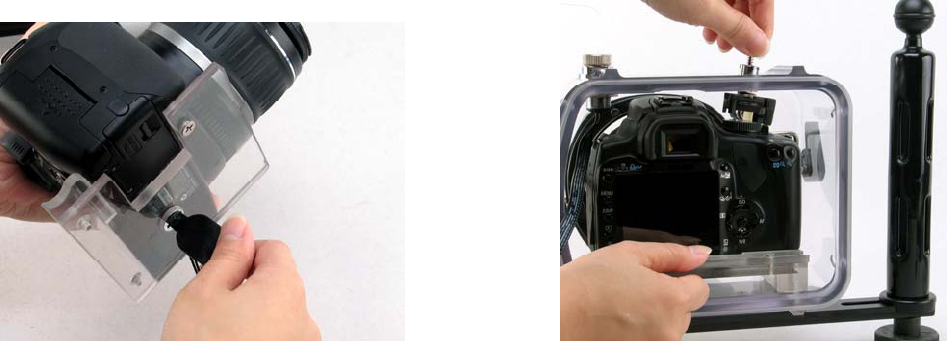
4.7 Mounting the camera in the housing:
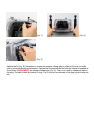
Remove the lens cap and wrist strap. The pressure release plug should be pulled out before
inserting the camera. Attach the plastic slide tray to the camera’s tripod mounting fixture with a coin,
screwdriver or the end of the universal tool supplied (Fig. 5). Take care not to excessively tighten the
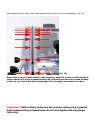
screw. Slide the camera into the body along the guide rail (Fig. 6). Make sure the camera body reach the
limit and test the function of the on/of button on the body of the housing. Slide the hot shoe plug into the
hot shoe (Fig. 7) Note: If you find that the buttons do not align properly with the controls, please check
again that the camera is properly seated to the limit of the guide rail.
(Fig. 5) (Fig. 6)