


55
Using BEST SHOT
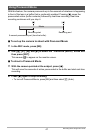
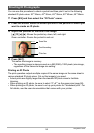
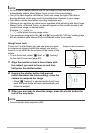
A process called “keystone
correction” makes lines straight
and natural, even if rectangular
subjects are shot from an angle.
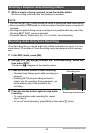
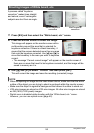
1. Press [BS] and then select the “White board, etc.” scene.
2. Press the shutter button to shoot the image.
This image will appear on the monitor screen with a
red boundary around the area that is selected for
keystone correction. If there is a black boundary, it
means that the camera detected more than one area
that could be keystone corrected. Use [
4] and [6] to
move the boundary to the area you want to keystone
correct.
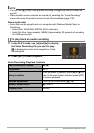
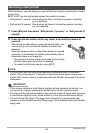
• The message “Cannot correct image!” will appear on the monitor screen if
there are no areas that need to be keystone corrected, and the image will be
saved to memory as it is.
3. Use [8] and [2] to select “Correct” and then press [SET].
This will correct the image and save the resulting (corrected) image.
NOTE
• When composing an image like the ones shown above, make sure that the entire
outline of the object you are trying to shoot is enclosed within the monitor screen.
• Make sure the object is against a background that allows its outline to stand out.
• VGA size images are stored as VGA size images. All other size images are stored
as 2M (1600
x
1200 pixels) images.
• Digital zoom is disabled while shooting with the “White board, etc.” scene.
However, you can use optical zoom (page 42).
Shooting Images of White board, etc.
Before keystone
correction
After keystone
correction