


Text
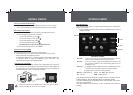
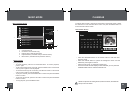
Create
VVD Button
Preview Window
Play button Stop button
Selected File
Clipart
Effect
USB Port
(computer)
USB Port (mini)
16
GETTING STARTED
17
GETTING STARTED
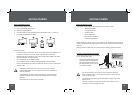
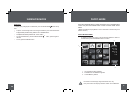
Turning Your Photo Frame On/Off
To turn your photo frame on, set the Power Switch to the “On” position.
To turn your photo frame off, set the Power Switch to the “Off” position.
Menu Interface Navigation
To select the different menu options and files of your digital photo frame:
Use the Navigation keys to make a selection.
To move the selection up, press
To move the selection down, press
To move the selection left, press
To move the selection right, press
Press ENTER to confirm the highlighted selection.
To return to the previous screen, press MENU.
•
•
•
•
•
•
•
•
•
Upon turning on the power, your photo frame will display the “
”
screen
shown below.
•
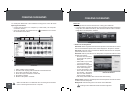
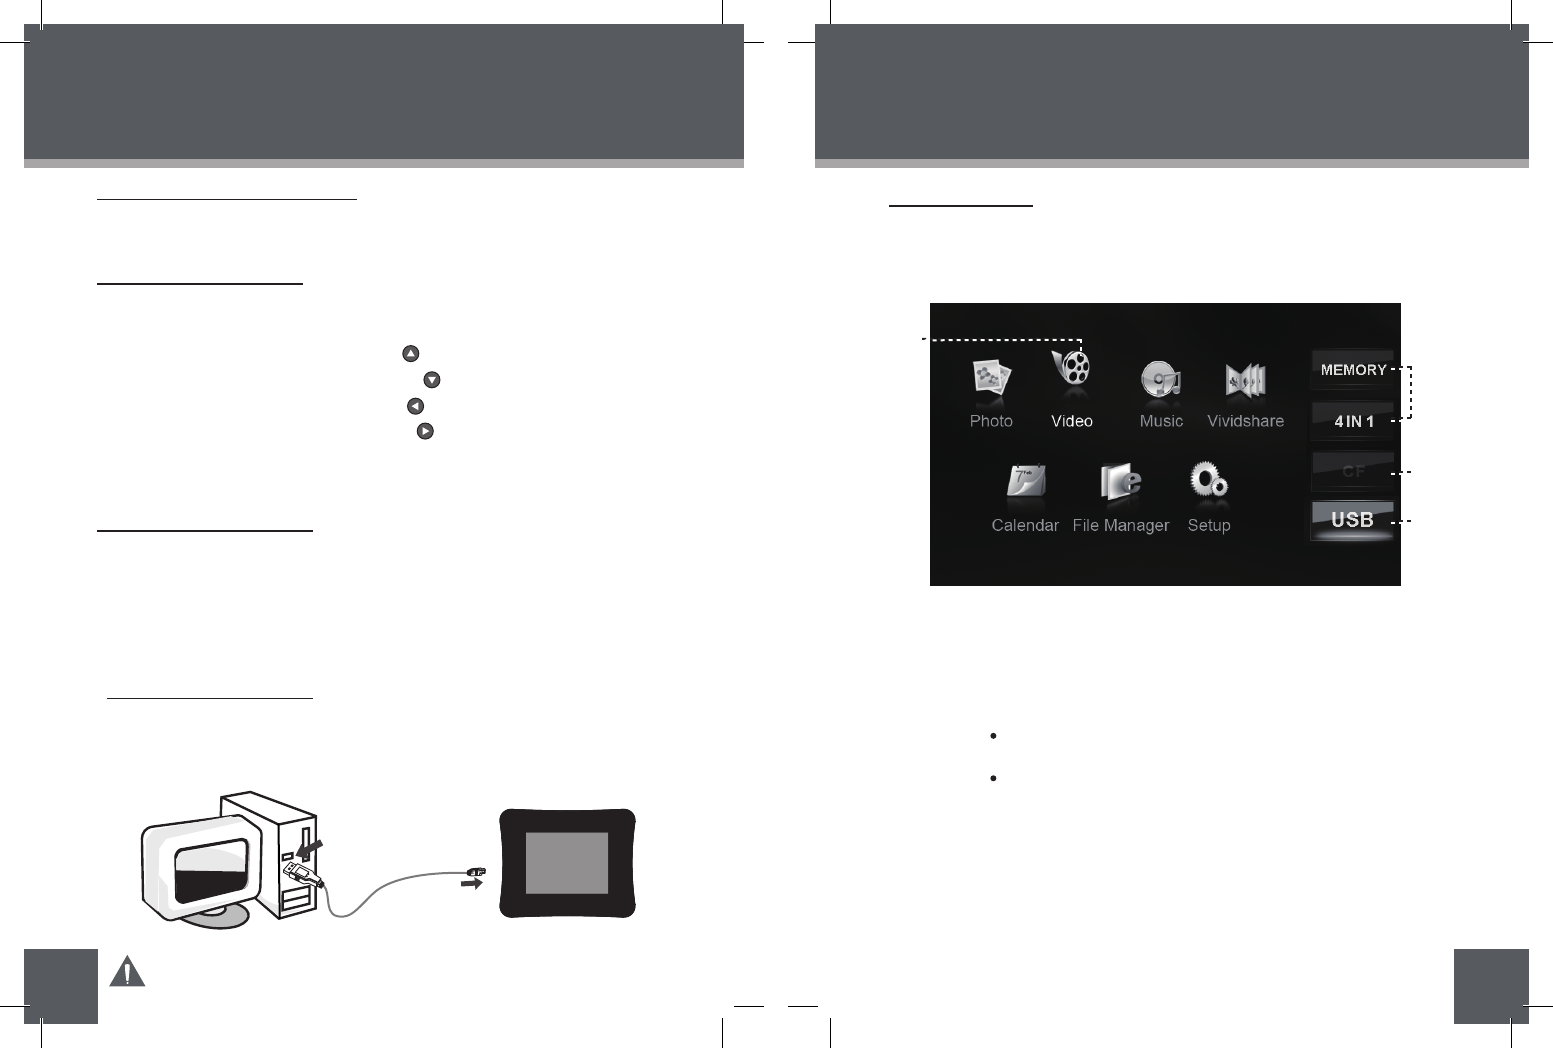
MAIN MENU SCREEN
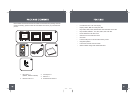
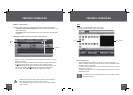
Connect the DP frameto a computer with USB cable to:
Transfer files to and from your photo frame’s installed memory cards.
Perform basic file management functions.
•
•
•
Connecting to a Computer
Connect the photo frame to your computer with USB cable. Upon
connection:
•
Your computer will automatically recognize installed in
your photo frame. representing your installed memory cards will appear
as “Removable Disk” when you open “My Computer”.
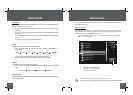
Computer Connection (USB)
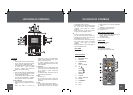
Icons
Main Menu Screen
Main Menu
Press the MENU button and then press the UP/DOWN button to select an
available card slot.
a
a
the memory cards
Inserted: A card icon that is in-color indicates that a memory card has
been inserted (installed) in the corresponding slot.
No Card: A card icon that is grayed-out indicates that a memory card
has not been installed in the corresponding slot and is not
available for use.
Selected: A highlighted frame indicates that the card slot is selected. Only
card slots with an installed memory card may be selected.
Selected
Selected
Inserted
No Card
Highlighted: the Video icon is being selected.
Memory: Built-in Memory 4 IN 1: SD / MMC / MS / XD Card
CF: CF card USB: USB flash drive
To make photo slideshows in Vividshare software. See Creating Slideshows
for operation details. To enjoy the slideshows on this DP frame , see
Vividshare Mode sections for operation details.
DP850 / DP852 / DP854
Make sure that there’s no USB flash drive connecting to the DP frame
before connecting the DP frame to a computer.
You can save pictures on the Memory ( built-in memory ) and enjoy them as
a demo slideshow. see File Manager section for operation details.
The demo slideshow will automatically start in approximately 8 seconds if
there is no card inserted.
The demo slideshow will stop when a card is inserted or any button is
pressed.
DP850
DP852
DP854
DP850 / DP852 or DP854
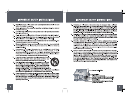
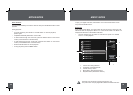
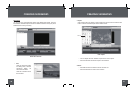
2
4
3
1
Remote Control x 1
1.
2.
AC Adapter x 1
Manual x 1
3.
4.
Kickstand and Screw x 1
5.
5
DP Frame x 1
(DP850 , DP852 or DP854)
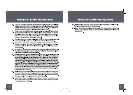
CHANGE
VIEW
CLOCK
MENU
ROTATE
COPY
/DEL
+
-
DP850,DP852 or DP854