


Q-SEE QUICK INSTALLATION GUIDE
M
M
O
O
D
D
E
E
L
L
N
N
U
U
M
M
B
B
E
E
R
R
Q
Q
R
R
4
4
1
1
4
4
-
-
4
4
0
0
5
5
5 | Page
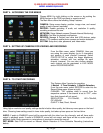
PACK TIME: Choose the time length of all recorded files: 15, 30, 45, 60 min.
(Max = 60 min)
Manual Recording:
From the Record Setup screen set the Rec Mode to “ALWAYS”. Your DVR will continuously record and separate
files will be created with the Pack Time intervals you selected.
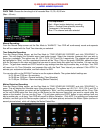
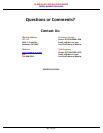
Time Schedule Recording:
From the Record Setup screen, set the Rec Mode to “TIME SCHEDULE RECORD” and click “SCHEDULE” in
green. This will display the Schedule menu (see below image). Select the channels (cameras) that you wish to
record on a schedule. The options are: All, CH-1, CH-2, CH-3, and CH-4 respectively. The channel you select will
be highlighted in “Blue”, and the unselected channels will be “Grey. Click on the green GENERAL option box then
click on the boxes for the days and times that you want to record using this option on the timeline. You can use the
[From – To] pull-down menus and COPY button to copy settings from one day to another day, or all days. Your DVR
will record on it’s Time Schedule, and separate files with the Pack Time Interval you selected. Click APPLY to
activate your customized schedule, and then reboot the DVR.
You can also click on the DEFAULT button to use the system defaults. The system default settings are:
Hr 01:00 am-07:59 am : No recording
Hr 08:00 am-18:59 pm : General recording (Time Schedule)
Hr 19:00 pm- 00:59 am : Alarm recording (Motion Detection)
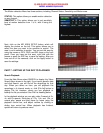
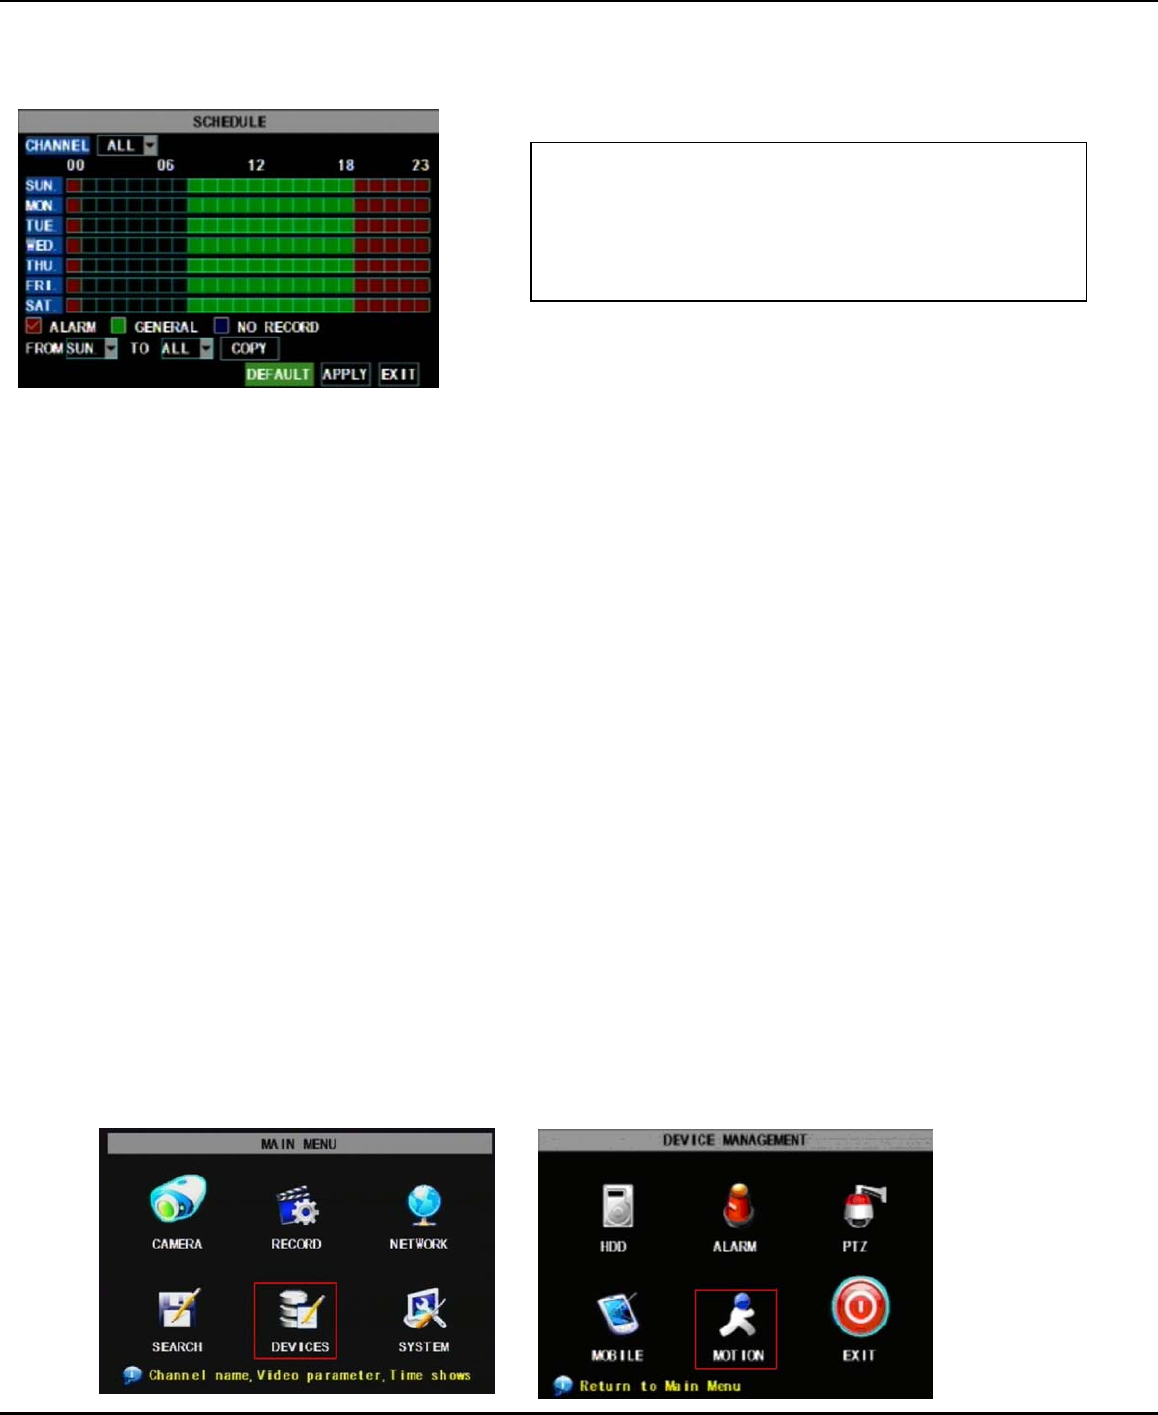
Motion Detection Recording:
From the Record Setup screen, set the Rec Mode to “TIME SCHEDULE RECORD” and click “SCHEDULE” in
green. This will display the Schedule menu (See picture above). The options are: All, CH-1, CH-2, CH-3, and CH-4
respectively. The channel you select will be highlighted in “Blue”, and the unselected channels will be “Grey. Click
on the red ALARM option box then click on the boxes for the days and times that you want to record using this
option on the timeline. You can use the [From – To] pull-down menus and COPY button to copy settings from one
day to another day, or all days. Your DVR will record on Motion Detection. Click APPLY to activate your customized
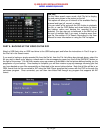
schedule, and then go to the Devices option (red box in first below picture) and select the Motion Option (red box in
second picture below), which will display the Motion Detect Box.
Grid Explanation:
Red = Alarm (motion detection) recording
Green = General (time schedule) recording
Transparent = No recording
Blue = The channel and date selected.