


Beep
59
Advanced Features
3
58
SETSET
OFFOFF
1
2
CONT.CONT.
:
:
:
OFFOFF
1
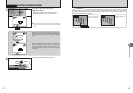
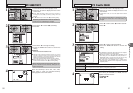
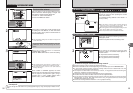
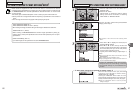
Select the Continuous shooting mode in the
Photography mode.
Select the required Continuous shooting mode.
High-speed shooting mode reduces the time
required for focusing when pressing the shutter
button down halfway.
The available shooting distance is from about 1 m
(3.3 ft.) to infinity.
●
!
When this function is active, higher sensitivity settings will
increase the amount of speckling in your images. This is
normal and does not affect the photographed image.
●
!
When taking pictures while the High-speed shooting mode is
set to “ON”, the battery will run down more quickly.
●
!
The LCD power save function is disabled in this mode.
Å
CONTINUOUS SHOOTING
â
HIGH-SPEED SHOOTING
Available Photography modes: B, À, m, ,, ., ©, ©M, s, M, <
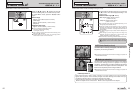
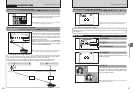
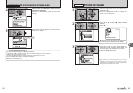
When setting the Continuous shooting mode
(except for “OFF”), the selected mode appears on
the LCD monitor.
f: Top 3-frame continuous shooting
k: Final 3-frame continuous shooting
h: Long-period continuous shooting
◆
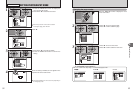
Notes on using the Continuous shooting modes
◆
h Shooting continues as long as holding the shutter button down.
h Number of available frames is limited depending on the available space on the xD-Picture Card.
h In Top 3-frame and Final 3-frame continuous shooting mode, the focus is determined in the first
frame and cannot be changed in mid-sequence.
h The exposure is determined in the first frame, however, in Long-period continuous shooting the
exposure is adjusted for the scene being shot.
h The speed of continuous shooting varies depending on the shutter speed.
h The flash cannot be used as the flash mode is set to “
v” Suppressed flash.
h For Top 3-frame continuous shooting and Final 3-frame continuous shooting, the results are always
displayed after you shoot. Note that pictures taken using Long-period continuous shooting are
recorded without displaying the results.
h Continuous shooting cannot be selected in “
©M” long exposure setting.
NNN
101010
2
ONON
HIGH-SPEED SHOOTINGHIGH-SPEED SHOOTING
SETSET
ONON
OFFOFF
:
:
:
:
OFF
OFF
OFFOFF
NNN
101010
CUSTOMCUSTOM
1
AUTOAUTO
2
OFFOFF
AUTOAUTO
M
:
:
OFF
OFF
:
:
:
:
0
1
01
02
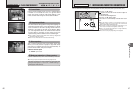
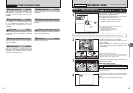
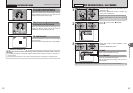
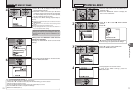
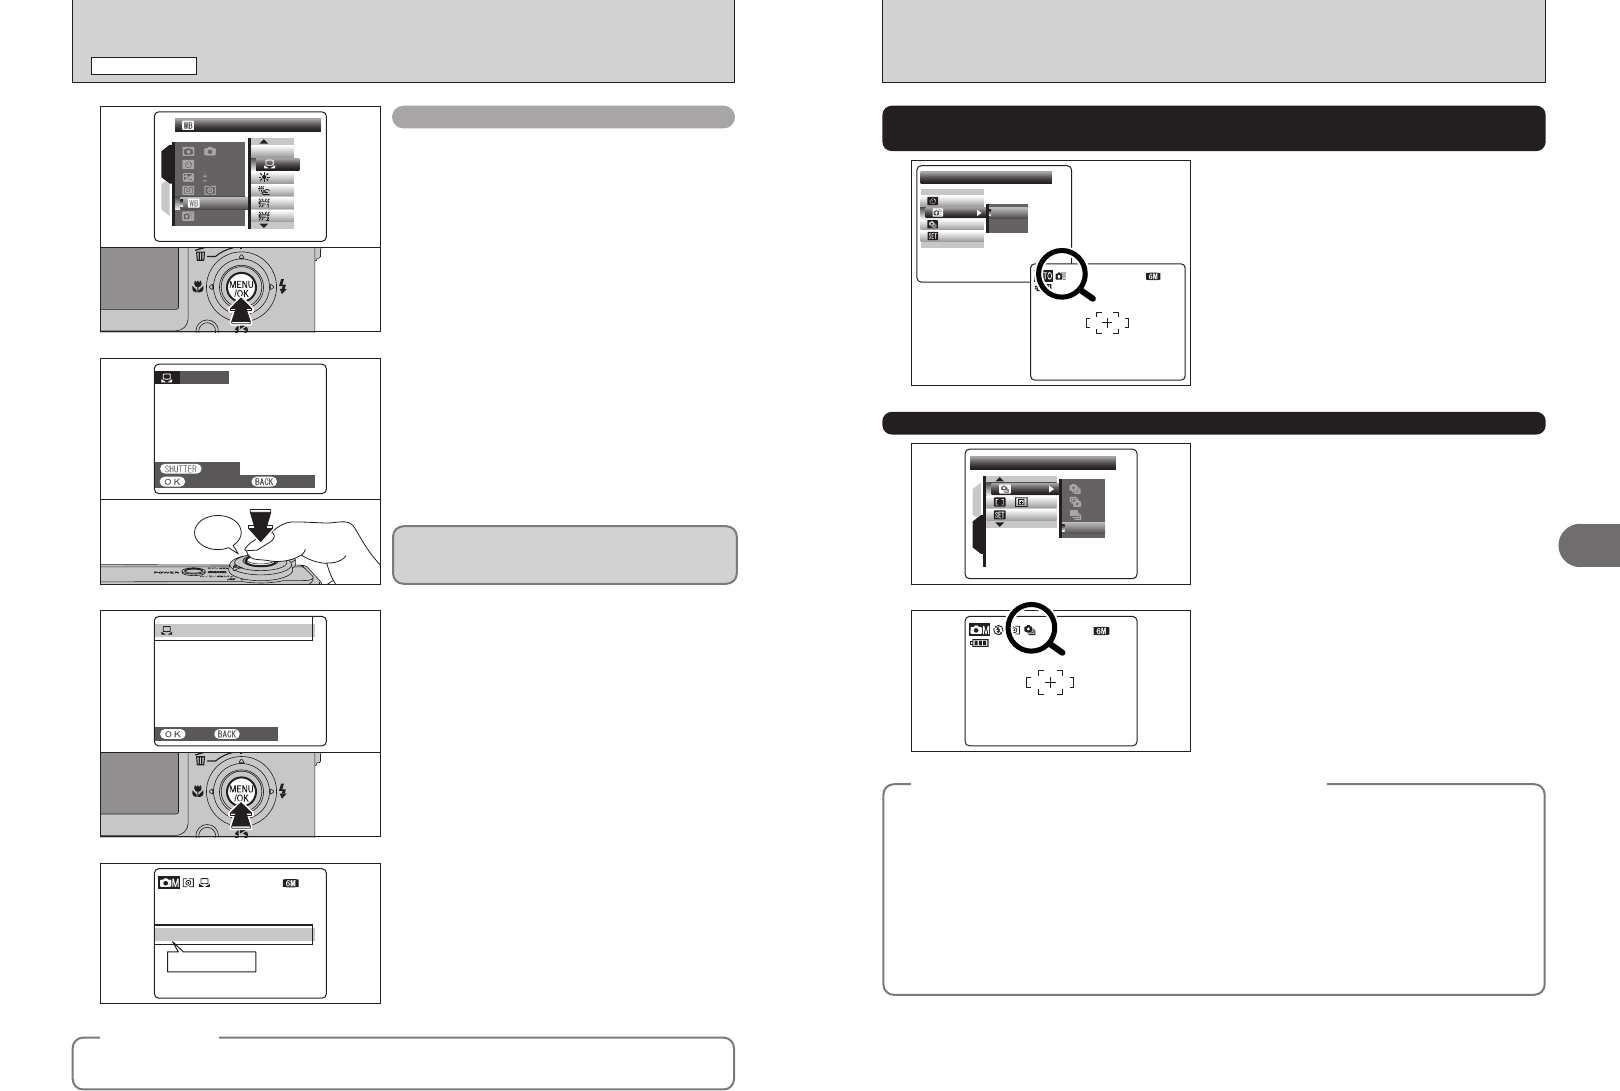
Use this setting to set the white balance for the
ambient natural or artificial lighting in images. Use
this setting to achieve special effects also.
1Select “≥” custom white balance.
2Press the “MENU/OK” button.
Custom white balance
CUSTOMCUSTOM WBWB
NOTNOT CHANGECHANGE
NEWNEW WBWB
CANCELCANCEL
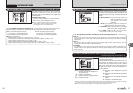
2
Hold a piece of white paper under the light source
for setting the white balance, so that it fills entire
the LCD monitor. Then press the shutter button to
set the white balance.
●
!
The white balance setting does not affect the image shown
on the LCD monitor.
To use the white balance set previously, press the
“MENU/OK” button without pressing the shutter
button.
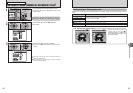
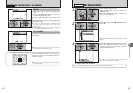
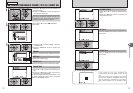
3
When the correct exposure is measured,
“COMPLETED !” appears.
Press the “MENU/OK” button to confirm the setting.
●
!
The specified custom white balance is retained until it is
reset. This setting is retained even if the battery is removed.
●
!
After taking the picture, check the color (white balance)
setting for the image.
When “OVER” or “UNDER” appears, the white
balance was not measured at the correct exposure.
Set the exposure compensation again, using a
negative value (–) when “OVER” appears and a
positive value (+) when “UNDER” appears.
COMPLETED! COMPLETED! COMPLETED! COMPLETED!
SET
SET CANCELCANCEL
OVEROVEROVEROVER
NNN
101010
OVEROVER
or
UNDERUNDER
◆
Example
◆
You can change the white balance for a photographed image by using colored paper instead of white
paper.
PHOTOGRAPHY MENU
PHOTOGRAPHY MENU
✽ Displaying the menus (➡P.52) ✽ Displaying the menus (➡P.52)