


5
7978
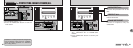
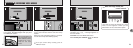
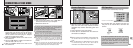
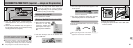
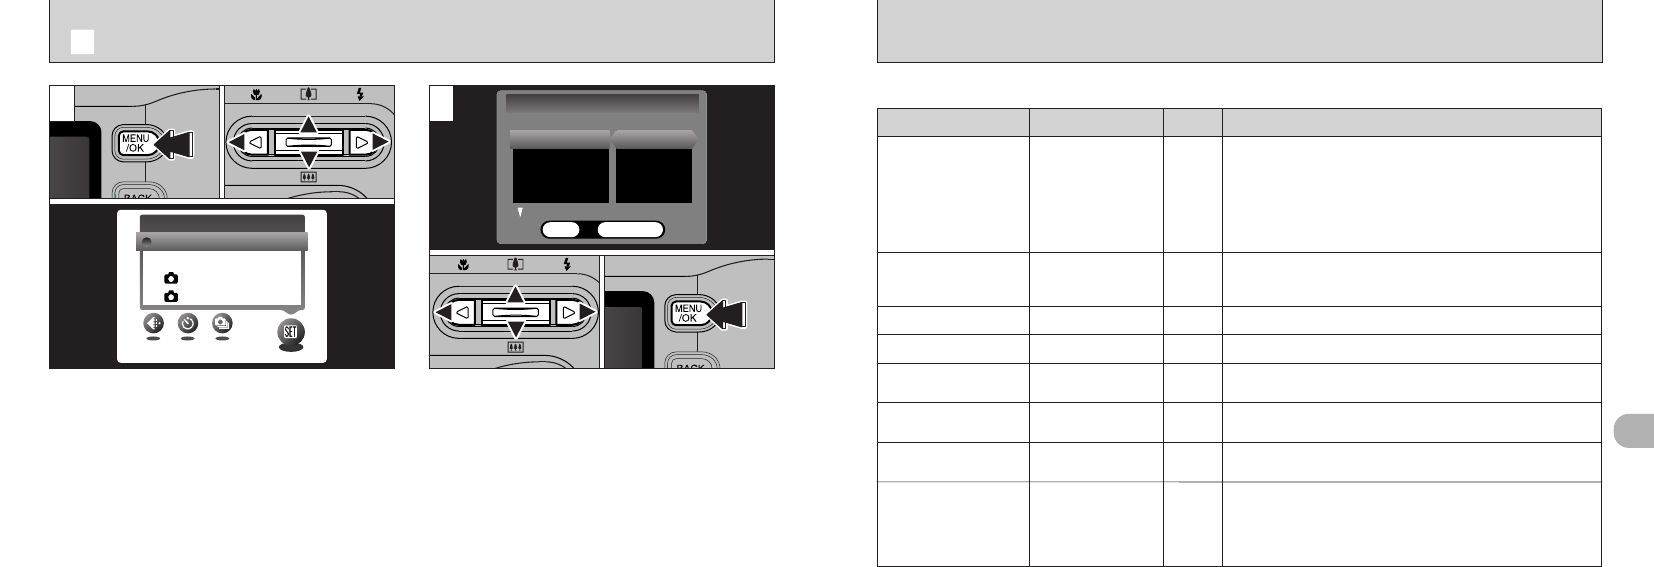
1Press “P(a)” or “{(b)” to select a menu
option and then press “d” or “c” to change
the setting.
2Press the “MENU/OK” button.
You can set in any mode.
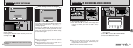
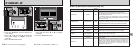
1Press the “MENU/OK” button to display the
menu screen.
2Press “d” or “c” to select “
g” OPTION and
then press “P(a)” or “{(b)” to select
“SET–UP”.
3Press the “MENU/OK” button.
●
!
Press “c” for “DATE/TIME” or “RESET ALL”.
21
01
0201
0203
●
!
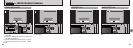
The screen shown is for still photography.
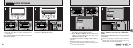
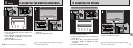
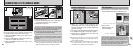
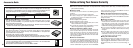
■ SET–UP Menu Options (Date/time setting, etc.)
Settings Display Explanation
POSTVIEW
USB MODE
POWER SAVE
DATE/TIME
ON/OFF
DSC/PC CAM
2MIN/5MIN/OFF
SET
This option specifies whether or not an image checking screen
(photography results) is displayed after you take a shot.
The photography results are displayed for about 2 seconds and
then automatically recorded.
In continuous shooting, the photography results are displayed
for a set time before being automatically recorded even if this
option is set to “OFF”.
See P.81 for details.
Use this option to specify whether the camera’s power
consumption is reduced and the camera is subsequently switched
off automatically when it is not being used. See P.80 for details.
Use this option to correct the date or time. See P.16 for details.
Factory
default
ON
DSC
2MIN
—
q
LCD
ON/OFF
Use this option to specify whether the LCD monitor is automatically
switched ON or OFF when the Mode switch is set to “
q
”.
ON
SOUND LOW/HIGH/OFF
This option allows you to set the volume of the beep emitted
when the camera controls are used.
LOW
RESET ALL OK
This resets all camera settings (including the photography and
playback menu settings) other than the date and time to the
factory default values set at shipment. When you press “c”, a
confirmation screen appears. To proceed, press the
“MENU/OK” button again.
—
LANGUAGE
ENGLISH/FRANCAIS/
DEUTSCH
Select English, French or German as the language used for
screen display.
ENGLISH
g USING SET– UP