93
Viewing Images
6
92
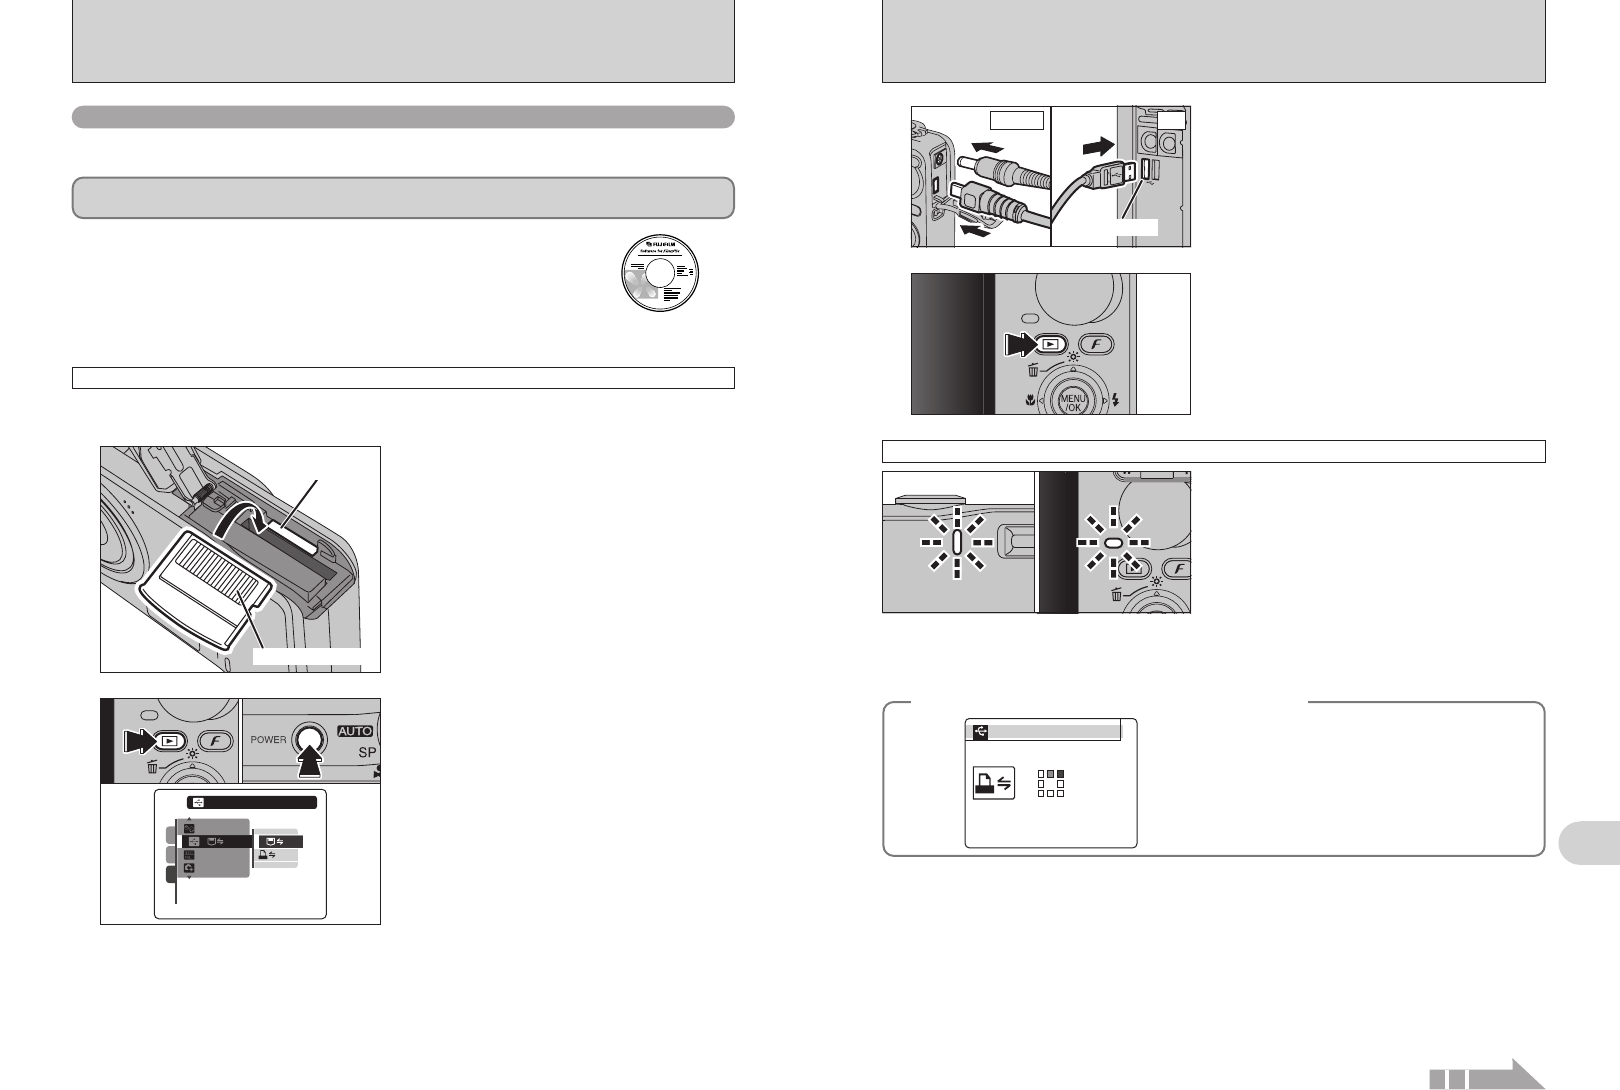
h When the camera and PC are exchanging data,
the self-timer lamp blinks and the indicator lamp
blinks orange.
h “¶ DSC” appears on the LCD monitor.
h Auto power off is disabled during USB
connection.
●
!
Before replacing the xD-Picture Card, always disconnect the
camera from the PC. See P.95 for information on the
disconnection procedure.
●
!
Do not disconnect the USB cable (included) when the camera
is communicating with a PC. See P.95 for information on the
disconnection procedure.
Camera operation
6.3 CONNECTING TO A PC
The “Connecting to a PC” section explains how to connect the camera to your PC using the USB
cable (included) and describes the functions you can use once the camera and PC are connected.
If the power cuts out during data transmission, the data will not be transmitted correctly. Always use the
AC power adapter when connecting the camera to a PC.
Refer to Section 5 the first time you connect the camera to your PC.
Install the software first. Do not connect the camera to the PC before installing
all the software.
This mode provides a simple way to read images from an xD-Picture Card or internal memory and
store images onto an xD-Picture Card.
CD-ROM
(Software for FinePix
CX)
DSC
(
Mass storage device
)
mode
6.3.1
Connecting to a PC
1
Insert an xD-Picture Card into the camera.
Gold marking
Gold contact area
Continued
1Press the “
w” button for about 1 second to turn
the camera on in Playback mode.
2Select “¶” DSC in “ò” USB MODE in the
“˜” SET-UP menu (➡P.76).
3Press the “POWER” button to turn the camera
off.
2
DSCDSC
ENGLISHENGLISH
OKOK
NTSCNTSC
:
:
:
:
1
3
2
01
02
03
3
1Turn your PC on.
2Connect the camera to the PC using the USB
cable (included).
●
!
Make sure that the USB cable (included) is connected
correctly and pushed in.
USB socket
PCCamera
4
Press the “w” button for about 1 second to turn the
camera on in Playback mode.
◆ When displaying [COMMUNICATION ERROR] ◆
If “CHECKING USB” appears and then
[COMMUNICATION ERROR] is displayed on the
LCD monitor, “
¶” (DSC mode) is not selected in
“
ò”USB MODE. Disconnect the USB cable
(included) to the camera and restart the procedure
from step
2.
CHECKING USBCHECKING USB
PICTBRIDGEPICTBRIDGE


