


65
Viewing Images
6
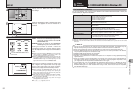
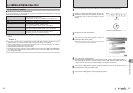
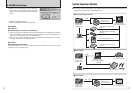
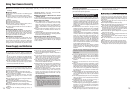
6.3 CONNECTING TO A COMPUTER
The “Connecting to a Computer” section explains how to connect the camera to your computer
using the USB cable (included) and describes the functions you can use once the camera and
computer are connected.
If the power cuts out during data transmission, the data will not be transmitted correctly. Always use the
AC power adapter when connecting the camera to a computer.
Refer to Section 5 the first time you connect the camera to your computer.
Install the software first. Do not connect the camera with the computer before
installing all the software.
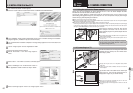
This mode provides a simple way to read images from an xD-Picture Card and store images onto
an xD-Picture Card (➡P.66).
CD-ROM
(Software for FinePix AX)
DSC
(
Mass storage device
)
mode
6.3.1
Connecting to a Computer
64
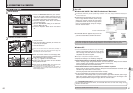
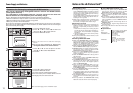
6.2 CONNECTING THE CAMERA DIRECTLY TO THE PRINTER FOR
PRINTING IMAGES
(
PictBridge FUNCTION
)
●
!
“PRINT WITH DATE” is not available when the camera is
connected to a printer that does not support date printing.
●
!
Press the “DISP/BACK” button to cancel the printing.
Depending on the printer, the printing may not be canceled
immediately or printing may stop mid way through. When
printing stops mid-way, briefly turn the camera off and then
on again.
6
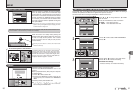
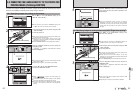
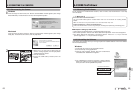
Press the “MENU/OK” button to download the data
to the printer and start printing the specified
number of prints.
To end printing, press the “DISP/BACK” button.
4
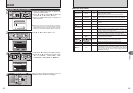
1Press “a” or “b” to select “PRINT WITH DATE”
or “PRINT WITHOUT DATE”. If “PRINT WITH
DATE” is selected, the date is imprinted on your
prints.
2Press the “MENU/OK” button.
01 02
●
!
Movie images cannot be printed.
5
1Press “d” or “c” to display the frame (file) for
which you want to specify PRINT settings.
2Press “a” or “b” to set a value up to 99 as the
number of copies of the frame (file) to be printed.
For frames (files) that you do not want printed,
set the number of prints to 0 (zero).
To specify more PRINT settings, repeat steps 1
and 2.
3Always press the “MENU/OK” button to complete
the settings.
01 03
1Check that “ ” is not displayed on the
camera’s screen.
2Turn the camera off. Unplug the USB cable.
◆
Disconnecting the printer
◆
(USB)socket
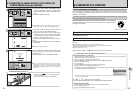
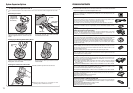
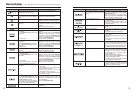
This function allows you to conduct videoconferencing sessions between PCs connected to the
Internet.
●
!
The WEB Camera function can only be used on Windows XP SP1.
●
!
Microsoft Windows Messenger 5.0 or later is required to use the WEB Camera function.
Please download it from the Messenger web site.
●
!
Images are not output to a TV.
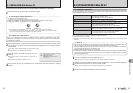
Change between “¶” and “q WEB” in the camera’s SET-UP screen.
q
WEB
WEB CAM
(
Web Camera
)
mode
Connecting camera to a Computer
qPlug the AC power adapter connector into the “DC IN 3V” socket on the camera and then plug the
adapter itself into the main power outlet.
wTurn the camera on in Photography mode (➡P.12).
eSet the “USB MODE” setting in the “SET-UP” menu to “
q WEB” (➡P.48).
rTurn the camera off (➡P.12).
tTurn your PC on.
yUse the USB cable to connect the camera to your computer.
uTurn the camera on in Photography mode (➡P.12).
iUsing Video Chat with Windows Messenger, refer to “How to use FinePixViewer” in the HELP menu
which was installed from the CD-ROM.
Disconnecting the Camera
qQuit all applications (FinePixViewer etc.) that are using the camera.
wTurn the camera off (➡P.12).
eUnplug the USB cable from the camera.
●
!
Take care to ensure that the USB cable is connected the correct way around and that the plugs are pushed fully
into the connection sockets.
h “≈” appears on the LCD monitor.
h Power save and Auto power off are disabled during USB connection.
◆
Using Video Chat with Windows Messenger
◆
02