


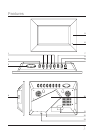

Features Dened
4
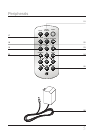
1 Navigation Controls Use the navigation controls to move up, down, left, or right through
the menu systems. In slideshow mode, use the navigation controls to rotate the images or
ip them vertically.
2 Mode Press the Mode button to switch between the clock and the main menu.
3 SNOOZE Press the SNOOZE button to delay the alarm for 5 minutes.
4 USB Port Connect a USB Mass Storage Device to play photos, videos and audio les from
the digital storage device. You can also transfer photos from a USB Mass Storage Device
(Thumb Drive) to the photo frame’s internal memory using the copy option in the main
menu.
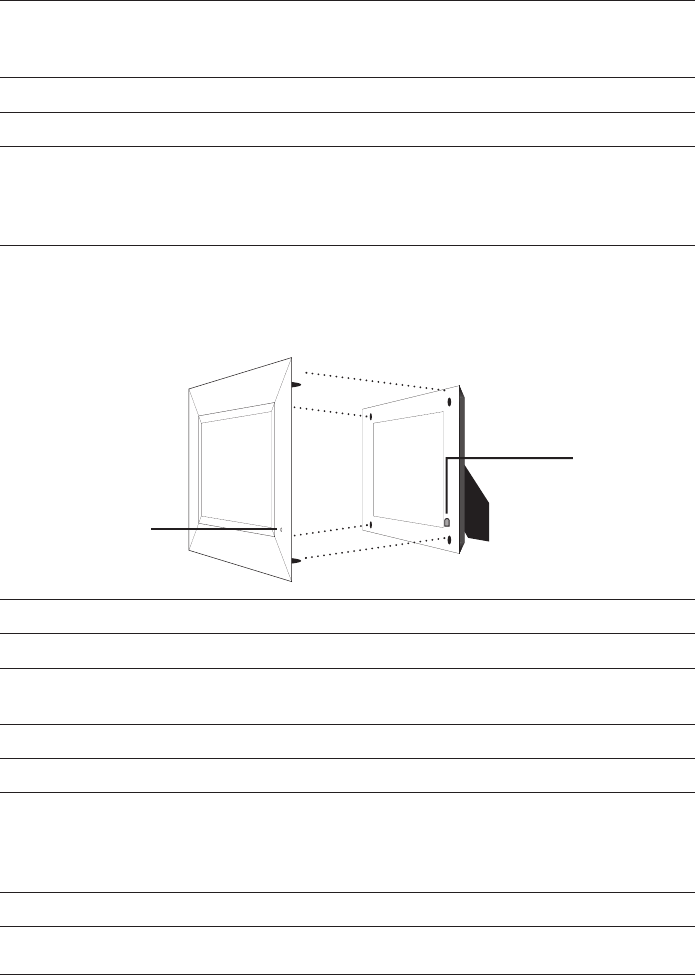
5 Frame Three interchangeable frames are included ( Cherry Wood, Pewter, and Black ).
6 IR Receiver The Infrared Receiver is an input for the signals the remote control transmits.
7 RETURN Press the Return button to return to previous menus.
8 PLAY/ENTER Press the Play button to play or pause a slideshow, music, or movie. Press
the Enter button to select different menu options.
9 POWER Press the Power button to turn the digital photo frame on and off.
10 Easel Use the Easel to stand the digital photo frame up in landscape or portrait orientation.
11 SD/MMC/XD/MS Expansion Slot Insert an optional memory card to play photos, videos
and audio les from the memory card. You can also transfer photos from a memory
expansion card to the photo frame’s internal memory using the copy option in the main
menu.
12 PHONES Plug headphones into the PHONES port to listen to music in private.
13 DC In (9V) Connect the DC adapter to provide power to the digital photo frame.
NOTE: To change frames carefully pull the attached frame away from the unit, then match the desired
frame’s pins with the rubber inset holes on the player and align the infrared receiver with the receiver win-
dow on the frame. Finally, squeeze together rmly to ensure a good connection.
Infrared Window
Infrared Receiver