


NOTE: If you load sheet paper with skew checking disabled, the printer does not measure the length of the
sheet, so the print preview will not be a reliable guide to the final printout.
●
To preview a print under Windows, you have the following options:
◦
Use your application's print preview option.
◦
Check the Show preview before printing option, which you can find in the driver's Paper/Quality
tab and Features tab. The preview may be provided in different ways, depending on your printer
and printer driver.
●
To preview a print under Mac OS X, you have the following options:
◦
Use your application's print preview option.
◦
Only with PostScript upgrade: open the PDF menu at the bottom left of your application's Printing
panel. Select the HP Print Preview option, which opens the HP Print Preview application to display
the final appearance of your printed image. Printing features, such as the ability to change paper
size, paper type, and print quality, or rotate the image, can be changed on the fly.
●
To preview a print using the Embedded Web Server, select Basic settings > Hold for preview.
Print 16-bit color images
In a 16-bit RGB image, each of the three primary colors is encoded by a 16-bit value, so that each pixel takes
up 48 bits.
If you print your 16-bit color images through a printer driver, they will be reduced to 8-bit colors before they
reach the printer.
In order to send a 16-bit color image to the printer, you must save it as a 16-bit color TIFF or JPEG file, then
send the file directly to the printer without using a printer driver (see
Using the Embedded Web Server to
print files on page 82). In this case, color management is done on the 16-bit color image, and is therefore
done more accurately. The image is still reduced to 8-bit colors for final printing.
TIP: Some applications refuse to save a 16-bit color image in JPEG format; others automatically reduce it to
8-bit colors. A TIFF file generally gives a higher-quality result, and is recommended.
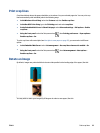
Change the treatment of overlapping lines
NOTE: This topic applies only when printing an HP-GL/2 job.
The merge option controls the overlapping lines in an image. There are two settings:
●
Off: where the lines cross, only the color of the top line is printed. This is the default setting.
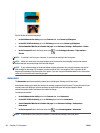
●
On: where the lines cross, the colors of the two lines merge.
To turn merge on, go to the front panel and select the Setup menu icon
, then Printing preferences >
HP-GL/2 options > Enable merge. You can set the merge option from your software in some applications.
Settings in your software override the front-panel settings.
88 Chapter 6 Print options ENWW