


6
U
U
s
s
i
i
n
n
g
g
F
F
l
l
a
a
s
s
h
h
The camera's builtin flash cannot be used
E
E
x
x
t
t
e
e
r
r
n
n
a
a
l
l
F
F
l
l
a
a
s
s
h
h
An external strobe offers several advantages over using the
camera’s builtin flash External strobes move the flash away
from the camera lens which helps reduce backscatter They also
expand lighting options to achieve the best lighting for
different subjects A second external digital strobe package can
b
e added to fill the shadows and produce more realistic
photographs
O
O
p
p
t
t
i
i
o
o
n
n
U
se any Ikelite Substrobe in the manual mode
The housing provides a Hot Shoe connector and an external
strobe connector to connect external strobes
A sync cord is
required to connect the housing's strobe connector to the
s
trobe
O
O
p
p
t
t
i
i
o
o
n
n
Use an Ikelite EVController which offers manual power
settings in / stop increments for precise illumination of macro
or wideangle subjects The EVController requires no batteries
and is compatiable with preflash and non preflash cameras
The EVController can only be used with Ikelite DS Substrobes
A sync cord is required to connect the EVController to the
camera housing
5
S
S
e
e
c
c
u
u
r
r
e
e
C
C
a
a
m
m
e
e
r
r
a
a
t
t
o
o
M
M
o
o
u
u
n
n
t
t
i
i
n
n
g
g
T
T
r
r
a
a
y
y
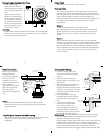
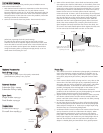
Install a fully charged
battery
into the camera
before
securing the camera
to the housing’s mounting
t
ray
Remove the back from the
housing The mounting tray
for the camera is secured to
the housing back Position
the camera
on the tray and
secure it with the
mounting
bolt which threads into the
camera's tripod socket
C
C
A
A
U
U
T
T
I
I
O
O
N
N
:
:
Some camera tripod socket threads
are plastic The mounting bolt
is metal
Do not cross thread or over tighten as you may damage
the camera tripod socket threads
Mounting
Bolt
Mounting
Tray
7
F
F
l
l
a
a
s
s
h
h
C
C
o
o
n
n
n
n
e
e
c
c
t
t
i
i
o
o
n
n
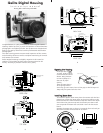
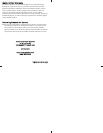
When using an external
strobe connect the
housings Hot Shoe
Connector by sliding the
connector into the
accessory shoe of the
camera from the back as
shown Slide the
connector forward until it
stops This can be done
after the camera is
mounted to the mounting
tray
C
C
a
a
u
u
t
t
i
i
o
o
n
n
Only remove the WaterProof cap from the external strobe
connector on the back of the housing when an external strobe
will be connected
External Strobe Connector
Waterproof Cap
O'ring
Housing Back
Hot Shoe
Connector
I
I
n
n
s
s
t
t
a
a
l
l
l
l
i
i
n
n
g
g
t
t
h
h
e
e
C
C
a
a
m
m
e
e
r
r
a
a
i
i
n
n
t
t
o
o
t
t
h
h
e
e
h
h
o
o
u
u
s
s
i
i
n
n
g
g
Pull out on each of the housing's controls that have a knob This
will get the controls out of the way for easier camera
installation
8
C
C
l
l
o
o
s
s
i
i
n
n
g
g
t
t
h
h
e
e
H
H
o
o
u
u
s
s
i
i
n
n
g
g
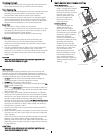
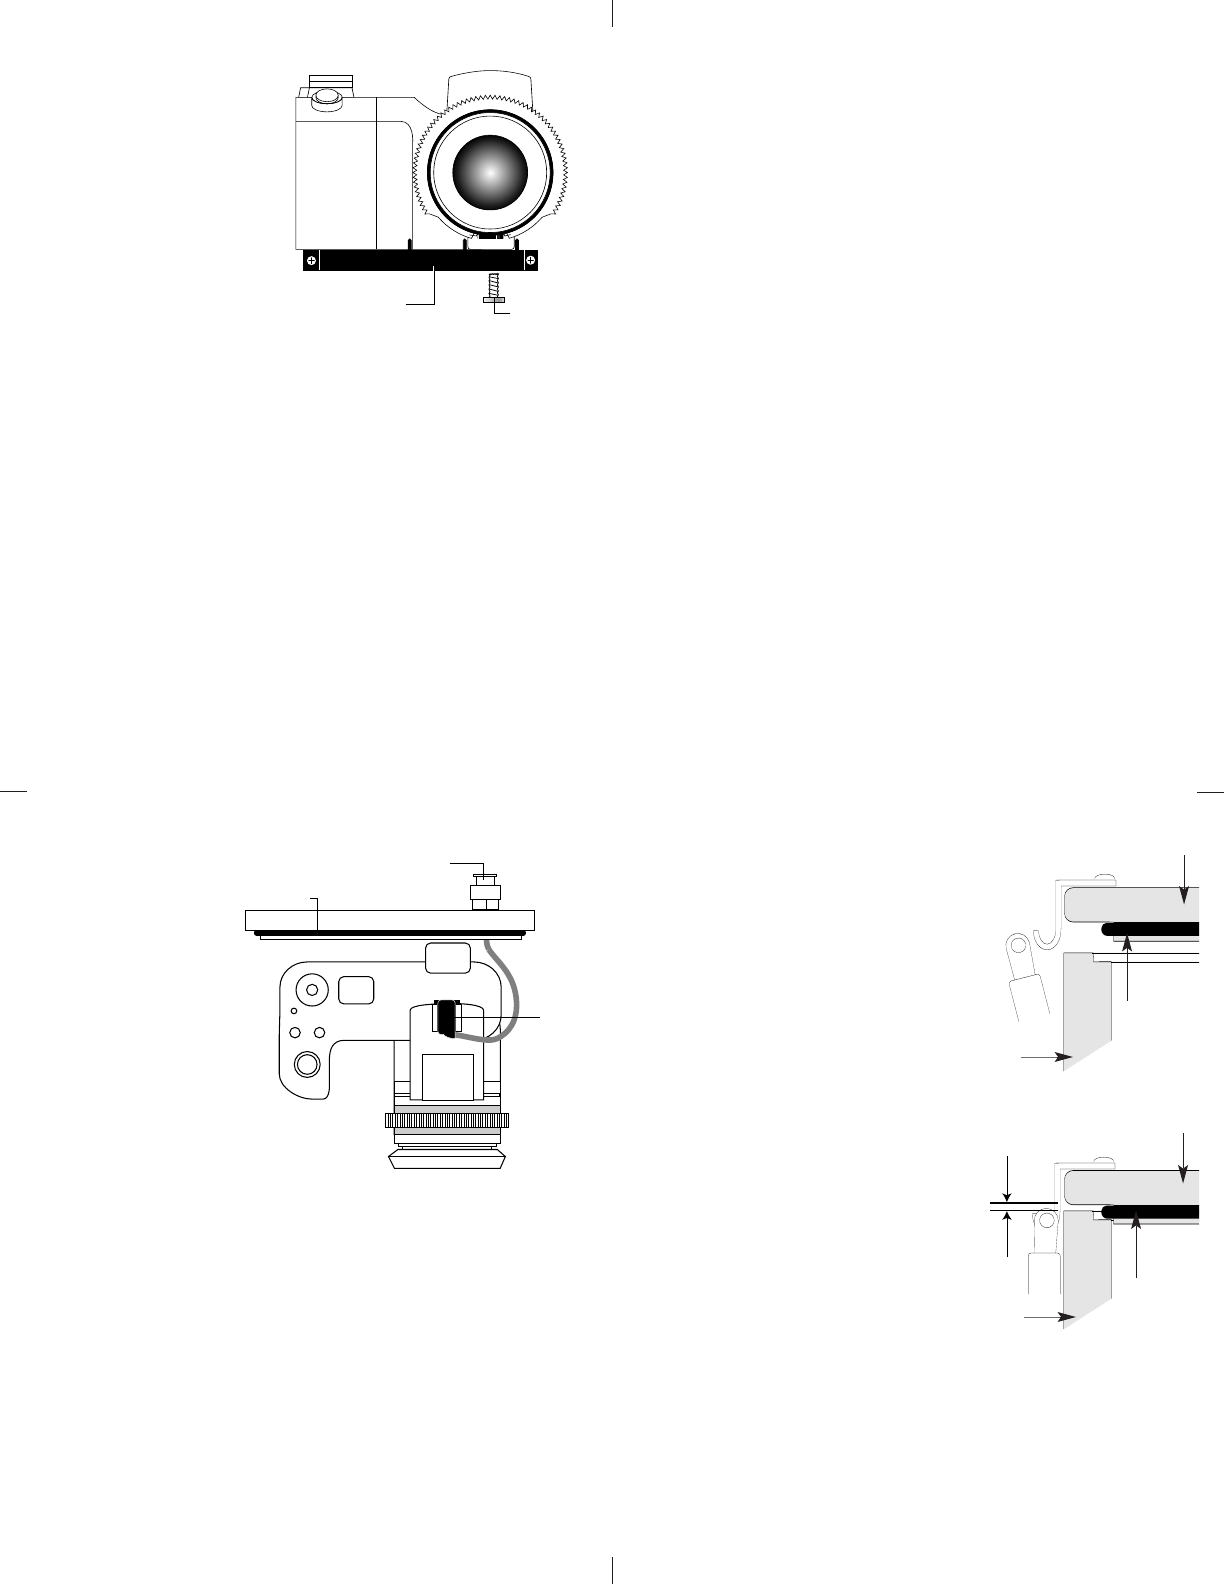
Check to see that there is an
o’ring on the housing back and
that it is clean and in its proper
location
Place housing with the port
pointing down in your lap or on a
flat surface
Guide the back onto the housing
The o’ring should touch the
housing all the way around There
should be an even gap all the way
around between the housing and
the housing back
Lift the lid snaps so they are
extended and place the lid snap
into the hook on the housing
back
To close the housing push
down on the lid snaps until
they snap into place Lid
snaps on opposite sides of the
housing should be closed at the
same time Be sure they are down
far enough to engage the lock
D
D
o
o
u
u
b
b
l
l
e
e
c
c
h
h
e
e
c
c
k
k
Once the housing is closed check the o’ring seal
Check the gap between the housing back and the housing it
should be even all the way around
Look through the clear plastic back at the o’ring You should see
a darkened area where the o’ring is compressed against the
housing back If you do not see an even black compression seal
all the way around the back open the lid snaps reseat the
housing back and close the lid snaps Visually check the seal again
o’ring
housing back
housing back
housing
housing
o’ring
ev
en gap
all 4 sides