


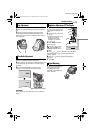
GETTING STARTED
GETTING STARTED
EN 13
MasterPage: Start_Right
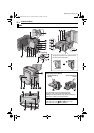
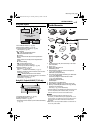
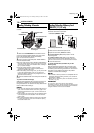
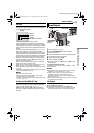
1 Adjust the velcro strip.
2 Pass your right hand through the loop and grasp the
grip.
3 Adjust your thumb and fingers through the grip to
easily operate the Recording Start/Stop Button and
Power Zoom Lever. Be sure to fasten the velcro strip to
your preference.
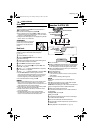
1 Set the Power Switch to “A” or “M” while pressing
down the Lock Button located on the switch.
2 Make sure the LCD monitor is closed and locked. Pull
out the viewfinder fully and adjust it manually for best
viewability.
3 Turn the Dioptre Adjustment Control until the
indications in the viewfinder are clearly focused.
CAUTION:
When retracting the viewfinder, take care not to pinch your
fingers.
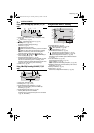
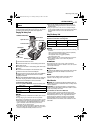
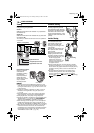
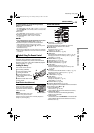
1 Set the Power Switch to “M”
or “PLAY” while pressing down
the Lock Button located on the
switch.
2 Open the LCD monitor fully.
(੬ pg. 15)
● To adjust the brightness of the
viewfinder, pull out the
viewfinder fully and set
“PRIORITY” to “FINDER”
(੬ pg. 27, 29).
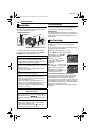
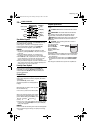
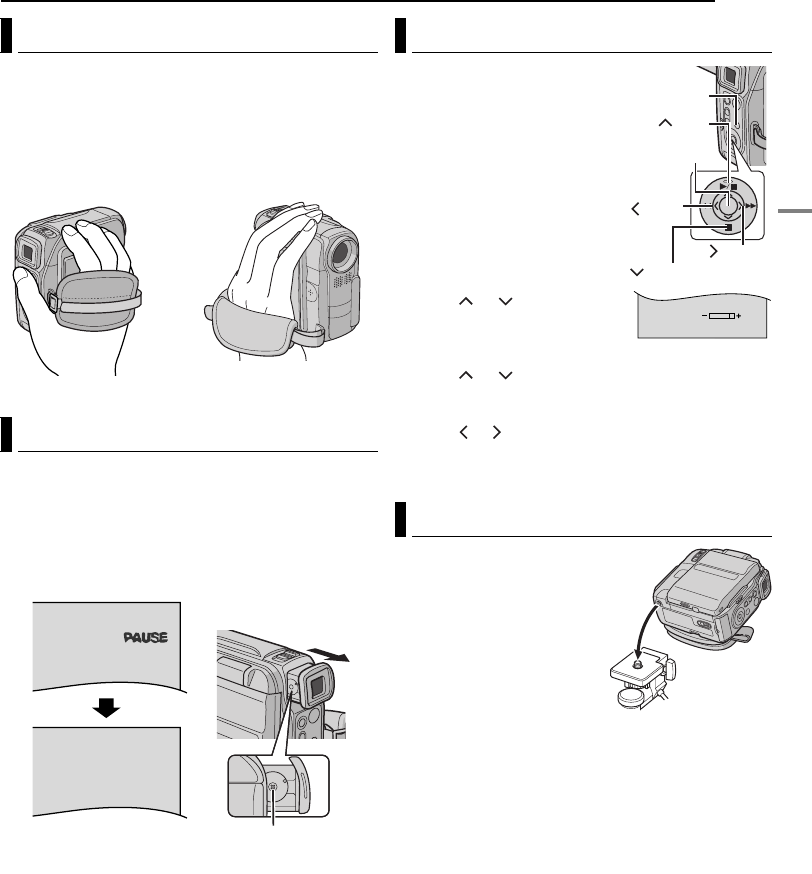
3 Press MENU. The Menu
Screen appears.
4 Press or to select
“n”, and press SET. The
CAMERA DISPLAY Menu
appears.
5 Press or to select “BRIGHT”, and press SET.
The Menu Screen closes and the brightness control
indicator appears.
6 Press or until the appropriate brightness is
reached.
7 Press SET.
To attach the camcorder to a
tripod, align screw to the
mounting socket on the
camcorder. Then tighten the
screw clockwise.
Grip Adjustment
Viewfinder Adjustment
PAUSE
Dioptre Adjustment Control
Brightness Adjustment Of The Display
Tripod Mounting
BRIGHT
SET
MENU
(Up)
(Right)
(Down)
SET
(Left)
GR-DX97PAL.book Page 13 Tuesday, January 6, 2004 12:44 PM