


38
EDITING
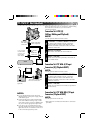
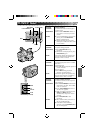
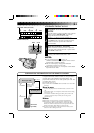
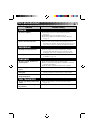
Tape Dubbing
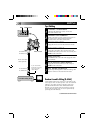
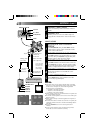
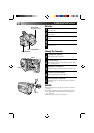
CONNECT EQUIPMENT
1
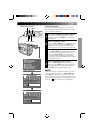
Following the illustration at left, connect the
camcorder and the VCR.
PREPARE FOR DUBBING
2
Set the camcorder’s power switch to PLAY, turn on
the VCR’s power, and insert the appropriate
cassettes in the camcorder and the VCR.
SELECT VCR MODE
3
Engage the VCR’s AUX and Record-Pause modes.
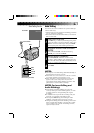
FIND EDIT-IN POINT
4
Engage the camcorder’s Play mode to find a spot
just before the edit-in point. Once it’s reached, press
PAUSE on the camcorder.
START EDITING
5
Press PLAY on the camcorder and engage the VCR’s
Record mode.
STOP EDITING TEMPORARILY
6
Engage the VCR’s Record-Pause mode and press
PAUSE on the camcorder.
EDIT MORE SEGMENTS
7
Repeat steps 4 through 6 for additional editing, then
stop the VCR and camcorder when finished.
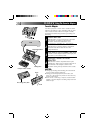
EDIT
PLAY/PAUSE
VCR (Recording deck)
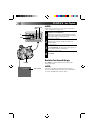
Random Assemble Editing [R.A.Edit]
Create edited videos easily using your camcorder as the
source player. You can select up to 8 “cuts” for automatic
editing, in any order you like. R.A.Edit is more easily
performed when the RM-V706U MBR (Multi-Brand
Remote) is set to operate with your brand of VCR (see
chart on the next page), but can also be performed by
operating the VCR manually.
CONTINUED ON NEXT PAGE
To AUDIO out
To VIDEO out
Power switch
To AUDIO IN
To VIDEO IN
Audio and Video
cable (optional)
If your TV/VCR has
the SCART connector,
use the provided
cable adapter.