


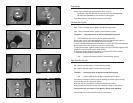
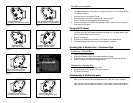
Installing the D100
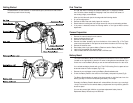
1. Remove the rear plate by holding both latch locks in and simultaneously rotating both
latches down and rearward of the housing body (Fig. 9).
2. Remove the camera tray. Press the Camera Tray Latch to the left and pull the tray
backward out of the housing (Fig 10).
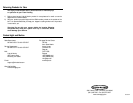
3. Remove the accessory cap from the bottom of the camera. Place the cap in the retaining
pocket in the camera tray for easy retrival.
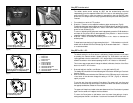
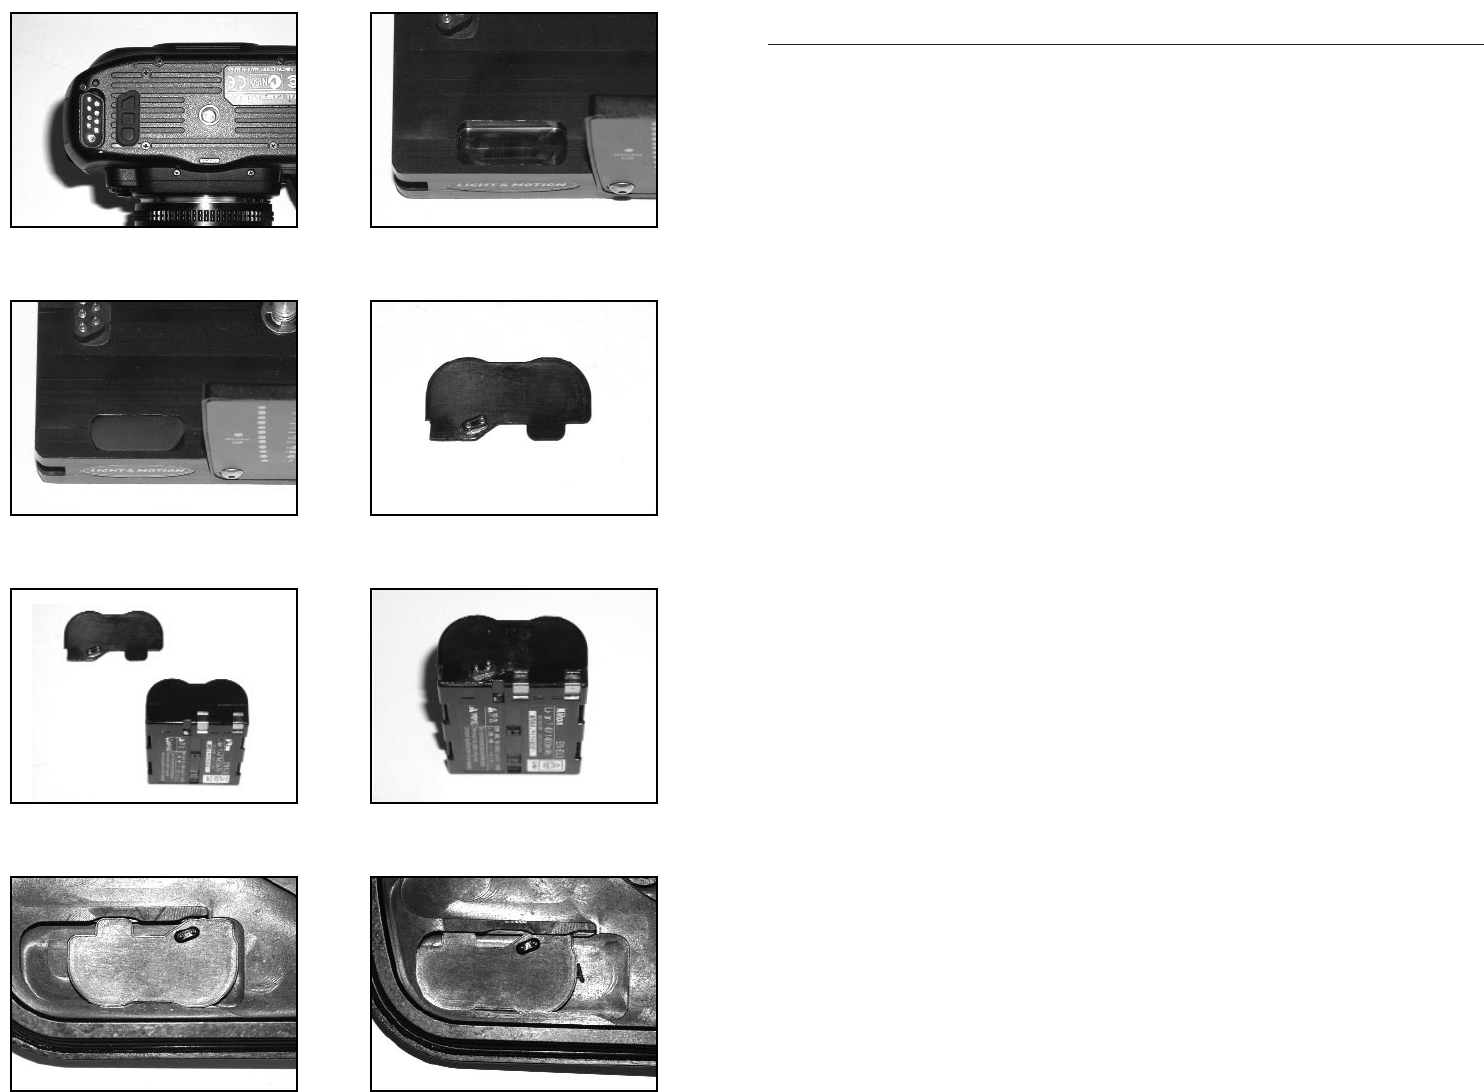
4. Place the battery board onto the camera battery if you haven’t already done so.
5. Install the battery into the camera.
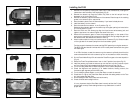
6. Place the camera’s focus selector in the C position (Fig. 11).
Rotate the focus selector gears on the camera tray so the gear opening is oriented at the
six O’clock position (Fig 12.).
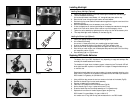
7. Place the D100 onto the camera tray, align the tripod screw and accessory jack, and
tighten tripod screw into camera.Tighten the screw with a coin.
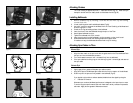
8. Rotate the focus selector gears to ensure they engage properly on the camera. If the
gears are not operating correctly, remove the camera from the tray,realign the gear with
the camera’s lever and reattach the camera to the tray.
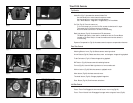
9. Attach hotshoe cable from tray into hotshoe mount of camera (Fig 13). Guide the cable
on the right side of the camera, away from the focus selector gears.
Test the connection between the camera and the ROC system by turning the camera on.
The ROC LED panel should illuminate with a LED in each power bank and the two green
LED back lights.
If no LEDs illuminate, re-seat the camera onto the camera tray.Visually check that the
camera is seated flush with entire camera tray.Turn on the camera to check connectivity.
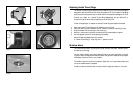
10. Pull the Titan’s Mode Dial up.Pull and rotate the Focus/Zoom gear to the neutral position
(Fig 14).
11. Rotate the Titan’s Focus Mode selector lever to the C position (lever down Fig. 15).
12. Install the camera tray. Guide the camera tray onto the two tray rails. Continue to push
until the Camera Tray Latch engages the guide pin and locks the tray (Fig 16).
13. Turn the housing Mode Dial to match the position of the camera and press down.
14. Check the alignment and operation of all handle functions, housing controls, the
focus/zoom gear alignment, and the MSC Lever.
15. Turn the Metering Mode Selector on the Rear Plate to match the camera’s.
16. Check both O-rings on the Titan’s Rear Plate and check the sealing surface on the Titan
hull, then replace the Rear Plate.
17. When sealing the Rear Plate, rotate both latchs evenly.
18. Check all handle and housing functions.
It is very important that the Rear Plate draws in evenly and that the O-rings
seat and seal correctly. Check sealing surface on top and bottom to confirm
proper seal.
(Fig. 1) (Fig. 2)
(Fig. 3) (Fig. 4)
(Fig. 5) (Fig. 6)
(Fig. 7) (Fig. 8)
Battery Board