


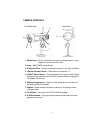
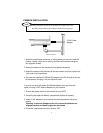


CAMERA INSTALLATION
1. Attach the stand base to the wall or ceiling where you want to install the
camera. Locate a wall stud or ceiling, and secure the bracket using the
four supplied screws.
2. Attach the camera to the stand and firmly tighten the swivel.
3. Attach the camera with the stand to the stand base, and firmly tighten the
joint knob on the stand base.
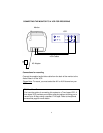
4. Connect the supplied 9V 500mA DC adapter to the DC IN jack at the rear
of the camera, and plug it into an electrical outlet.
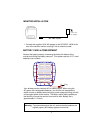
If you are not using AC power (9V 500mA adapter) then you have the
option of using 4 “AA” alkaline batteries in your camera.
1. Ensure the power switch on the camera is turned OFF.
2. Carefully slide open the battery compartment (bottom of camera)
3. Insert 4 “AA” batteries (not included) into the compartment noting the
polarity
Warning: to prevent damage to the unit, ensure the batteries are
aligned properly and battery types are not mixed
4. Close the compartment and turn camera “ON”
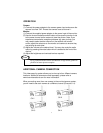
Ensure the power switch on the monitor and camera are set to
the OFF position before proceeding with the following steps.
NOTE
5
To 9V Power
Adapter