


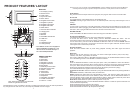
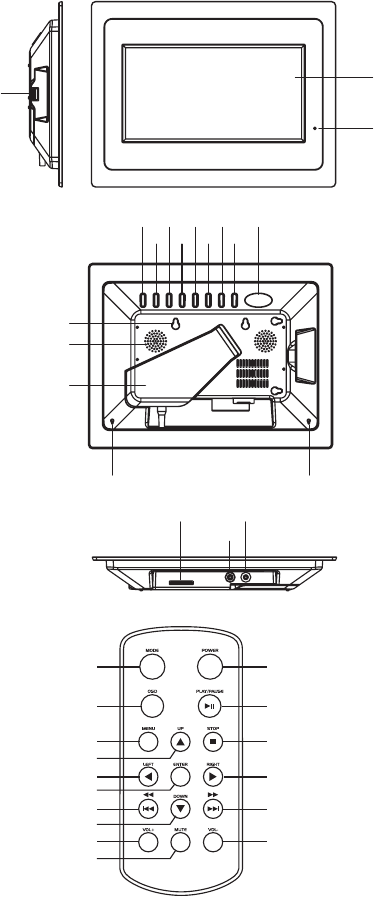
MAIN UNIT
1. TFT display (screen)
2. Remote sensor
3. Power button
4. Play/ Enter button
5. Return button
6. Navigation down button
7. Navigation up button
8. Navigation right button
9. Navigation left button
10. Mode button
11. Snooze/ Alarm off button
12. Hanging hole
13. Speaker
14. Bracket
15. SD/ MMC/ XD/ MS slot
16. USB Port *
17. DC jack
18. Headphone jack
19. Hole (optional)
1
2
3
4
5
6
7
8
9
10
11
12
13
14
15
16
REMOTE CONTROL
1. Mode button
2. OSD button
3. Menu button
4. Navigation up button
5. Navigation left button
6. Enter button
7. F.BWD & previous button
8. Navigation down button
9. Volume “+” button
10. Mute button
11. Power button
12. Play/ pause button
13. Stop button
14. Navigation right button
15. F.FWD & next button
16. Volume “-” button
2
The Manufacturer of this unit follows a principle of constant improvements and is not held responsible for
any changes that are made to the unit, nor accepts any liabilities for these changes.
Power Supply
Plug one end of the AC adaptor into the DC input jack, then plug the other end into an AC wall outlet.
Phone Jack
For private listening, insert headphones into the headphone jack.
CAUTION: Listening to high volume levels for and extended period of time may cause damage or loss of
hearing.
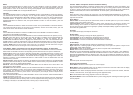
USB Slot
To enjoy music or pictures from your USB Travel Drive, simply insert it into the USB port on the side of the
Picture Frame. When unplugging in the USB Travel Drive, ensure that the Picture Frame is set back to the
main menu; then unplug the USB Travel Drive from the side of the Picture Frame.
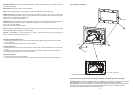
SD/ MMC/ XD/ MS
Insert an SD/ MMC/ XD/ MS card into the card slot to enjoy the audio files or pictures.
Snooze/ Alarm Off Button
(The following instructions work only when the ALARM option is enabled).
To snooze the alarm when it sounds, simply press the SNOOZE/ ALARM OFF button. This will
momentarily mute the alarm sound from buzzing, but will sound the buzzer again after a few minutes.
To turn off the alarm, press and hold the SNOOZE/ ALARM OFF button for 3 seconds. NOTE: After the
alarm buzzes and is turned off, it is required to turn the alarm back on again. Otherwise, the alarm will not
sound again once it reaches the pre-set time.
Play/ Pause Button
Press the PLAY/ PAUSE button to pause during playback. Pressing this button again will resume
playback.
Basic Play
Power on the unit then enter the main menu. The screen shows eight functions: photo, movie, setup,
calendar, clock, alarm, copy/ delete, and favorite.
First, insert a USB Travel Drive or SD/ MMC/ XD/ MS card, then use the NAVIGATION buttons to select
one of the following function. Press ENTER to confirm the selection.
Photo
Press the NAVIGATION buttons to select the photo option. Then press ENTER to confirm the selection.
After the Picture Frame reads the data for several seconds, it begins to browse the pictures automatically
one by one. When the Picture Frame is in auto playback mode, it enters Thumbnail Mode directly.
Pressing the STOP button while the pictures are playing will stop the pictures from playing.
The Thumbnail Mode menu appears on the screen as follows:
Thumbnail of each title: select the thumbnail by using the NAVIGATION buttons and pressing ENTER to
play.
Information: Resolution, created date, rotate, and slide show.
Rotate: Highlight the rotate option and press ENTER to confirm. Then enter the rotate mode, there are
three options at the bottom of the screen: Rotate it, Reset, and Return. Use the NAVIGATION buttons to
select the desired picture to rotate. Now press ENTER to rotate it. Select reset to restore the picture back
to its original setting. Select RETURN to return to the Thumbnails Mode menu.
Slide show: Select slide show option to slide the pictures one by one.
Press the NAVIGATION LEFT and the NAVIGATION RIGHT buttons to rotate the picture Clockwise and
Counter-Clockwise respectively.
Press STOP button twice to return the file manager.
Press NAVIGATION DOWN button to flip the picture vertically.
Press NAVIGATION UP button to flip the picture horizontally.
1
PRODUCT FEATURES/ LAYOUT
Thank you for your purchase of this MAGNASONIC product. Please read this Instruction Manual
carefully before using this product. Keep this manual in a safe place for future reference.
1
2
18
17
16
15
19 19
3
4
5
6
7
8
9
10
11
13
12
14
Note: Please remove Battery Insulation Tab
before using the Remote Control.
* The USB Port on this unit is equipped to
support USB Data Travellers only. This
unit can not be connected directly to a
PC to download/upload data.