


P/N 6B5813 2 August 24, 2001
4. Attach the Pro Back/Pro Back Plus to the MAMIYA Interface Plate as described in the DCS Pro Back
or DCS Pro Back Plus User’s Manual.
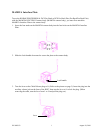
5. Once the Pro Back/Pro Back Plus is attached, lock the Shutter Release on the camera body by rotating
the Shutter Release lock as described in your RZ67 PRO II instruction manual. Use the Release button
on the Capture cable to capture images. (The Shutter Release on the camera bo
dy will not capture
digital images.)
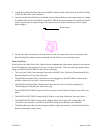
6. On the side of the camera body, set the R-M lever to M. The camera body does not respond to Pro
Back/Pro Back Plus shutter release commands if the R-M lever is not in the M position.
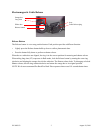
Lens Sync Error
If the Pro Back/Pro Back Plus issues a shutter release command and a lens shutter opening is not detected,
the LCD displays the error message "Lens error: No sync detected!". If this error message appears when
using your MAMIYA RZ67 PRO II, check for the following:
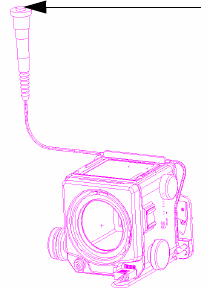
• The Lens Sync Cable is not connected between the MAMIYA lens Flash Sync Terminal and the Pro
Back/Pro Back Plus’s Lens Sync Cable jack.
• The MAMIYA Interface Plate's Cable Release is not plugged into the RZ67 PRO II camera body's
auxiliary release jack. See step 3 on the previous page.
• The MAMIYA Interface Plate's Release button does not have its two white dots aligned. See
"Electromagnetic Cable Release" on the next page.
• The MAMIYA RZ67 PRO II camera body has not been wound. Push the Cocking Lever all the way
down.
• The MAMIYA RZ67 PRO II camera body R-M lever is not in the M position. See step 6 above.
• The MAMIYA RZ67 PRO II camera body's Shutter Speed dial is at the AEF setting and an AE
viewfinder is not installed, or the dial is at the RBL setting and an RB lens is not installed.
• The Shutter Release collar is in the Emergency Shutter Operation position. Lock the Shutter Release
Button as described in step 5 above.
Release button