


INTRODUCTION
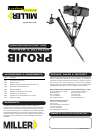
The Miller Projib is a versatile camera mount; designed to add the
dimension of tracking and elevation to the normal range of movements
afforded by your uid head. It is designed for use in professional lm
and video
production by professional support equipment operators. For safe op-
eration of the Miller Projib, please observe the following precautions:
The Safe setup and operation of this equipment is the responsibilty
of the operator. This equipment is to be set up and used by qualied
personnel only.
A Miller Projib, when loaded with camera, uid head and counterbal-
ance weights, exerts a considerable amount of leverage on the surface
it is attached to. For this reason, precautions must be taken to prevent
accidental over-balancing. ACCIDENTAL OVER-BALANCING OF
THE PROJIB MAY CAUSE EXPENSIVE EQUIPMENT DAMAGE AND
SERIOUS PERSONAL INJURY. The risk of over-balancing is reduced
by adding suitable ballast, such as sandbags, to the base of the tripod
or dolly to which the Projib is attached. THE USE OF SUITABLE AND
SUFFICIENT BALLAST IS ESSENTIAL TO SAFE PROJIB OPERATION.
The Miller Projib is designed to attach to most professional heavy duty
tripods or hi-hat type dollies. FOR MAXIMUM STABILITY WHEN USING
TWO STAGE TRIPODS, ENSURE THAT THE LOWER TUBE LEGS
ARE COMPLETELY COLLAPSED.
The total payload must not exceed the capacity of the tripod. NOTE:
Make sure all items on the jib, (uid head, camera and counterbalance
weights), as well as the jib itself, are considered in assessing the weight
of the payload. The jib is designed to carry a camera and uid head
weight up to 50 lbs. (22kg) maximum.
If the Projib is mounted on a dolly, the dolly should be of a heavy duty
type with sufcient additional payload capacity to accept sandbags or
similar safety ballast to prevent over-balancing as cautioned above.
FAILURE TO OBSERVE THIS PRECAUTION MIGHT CAUSE THE
ASSEMBLY TO OVER-BALANCE IF THE DOLLY IS BROUGHT TO A
SUDDEN STOP AT THE END OF A TRACKING MOVEMENT.
Miller recommends the use of standard, rubber covered circular bar-
bell weights as suitable counterbalance for the Projib. For the average
camera/uid head payload of between 15kg (30lb) and 20kg (45lb), a
suitable combination of 5kg (10lb), 7.5kg (15lb) and 10kg (20lb) bar-bell
weights is recommended.
1. Remove the Priojib from the protective carry case and ip over the
uid head mounting plate so that the threaded male and female mount-
ing connectors are aligned. Join the connectors and hand-tighten only.
2. Attach the Projib to the tripod using the clamp nut provided. Note
that the main body of the Projib at the pivot point is tted with a spirit
level. Adjust the legs of the tripod so that the spirit level indicates a level
position for the PROjIB. FAILURE TO LEVEL AT THIS POINT FIRST
WILL PREVENT THE PROJIB FROM MAINTAINING A LEVEL POSI-
TION THROUGHOUT THE RANGE OF MOTION OF THE PROJIB ARM
- REGARDLESS OF OTHER ADJUSTMENTS! Correct levelling of the
tripod bowl or dolly hi-hat is important and should be checked regularly
during operation. Do not adjust the level of the tripod or dolly with the
camera tted.
3. Loosen the lock nut that controls the motion of the sliding counterbal-
ance arm at the rear of the Projib. Slide this arm out so as to achieve a
balance in the Projib over the pivot point at the tripod.
SAFETY INSTRUCTIONS
PROJIB SETUP
PROJIB SETUP contd.
4. Attach a 100mm ball levelling uid head to the jib mounting plate.
View the 2nd spirit level, located on the uid head mounting surface of
Projib. If it is not indicating level, rst check to make sure that the central
pivot point is level. Once that is conrmed, loosen the lock ring that is
located at the base of the parallel tube under the jib arm near the central
pivot point at the tripod. CAUTION! DO NOT LOOSEN THE LOCK
RING FOUND NEAR THE FLUID HEAD MOUNTING SURFACE
WHICH IS USED ONLY TO RETURN THE PROJIB TO STORAGE
POSITION. Once the lock ring near the center of Projib is loosened, turn
the entire parallel tube beneath the jib arm in or out until the uid head
mounting surface is indicating level in the #2 bubble level. Tighten the
lock ring in this position. Now level the uid head using the bubble level
on the uid head. Once all three bubble levels are indicating level, the
camera will remain level throughout the jib’s operational range.
5. Mount camera to uid head and add sufcient weights to rear of jib (or
adjust length of jib counterbalance arm) to balance camera. CAUTION:
THE PROJIB COMES EQUIPPED WITH A LARGE PIN WHICH WILL
PREVENT ACCIDENTAL DETACHMENT OF THE WEIGHT RETAINING
NUT DURING JIB OPERATION. BE CERTAIN THAT THIS COTTER
PIN IS IN PLACE DURING JIB OPERATION.
The Projib is tted with pan and tilt drag controls and positive tilt lock for
the jib arm vertical movement. The tilt lock is easily distinguished from
the tilt drag by the large cone shape thrust locker located under the tilt
lock knob. Rotating the drag adjusters inward (clockwise) increases the
amount of drag; counter-clockwise rotation reduces drag. Pan and tilt
drag are adjusted by the operator to personal preference and to achieve
correct motion for shooting requirements.
OPERATING CONTROLS
PROJIB SPECIFICATIONS
Maximum Payload 25kg (50lb)
Typical Payload ENG Camcorders up to 20kg (44lb)
Weight 11.4kg (25lb)
Height Range 2m (78”)
Dimensions (mm) 230W x 505D x 1220L
(folded down) (in) 9”W x 20”D x 48”L
Counterbalance 25mm (1”) centre barbell weights
Attachment 100mm Base, 100mm bowl
Controls Friction pan & tilt locks
Adjustable tilt drag
Levelling Adjustable levelling arm. Dual bubble
levels mounted at tripod base and
uid head mount
Min Tripod Req. HD-style tripod with minimum
24mm (1”) tube diameter.
COUNTERWEIGHTS