


1. Wait for the film to completely
rewind into the cassette.
• The frame counter will count down during
rewind.
• will appear in the frame counter and
will blink when the film is rewound (M)
.
2. Turn the camera upside-down
and press the film-chamber
release.
3. Open the film-chamber door and
remove the film.
• The film’s VEI indicator will be ✖.
1.Center your subject in the focus
frame , then press the shutter-
release button partway down (K).
2.Without lifting your finger, recompose
the picture, then press the shutter-
release button all-the-way down to take
the picture (L).
• Lift your finger from the shutter-release button to
cancel focus hold.
• Make sure the subject is within the
focus distance of 0.8m - ∞
(2.6 ft. - ∞)( I )
.
3.Center your subject in the focus
frame, then press the shutter-
release button partway down.
• If blinks in the data panel with the shutter-
release button pressed partway down, and
the green flash lamp blinks the flash is
charging ( J )
.
4.When the green flash lamp glows,
press the shutter-release button
all-the-way down to take the
picture.
• After use, slide the main switch to to
close the lens cover and turn the camera off.
1. Turn the camera upside down
and slide the film-chamber
release in the direction
indicated and open the film-
chamber door (D).
2. Insert the film cassette into the
film chamber (E).
•
This camera will only load film with
the ● mark current.
3. Close the film-chamber door
until it clicks.
• The film will advance to the first frame,
then and will appear in the
data panel (F)
.
• If blinks in the data panel, open the
chamber, then remove the film.
- Your camera cannot load a cassette if
the current VEI(Visual Wxposure
Indicators) is ◗, ✖, or ■.
- If a processed (VEI ■) or partially
exposed (VEI ◗) cassette was loaded
into this camera, the VEI has been
changed to ✖.
1. Slide the battery-chamber
release in the direction
indicated and open the battery
chamber (A).
2. Insert the battery into the
chamber with the – side
entering first (B).
3. Close the battery-chamber
cover until it clicks.
• To save power, your camera will shut
down if it is not operated for more than
five minutes. Close, then open the lens
cover again to restore power.
BBAASSIICC OOPPEERRAATTIIOONN
D
E
F
G
H
I
A
B
C
CONTINUOUS-DRIVE MODE
AUTOFLASH
The flash will fire automatically when the light level is low.
AUTOFLASH WITH RED-EYE REDUCTION
Use the red-eye reduction mode to reduce
the red-eye effect when photographing in
low light situations. The red-eye reduction
lamp will glow for a moment before the flash
fires and the picture is taken (R), (S).
The flash will fire automatically when the
light level is low.
Press the mode button until
appears in the data panel.
• The flash mode remains selected after the shutter is released.
MANUAL FILL-FLASH
The flash will fire with every shutter release, regardless of lighting. This
can be used to reduce harsh, unflattering shadows on your subject’s face.
Press the mode button until appears in the data panel.
• The flash mode remains selected after the shutter is released.
FLASH CANCEL
With flash-cancel, the flash will not fire. This mode should be used when
photographing twilight scenes, subjects that are beyond the flash range, or
when flash photography is prohibited.
Press the mode button until appears in the data panel.
• Shutter speeds may be slow when the flash is canceled. Use of a tripod is
recommended.
• The flash mode remains selected after the shutter is released.
NIGHT PORTRAIT MODE
In night portrait mode, the camera balances the flash and existing light
exposure so you can take beautiful pictures of people at sunset or at
night. The flash is set to manual fill-flash.
Press the mode button until appears in the data panel.
• The shutter speed will be slow. Use of a tripod is recommended.
• The flash mode will return to autoflash after the shutter is released.
AADDVVAANNCCEEDD OOPPEERRAATTIIOONN
T
U
V
S
R
Q
P
O
N
M
K
L
J
INSERTING THE BATTERY
Your camera uses one 3-volt CR-2 lithium battery to
supply power for all camera operations.
CHECKING THE BATTERY POWER
Battery-condition indicator appears even with the camera off (C)
.
:Power is sufficient for all
camera operations.
:Power is sufficient, but the
battery will have to be
replaced soon.
:Replace the battery.
The shutter will lock until the
battery is replaced.
No display: Replace battery or
confirm it is inserted correctly.
• The frame counter is resets to when you replace the
battery if film is in the camera.
LOADING THE FILM
Your camera uses IX240 type ISO100-400 speed film
designed for use in Advanced Photo System cameras.
FULL AUTO OPERATION
1.Slide the lens cover switch
to to open the lens cover
and turn the camera on (G).
2.Use the format switch to
choose the print format (H).
• The viewfinder changes to match
your selection.
Hold the camera steady, making
sure your fingers do not cover the
flash. If you are taking a vertically
framed picture, turn the camera so
the flash is on top.
REWINDING THE FILM
MANUAL REWIND
Use manual rewind to rewind the film before the roll is finished.
1. Gently press the manual rewind
button key on the camera strap
or similar object (N).
• Start rewind manually if automatic rewind
does not start after you take the number of
exposures specified on the film cassette.
Additional exposures may overlap
.
2.Follow steps 1- 3 from
automatic rewind.
FOCUS HOLD
When your subject is located outside the focus frame, you can first
lock focus on your subject, then recompose the picture as desired.
The following modes can be selected:
Autoflash ( ),
Autoflash with red-eye reduction ( ),
Manual fill flash ( ),
Flash cancel ( ),
Night portrait ( ),
Continuous mode (
+
) (O) (P).
When you turn the camera on, the built-
in flash is set to autoflash ( ).
• The range of the built-in flash depends
on the film speed you are using. To
ensure proper exposure, make sure
your subject is within the flash range
(Q).
ISO 200 0.8 - 5.6m (2.6 - 18.2 ft.)
SELF-TIMER
The self-timer delays release of the shutter for approximately 10
seconds after you press the self-timer button.
In this mode, the camera continuously
takes picture and advances the film
as long as the shutter-release button
is held down.
• This mode is recommended for use
only in brightly lit scenes.
Use in low-light situation may result in
underexposure.
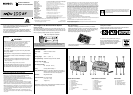
1. Press the flash-mode button
until is displayed in the
data panel.
• Flash cancel and faster shutter speed is
automatically selected.
2. Press and hold the shutter-
release button all the way
down.
• The camera will release the shutter and
advance the film as long as the shutter-
release button is held down (T).
• Continuous-drive mode remains
selected after the series is complete.
1. Place the camera on a
tripod, then center your
subject in the focus frame.
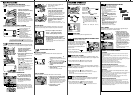
2. Press the self-timer button
to activate the self-timer.
(U)
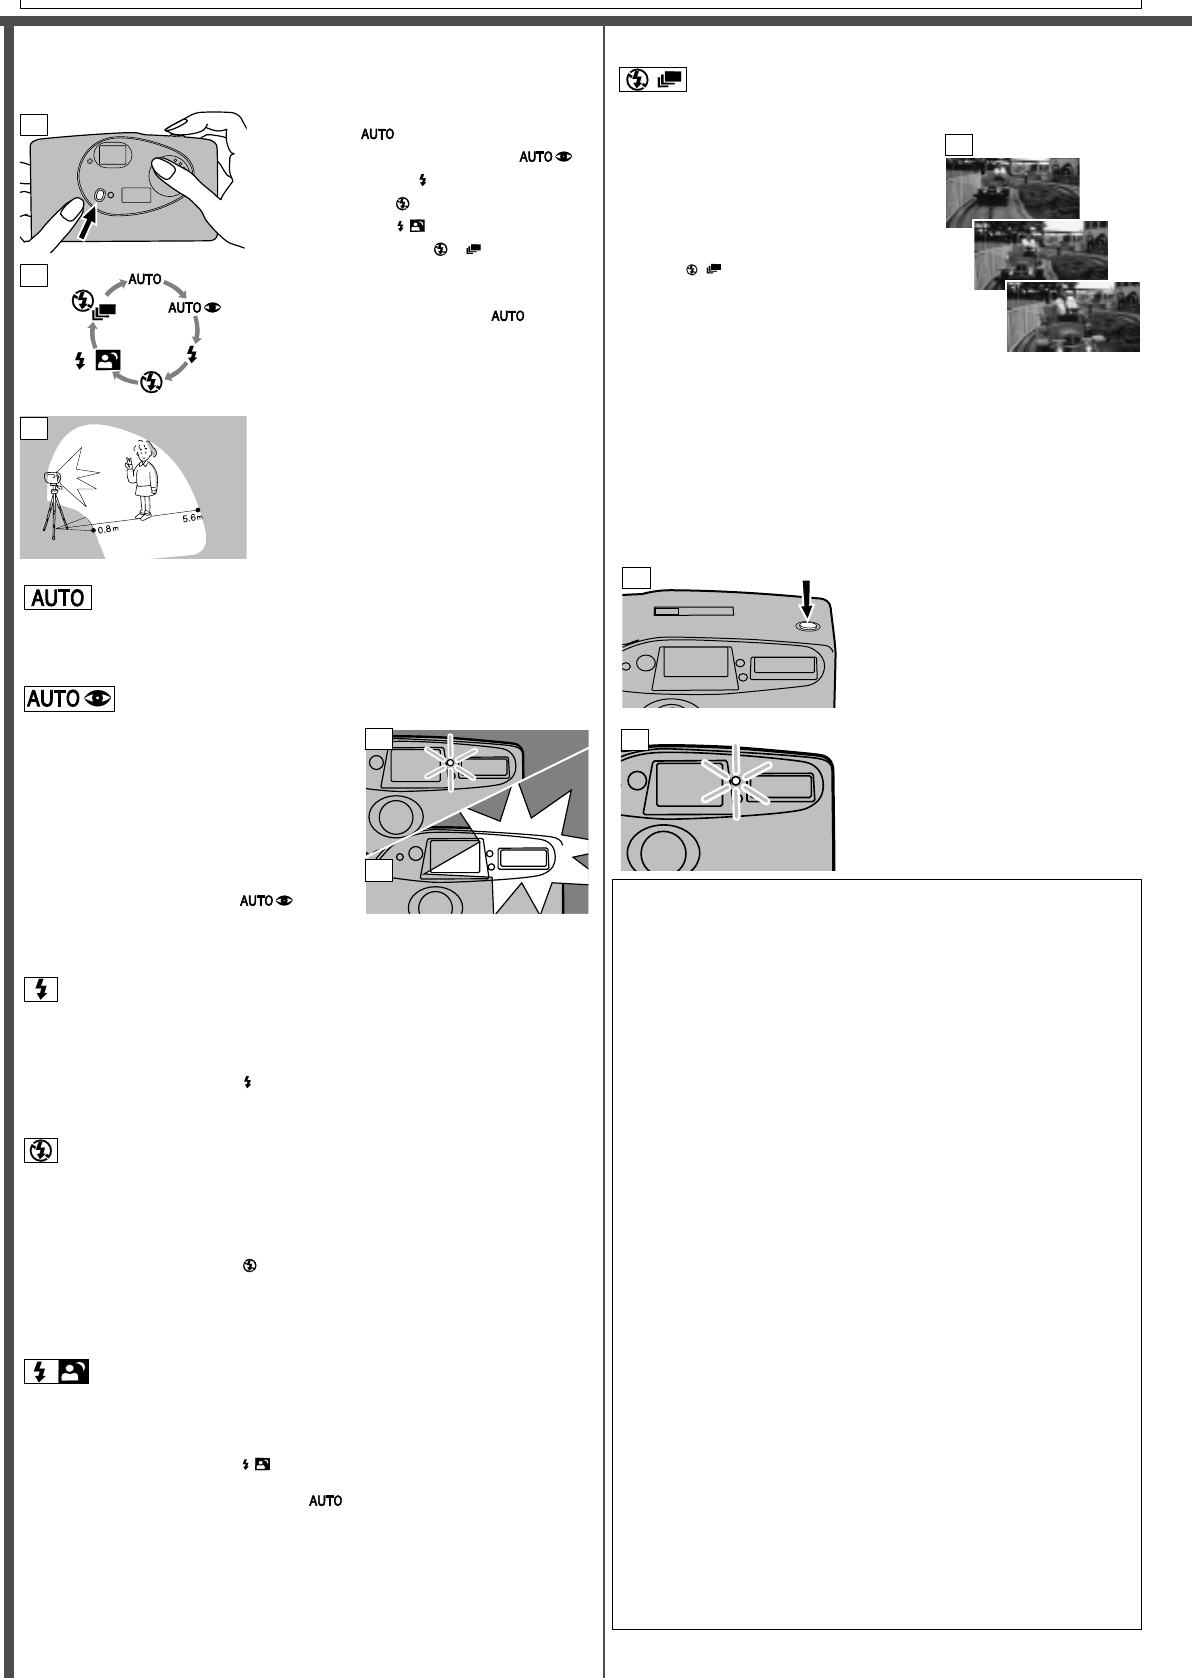
• The self-timer lamp will glow, then
blink rapidly before the shutter is
released (V).
• To cancel the self-timer, press the
shutter-release button, the self-timer
button, or turn the camera off.
• The self-timer is automatically
canceled after the shutter releases.
• Do not press the self-timer button
while standing in front of the
camera.
• The self-timer does not operate in
continuous-drive mode.
USING THE MODE BUTTON
CLEANING
• Keep the AF and meter windows clean or the focus and/or exposure
may not be accurate.
• If the camera body is dirty, gently wipe it clean with a soft, clean, dry
cloth.
• To clean the lens surface, first brush away any dust or sand then, if
necessary, moisten a lens tissue with lens cleaning fluid and gently wipe
the lens in a circular motion, starting from the center.
• Never place lens fluid directly on the lens.
• Never touch the lens surface with your fingers.
• Never use alcohol or solvents to clean the camera.
BEFORE IMPORTANT EVENTS
• Check camera operation carefully or take test photographs.
• Minolta is not responsible for any loss which may occur due to an
equipment malfunction.
STORAGE
When storing the camera for extended periods of time, please
follow these guidelines,
• Store the camera in a cool, dry, well-ventilated area away from dust and
chemicals. For very long periods, place the camera in an airtight
container with a silica gel drying agent.
• Before using after prolonged storage, always check the camera’s
operation to make sure it is functioning properly.
QUESTIONS AND SERVICE
• If you have questions about your camera, contact your local camera
dealer or write to the Minolta distributor in your area.
• Do not open the film chamber or forcefully remove the cassette if the
film cannot be rewound. Contact an authorized Minolta Service Facility.
• Before shipping your camera for repair, please contact an authorized
Minolta Service Facility for details.
CARING FOR YOUR CAMERA
Step
StepStep
Step
Step
AUTOMATIC REWIND
Your camera automatically rewinds the film into the cassette after
the last exposure.
ISO 200