


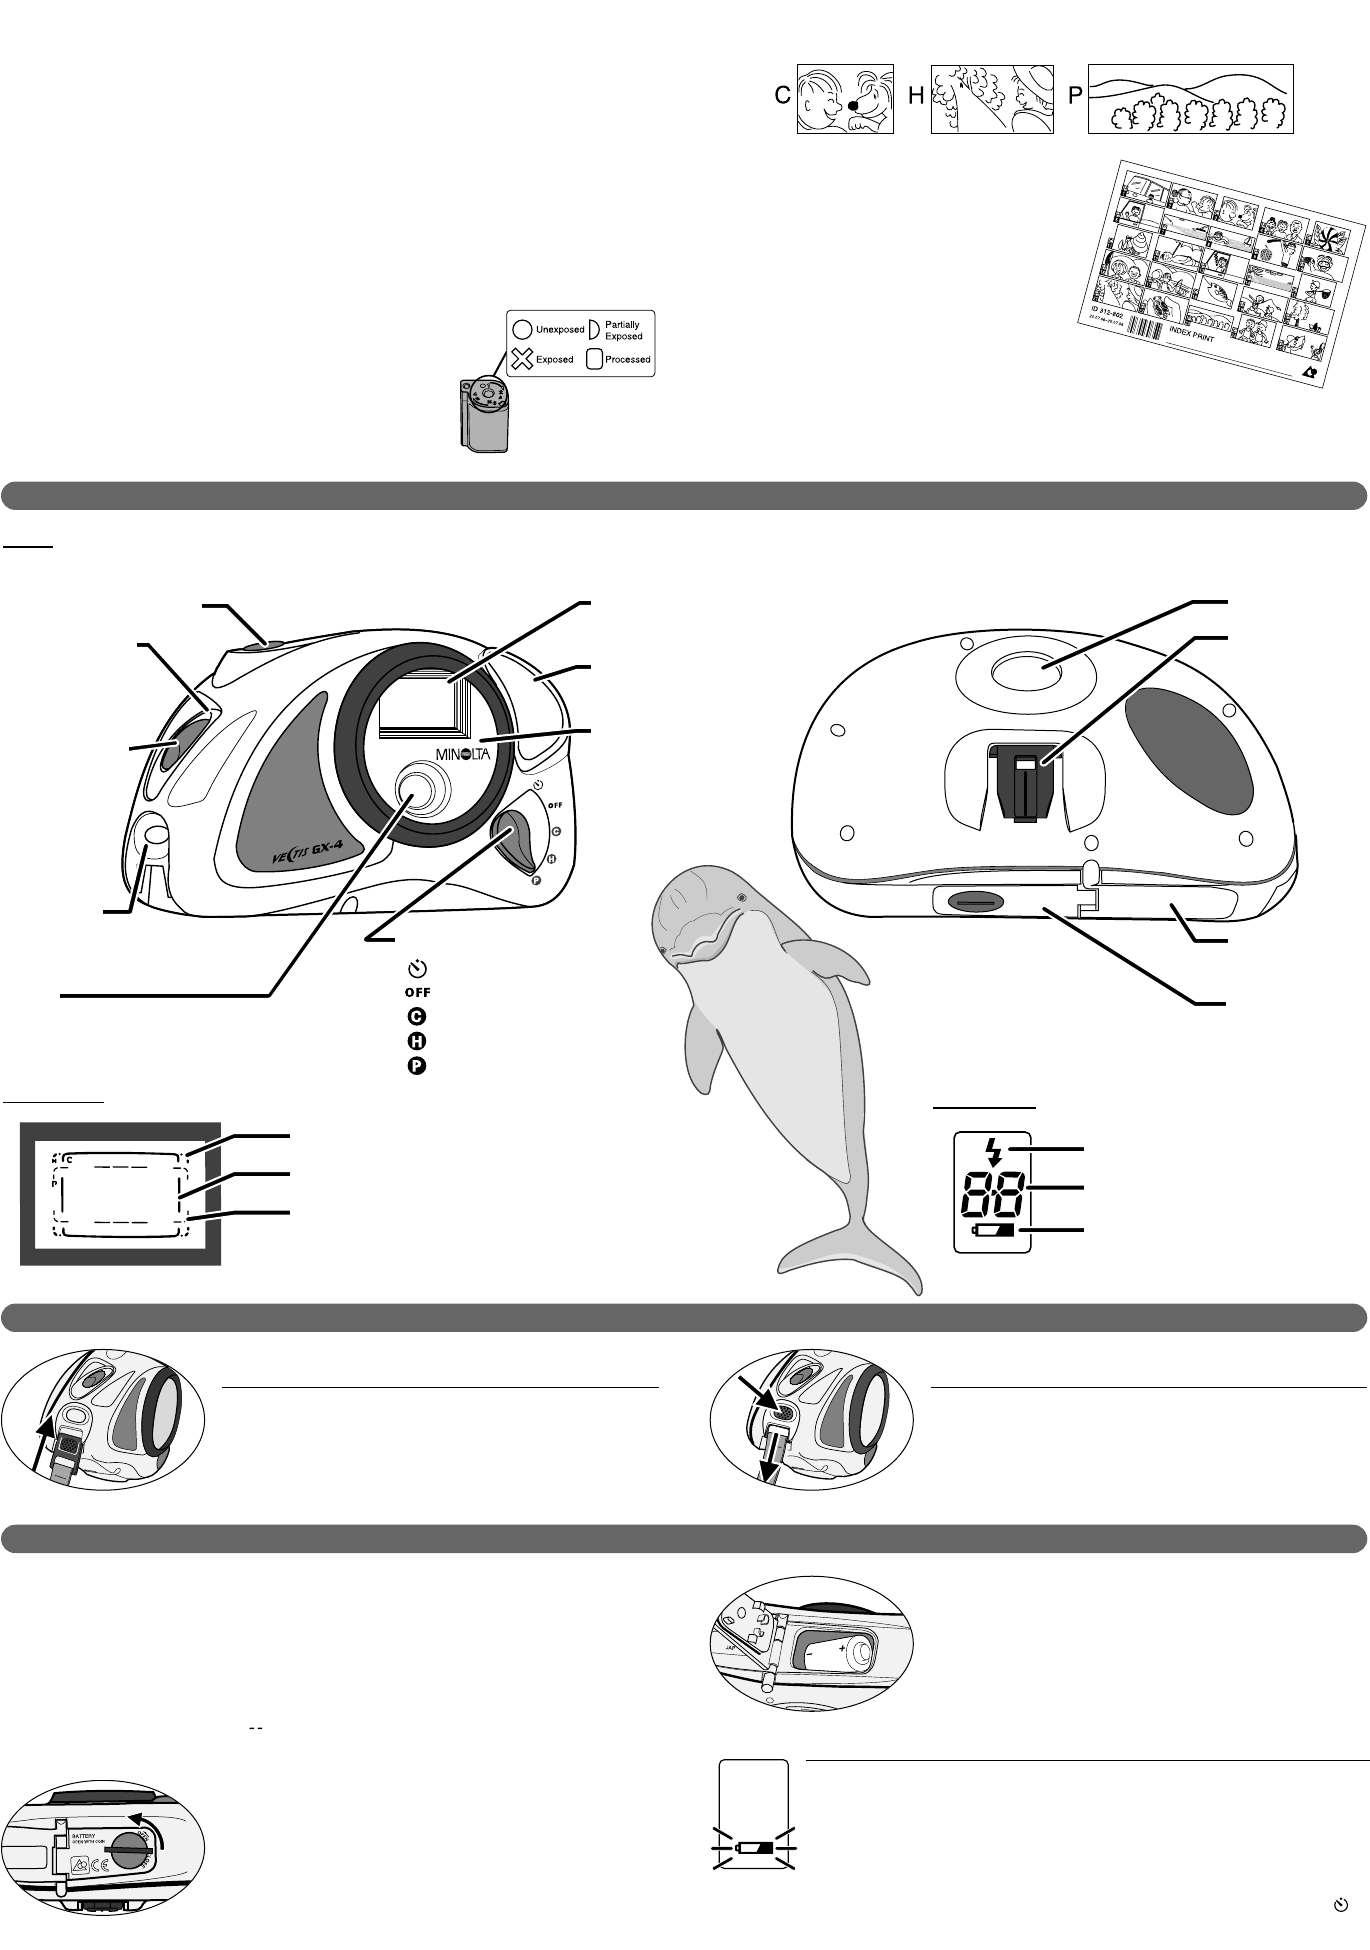
Self-timer
The Minolta GX-4 is a waterproof Advanced Photo System™ camera designed to
take pictures anywhere you go. Its housing is sealed to prevent entry of moisture
and dust, so you can enjoy taking pictures on the ski slope, at the beach, or even
underwater (approx. 5 m (16 ft.)).
Advanced Photo System™ is a trademark of the five system developing companies.
Your camera has been designed to be fully waterproof when used as described in
the manual. However, careless handling may allow water to enter the camera
causing permanent damage to internal parts. To obtain the best performance from
your camera, observe all notes and cautions in the instruction manual.
Advantages of the Advanced Photo System
Easier to load...
Advanced Photo System cameras use the new IX240 type film.
This new film features drop-in-loading to make loading your
camera simple, the first time, every time. Indicators on the top
of the cassette tell you if the film is unexposed, partially
exposed, exposed, or processed.
New print formats...
Classic C print, wider H print, and panorama P print formats are available with Advanced Photo
System cameras.
New processing....
In addition to returning your prints in the format you
selected, certified photofinishers will return your
Advanced Photo System film in its original cassette
with an index print. To order reprints, simply choose
the images you want from the index print. No more
searching through negatives to find the right frame.
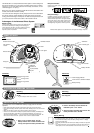
NAMES OF PARTS
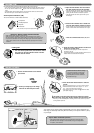
ATTACHING AND REMOVING THE STRAP
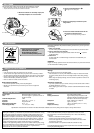
INSTALLING THE BATTERY
Your camera uses one 3-volt CR2 lithium battery to supply power for all camera
operations.
• Before opening the battery chamber, wipe all water, sand, and grit off of the camera.
• Do not open the battery chamber in places where water, blowing sand, or dust can enter the
camera.
• Make sure the battery is clean and dry before inserting it into the camera.
• If film is in the camera when the battery is replaced, install a new battery immediately after
removing the old battery. If the battery is not replaced immediately, your camera may
advance one frame and display in the frame counter for the remaining exposures. The
frame counter will return to normal operation when a new film cassette is loaded.
2. Insert a new battery into the chamber as
indicated by the
+
and
–
marks.
3. Close the battery-chamber door and turn the
battery-chamber lock to CLOSE.
1. Using a coin or similar object, turn the
battery-chamber lock counter-clockwise until
it stops, then open the battery-chamber door.
Insert the strap tab into the strap port until it
‘clicks’.
• Tug on the strap to make sure it is secure.
Attaching
Replace the battery
• If no display appears, replace the battery or make sure it is correctly installed.
• Do not remove the battery unless the battery warning blinks or no display
appears in the data panel.
• If the data panel dims after the flash fires, the battery will need to be replaced
soon.
• Your camera shuts down if it is not operated for more than three minutes. To
restore power, turn the command switch to OFF, then back to P, H, C, or .
Battery Warning
Before using your camera, familiarize yourself with the names and locations of the
controls, then read the instructions carefully.
Press the strap release and pull the tab out of
the strap port.
Removing
Shutter-release button
Command switch
Viewfinder window
Flash*
Lens
Film-chamber
release
Release lock
Strap port
Viewfinder*
Film chamber
Accessory port
Battery chamber
* Do not touch
P print (Panorama)
H print
C print (Classic)
Camera off
H image frame
P image frame
C image frame
Body
V
iewfinder
Data Panel
Flash-charging indicator
Frame counter / Self-timer indicator
Battery warning
Cover glass*