


1110
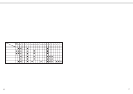
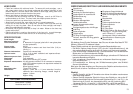
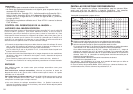
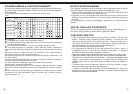
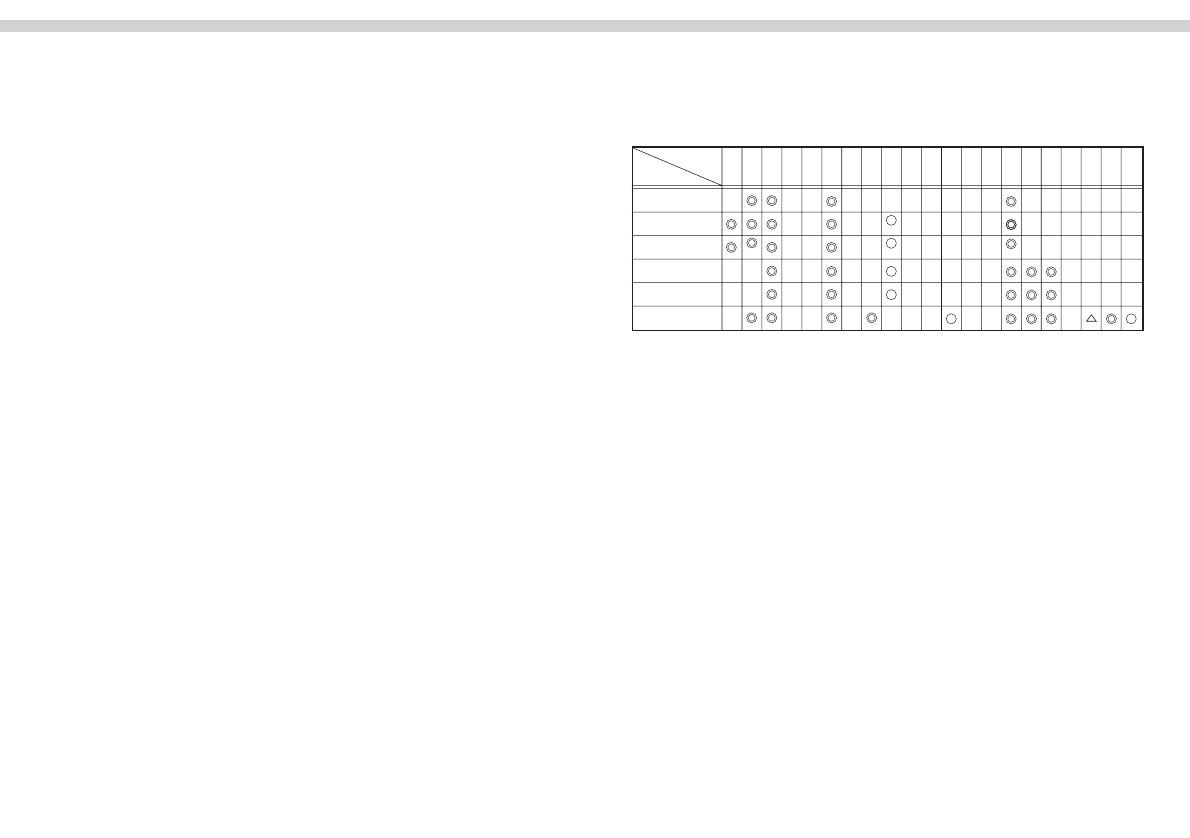
RECOMMENDED FOCUSING SCREEN
Various interchangeable focusing screens are available for Nikon cameras to suit
any type of lens or picture-taking situation. Those which are recommended for use
with your lens are listed below.
For determining the frame type and focusing
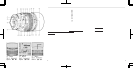
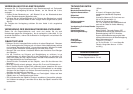
CONTROLLING DEFOCUS IMAGE
–
MAKING IMAGE BLUR
While pushing the DC ring lock release button. rotate the DC ring toward the R
(rear)
side to blur the
background. or toward the F (front) side to blue the
foreground (see illudt, A). To effectively blur background or foreground images.
turn the DC ring so the f-number on the DC ring (aligned to the DC ring index) is
same as the aperture in use. Turning the ring beyond the aperture in use lets you
creste a soft-focus effect.
• Defocus control should always be performed before focusing. If you rotate the
DC ring after focusing, or during focus lock in autofocus photography. your
subject will be out of focus.
•
With the DC ring at either the F or R side, the distance scale may not show the
correct distance.
• The effect of defocus image control depends on subject conditions such as
subject-to-background distance. subject
-
to
-
foreground distance, etc.
• Image blur cannot be verified through the viewfinder. To obtain the desired
effect, take a series of shots with the DC ring at various settings.
FOCUSING
This lens can be used for both autofocus and manual focus.
To select autofocus, while pressing the A-M ring lock release button, turn the A-
M ring so that “A” aligns with the A-M index. Also, set the camera’s focus mode
selector to autofocus position.
To select manual, turn the A-M ring so “M” aligns with the A-M index. Also, set
the camera’s focus mode selector for manual focus.
• With a Nikon autofocus camera, improperly setting the camera’s focus mode
selector and lens’ A-M ring may damage the camera body.
F6
F5
with DP-30
F5
with DA-30
F4
with DP-20
F4
with DA-20
F3
EC-B/
EC-E
A/L B C D E G1 G2 G3 G4 H1 H2 H3 H4 J K P M R T U
(
+0.5
)
(
+0.5
)
(
+1.0
)
(
+0.5
)
Camera
Screen
I
deal
Can be used even though part of the view is a little hard to see
Split image focusing is possible. but focusing is inaccurate
Correction value for center-weighted metering
When using the F6, you can correct the exposure value by setting “b6: Screen
Conpensation” to “Except for B and E” in the Customize menu.
When using a camera model othre than B or E. set this to “Except for B and E”
regardiess of whether the correction weight is set to “0” When using the F5.set the
compensation for the exposure value in custom setting number 18. When using a
camera from the F4 series, turn the exposure adjustment diat for the finder screen to
set the compensation.
For details, reter to the instruction manual for the camera you are using.
Blank: Unsuitable
However, when using the M screen, this value is not used in order to allow you to use a
rate of 1 to 1 or higher for close-up photography.
When using a camera other than one listed above with a B2/B3, E2/E3, or K2/K3 screen
refer to the B, E, or K column respectively.
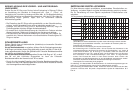
MINIMUM APERTURE LOCK
For Programmed auto or Shutter-priority auto exposure shooting. use the
minimum aperture lock lever to lock the lens aperture at f/16.
1. Turn the aperture ring so that f/16 on the aperture scale is alignae with the white
aperuture indes dot.
2. Slide the lock lever in the direction of the aperuture ring so the white dot on the
lever aligns with the orange dot (Illust. B).
To release the lock, slide the lever in reverse direction.
USING BUILT-IN LENS HOOD
Pull out the hood and turn it counterclockwise for two rotations (see Illst. C). To
store, turn the hood clodkwise and push back.