


iPIX® Photography with Nikon Digital Cameras
30
5 - TAKING YOUR PICTURES
Step 3: Take the First Picture
Step 3: Take the First Picture
When you take your first set of pictures, be aware of where you are in
relation to the camera’s field-of-view and the order in which pictures are
taken.
• Sequencing pictures (front/back, back/front) helps to locate matching
hemispheres when creating iPIX images in your iPIX software.
• Make sure that you are not in the range of the fisheye lens when you
are taking pictures.
• Try to avoid capturing people at the edge of the field of view. Take
care to not place the IPIX image seam on visually important regions
of the image.
• Make sure your hands are out of the way so they do not appear in the
image.
Procedure
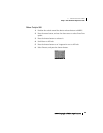
1. Position the switch around the shutter-release button to M-REC
mode.
2. Point the camera with the lens forward to take the picture.
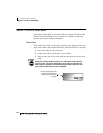
3. Grasp the rotator clockwise until it clicks into place. Do not turn the
rotator using the camera body.
4. Squeeze your thumb and forefinger together to take the picture. This
prevents the camera from moving and your pictures from blurring.
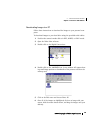
5. Once the picture is taken, a review image will appear in the color LCD
screen. This picture will be the first half of your iPIX image.