


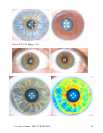
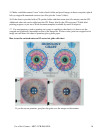


Use of Iris Camera – MEC-2-CB-D60-N105 12
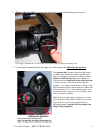
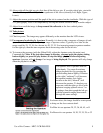
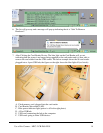
8. If the message complains that the folder is in use, check all folders, and even if it is not in use,
click it again, possibly a third time. Then it will say it is safe to unplug your device. The LED
light on the card reader will go off (Figure 4).
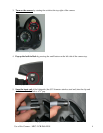
9. Disconnect the USB card reader from the computer (Figure 5)
10. Then remove the memory card (Figure 6).
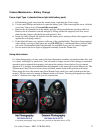
How to use the Computer to Organize Eye Pictures
There are many possible methods of image management, but how best to download and organize a
collection of eye pictures? I’ve been comparing the many ways of getting pictures from the camera,
and different ways of storing them. This is a write-up of my current preferences in acquiring and
organizing images from the digital eye camera.
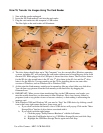
1. After taking a batch of pictures, turn off the camera and attach it to the computer using the USB
cord. It attaches near the bottom of the focus light battery pack on the camera and any standard USB
port on the computer. Turn the camera on. Alternatively: Eject the memory card and insert it into the
card reader, then plug the card reader into a USB socket on the computer.
2. The computer will ask what you want to do – which program you want to use to bring the images
into the computer hard drive.
3. At this point I am currently recommending that you select the "Microsoft Scanner and Camera
Wizard" since it has the best behavior and options. I do not bother with Nikon Picture Project but it
does work well with the Nikon Capture program. The Microsoft Scanner and Camera Wizard is good
at putting your pics into a logical place with conventional filenames. You can specify the directory
name and the first part of the file name (left part), and it will use consecutive numbers to make the
filename suffix (right part). I usually have it remove the pics from the camera at this time, because the
default behavior is to download all the pics but leave a copy on the memory card, and the next time
you have a new batch of pictures to transfer, you would not want to download the first batch again.
The Wizard shows you a list of thumbnails of all the pics, with a checked checkbox by each one.
Alternatively: Select the last option, which has a yellow folder icon next to it and it will just open the
memory card as a drive letter. You will first see a folder named “DCIM” (Digital Camera Image
Memory). Open this, and you will see another folder named something like “100NCD50” or
“101NCD60” etc. Open this and you will see the list of image files. If the same card is used in different
cameras, you will see a different folder for each camera. Create a destination folder with a name such
as “2006-06-27 Iris – San Marcos” or “Iris Pics 20060627” etc. Drag the files from the source folder
(on the memory card) to the destination folder (on the hard drive). To move the files instead of copying
them, use a right-click drag, and then select “Move Here” instead of the default “Copy Here.”
4. When the Wizard is finished, just close out and then turn off the camera. It is now ready for the next
batch and you disconnect the USB cable from the camera at this point.
Important – Card Usage:
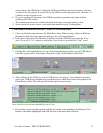
a. If you are using a card reader, close each window that is referring to the memory card, and any
program that may be accessing it. Then go to the small icon tray at the lower right of the
Windows toolbar (normally at the bottom of the screen) and left-click the icon with the left-
pointing green arrow, then left-click the item in the list of USB devices that has 3 or 4
(depending on which card read you have) drive letters. A message will pop up saying it is now