


Attaching Strobe Arm Mounts
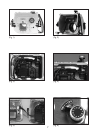
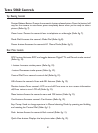
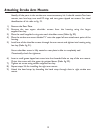
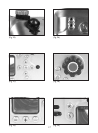
Identify all the parts in the strobe arm mount accessory kit. It should contain:Two base
mounts, two hex keys, two small O-rings and two green tipped set screws. For visual
identification of kit refer to fig. 19.
1) Remove the Rear Plate.
2) Remove the two upper shoulder screws from the housing using the larger
supplied hex key.
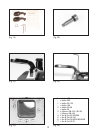
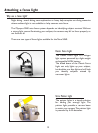
3) Place the small supplied o-ring onto each shoulder screw (Refer fig. 20).
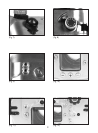
4) Place the strobe arm mount labeled “L” onto the upper left arm attachment point of the
housing.
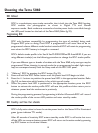
5) Install one of the shoulder screws through the arm mount and tighten into housing using
hex key (Refer fig. 21).
Ensure shoulder screw is fully seated so rear plate is able to completely seal.
Occasionally check for tightness.
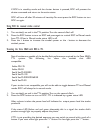
6) Insert a small green tipped set screw into the threaded hole on top of the arm mount.
Orient the screw with the green tip pointed down (Refer fig. 22).
7) Tighten set screw using smaller supplied hex key.
8) Repeat steps 3-6 for installing the right arm mount.
9) Attach the hand strap by threading the hand strap through slots in right strobe arm
mount.
12