8
It may be necessary to format the SD card if the card has been used in devices
other than your camera. To format, see Formatting Flash Memory or SD Card in
section 3.
“0” displays at lower right of the LCD display when the SD card is full, or the SD card
is write-protected, or there is an error writing to the card. You cannot take any
pictures when “0” is displayed. To take a picture, download the pictures to your
computer, or delete some unimportant pictures from the SD card (see Deleting an
Image
and
Connecting the Camera to Your PC
sections), or use a writable SD
card.
CHANGING RESOLUTION
Your 3MP Digital Camera offers 3 choices in resolution: Large, Medium and Small.
Large resolution is 3264 x 2448 pixels, Medium resolution is 2000 x 1500 pixels, and
Small resolution is 1000 x 750 pixels. The higher resolution setting allows an image
to be printed as large as 8 x 10 inches, but requires more memory to store. The
lower resolution setting will allow more images to be stored on the camera, but does
not ensure print-quality detail. It is best suited for images to be e-mailed or posted
on a web site.
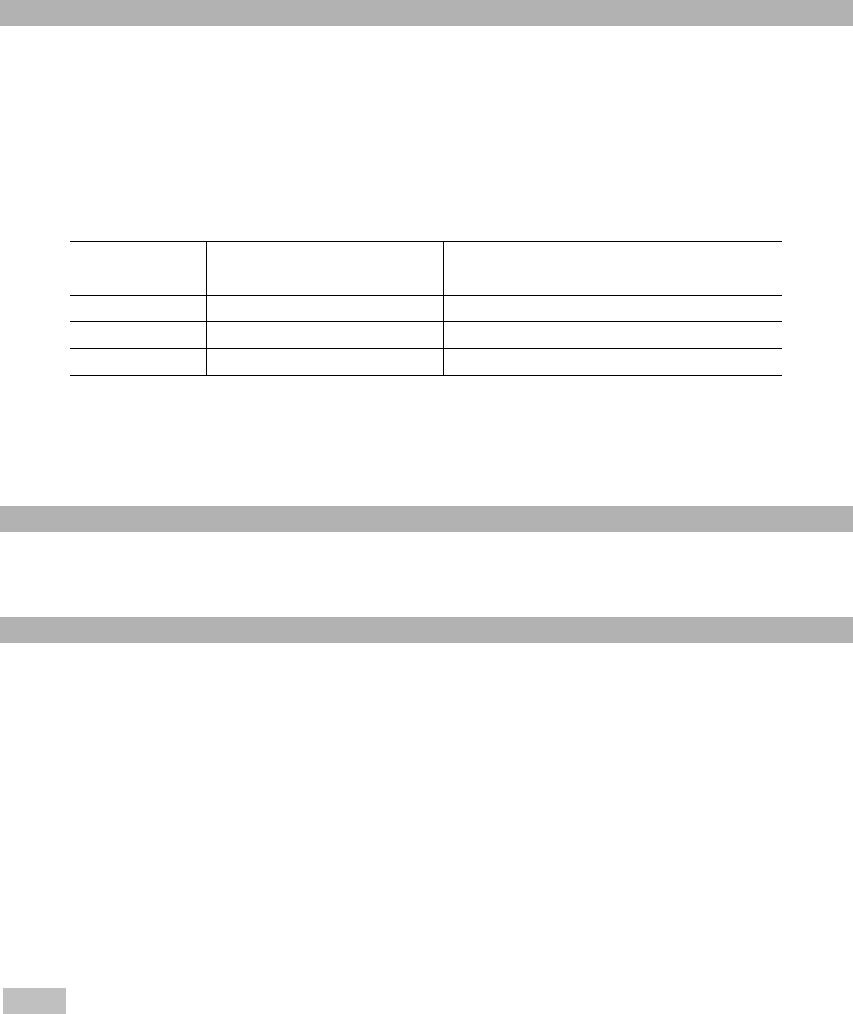
SIZE RESOLUTION SIZE # OF AVAILABLE SHOTS
(16MB INTERNAL MEMORY)
Large 3264 x 2448 pixels 3
Medium 2000 x 1500 pixels 7
Small 1000 x 750 pixels 15
To change the resolution:
1. Turn the camera on and press the Mode button.
2. Select Size and then select LARGE, MEDIUM or SMALL.
TURNING THE SOUND ON / OFF
1. Turn the camera on and press the Mode button.
2. Select Sound and then select ON or OFF.
TAKING PICTURES
To take pictures using your Digital Camera:
1. Turn the camera on.
2. In low light conditions, check to make sure the flash is ready. Be sure the Flash is
set to AUTO.
3. Use the aiming mark in the viewfinder to center the image you want to capture.
Alternatively, use the color LCD display to view the image you want to capture.
The color LCD comes on automatically in preview mode when the camera is
turned on. Press the LCD button again to view preview mode with icons.
4. Hold the camera still and press the Shutter button.
5. The LCD will indicate when the picture has been successfully taken by cycling
through the number display. If the sound feature is turned on, 1 short beep will
also indicate that a picture has been taken.
NOTE Safety while taking pictures
Do not use the camera while you are walking, running, driving or operating
machinery. Doing so can result in a serious accident.


