


62 VQT3G90 VQT3G90 63
How to select a scene (→61)
Using flash in Scene Modes (→52)
Taking pictures according to the scene
[Scene Mode] (Continued)
Recording Mode:
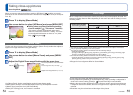
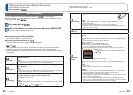
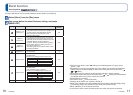
[My Scene Mode]
You can register a commonly used Scene Mode in on the mode dial.
After the settings are made, pictures can be taken in the preset Scene Mode by simply
setting the mode dial to
.
Set mode dial to /
Use cursor button to select the scene and press [MENU/SET]
(If scene menu is not displayed →38)
■
Changing registered Scene Modes
Perform the registration operation again.
■
Recording motion pictures in
Records motion pictures in registered Recording Mode.
●
and
Both represent the same function. Frequently-used scenes can be preset to each
position so that you can quickly and easily switch to the desired Scene Mode.
●
If recording settings are reset by [Reset] in the [Setup] menu, the preset Scene Modes
are cleared.
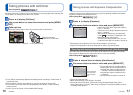
[Portrait]
Improves the skin tone of subjects for a healthier appearance in bright
daylight conditions.
Tips
• The closer the zoom is positioned to the T (telephoto) edge and the closer the
camera is brought to the subject, the greater the effect will be.
[Soft Skin]
Smoothes skin colors in bright, outdoor daylight conditions (portraits from
chest upwards).
Tips
• The closer the zoom is positioned to the T (telephoto) edge and the closer the
camera is brought to the subject, the greater the effect will be.
[Transform]
Changes the appearance of the subject by stretching the length or width,
and at the same time, improves the skin appearances.
Select the Transform level.
Notes
• [Picture Size] will be fixed according to the [Aspect Ratio] setting, as detailed
below.
: 3 M : 2.5 M : 2 M
[Self Portrait]
Take pictures of yourself.
Tips
• Press shutter button halfway → self-timer indicator illuminates → press
shutter button fully
(if self-timer indicator flashes, focus is not correctly aligned)
• Use of the 2-second self-timer is recommended when the shutter speed is
slow or jitter occurs easily.
[Scenery]
Takes clear pictures of wide, distant subjects.
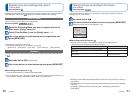
[Panorama
Assist]
Use the supplied software to join multiple pictures into a single panorama
picture.
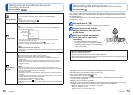
Use cursor button to select the recording direction, and press [MENU/SET] to
set.
Special panorama guidelines will be displayed.
Take the picture.
Select [Next], and press [MENU/SET] to set.
• Alternatively, press the shutter button halfway.
• You can take pictures again by selecting [Retake].
Change the composition and take the picture so that a part of the picture
overlaps with the previous picture.
• To take more pictures, select [Next] and repeat steps
and .
Section of picture that was taken last time
After you finish taking pictures, select [Exit], and press [MENU/SET] to set.
Tips
• Use a tripod.
• When it is dark, use the self-timer to record pictures.
Notes
• The focus, zoom, Exposure Compensation, White Balance, shutter speed,
and ISO Sensitivity are all fixed at the setting for the first picture.
• Shutter speed may slow down up to 8 seconds.
• After recording, the shutter may stay closed (up to 8 seconds) to process the
signal. This is not a malfunction.
• Panorama picture stitching cannot be performed by this camera. Use the
software on the supplied CD-ROM “PHOTOfunSTUDIO” to make the pictures
you record into a panorama still picture with your computer.