


Playback mode
26
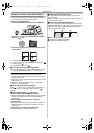
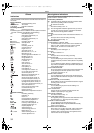
Variable-speed search function
The speed of cue/review playback can be varied.
(This operation is only available when using the remote
control.)
≥Set to Tape Playback Mode and play back a tape.
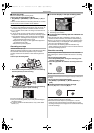
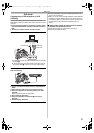
1 Press the [VAR. SEARCH] button on the remote control.
2 Press the [π] or [∫] button to vary the speed.
≥The speeds for cue/review playback are 1/5k (SP mode
slow-motion playback only), 1/3k (LP mode slow-motion
playback only), 2k, 5k, 10k, 20k.
ª
To return to normal playback
Press the [VAR. SEARCH] button or [1] button on the remote
control.
≥Images may be shown in a mosaic-like pattern.
≥The sound is muted during search.
≥This function is cancelled when the operation icon is
displayed.
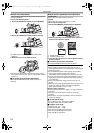
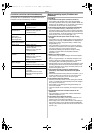
Playback on TV
Images recorded by this camera-recorder can be played back
on a TV.
≥Insert a recorded tape into this camera-recorder.
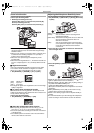
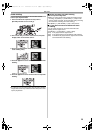
1 Connect the camera-recorder and a TV.
≥Connect the camera-recorder and a TV by using the
optional AV cable 1.
≥If the TV has an S-Video terminal, then also connect an
optional S-Video cable 2. It allows you to enjoy more
beautiful images.
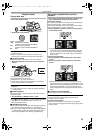
2 Turn on this camera-recorder and set the mode switch to
the Tape Playback Mode.
3 Select the input channel on the TV.
4 Press the [3] button to select the [1/;] icon to start
playback.
≥The image and audio are output on the TV.
5 Press the [4] button to select the [∫] icon to stop
playback.
≥Whenever plugging in the S-Video cable, plug in the AV
cable, too.
≥Use the AC adapter to free you from worrying about the
battery running down.
ª
If the image or audio from this camera-recorder is
not output on the TV
≥Check that the plugs are inserted as far as they go.
≥Check the connected terminal.
≥Check the TV’s input setting (input switch). (For more
information, please read the operating instructions for
the TV.)
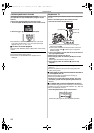
ª
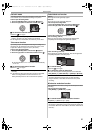
To display the on-screen information on the TV
The information displayed on the LCD monitor or the viewfinder
(operation icon, time code and mode indication, etc.), date and
time can be displayed on the TV.
1 Press the [OSD] button on the remote control.
≥Press the button again to erase the OSD information.
ENTER
VAR.
SEARCH
MENU
[VIDEO IN]
[AUDIO IN]
[S-VIDEO IN]
12
VIDEO OUT
DV
AUDIO
L–
–R
OUT
S-VIDEO OUT
OSD
DATE/
TIME
ZOOM
PHOTO
SHOT
START/
STOP
DVC20_Eng.book 26 ページ 2005年10月31日 月曜日 午前10時36分