


18
VQT1N74
≥ To select the recording functions (l 49, 53)
≥ To adjust manually (l 61)
≥ Playback operations (l 66, 71)
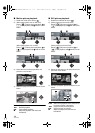
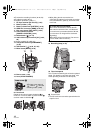
7 DC input terminal [DC IN 9.3V] (l 25)
8 Battery holder (l 23)
9 Battery release lever [BATTERY] (l 23)
10 HDMI mini connector [HDMI] (l 85, 87)
11 Disc copy button [DISC COPY] (l 93)
12 Power LCD Extra button
[POWER LCD EXTRA] (l 34)
13 Delete button [ ] (l 74)
14 Audio-video output terminal [A/V] (l 82,
96)
≥ Use the supplied AV cable only.
15 Component terminal [COMPONENT]
(l 86)
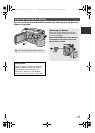
16 USB terminal [ ] (l 90, 97, 107)
17 Menu button [MENU] (l 29)
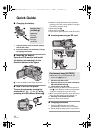
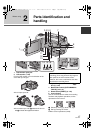
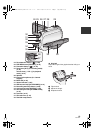
18 Built-in flash (l 57)
19 Lens (LEICA DICOMAR)
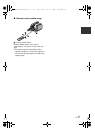
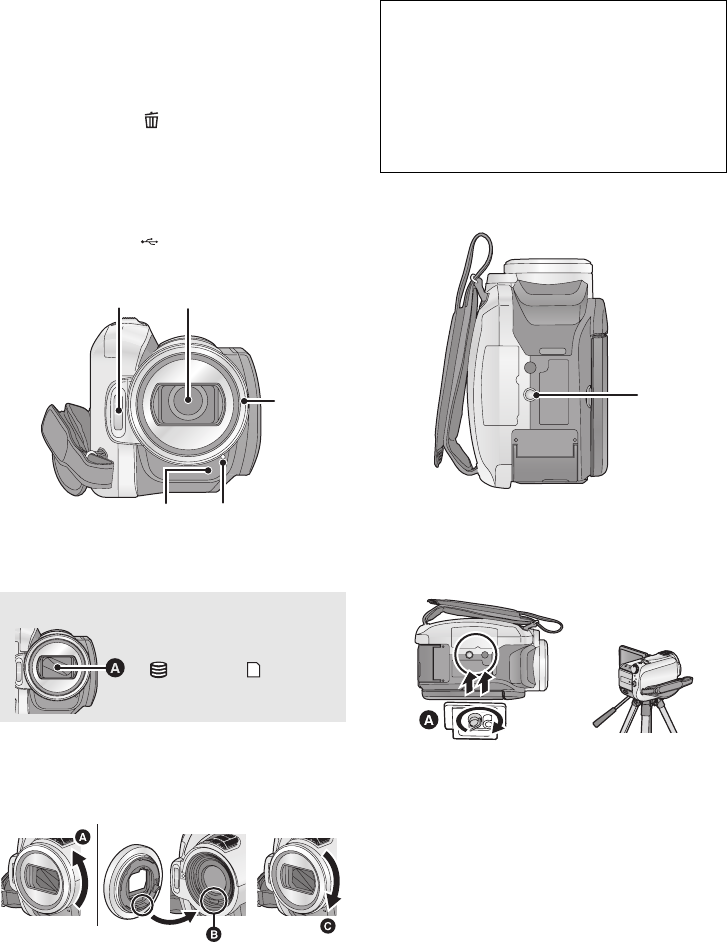
20 Lens hood
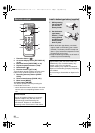
Rotate the lens hood counter-clockwise A to
remove it. In order to attach it, place into slot B,
and then rotate it clockwise C.
≥ When fitting the tele conversion lens
(VW-T3714H; optional) or the wide conversion
lens (VW-W3707H; optional), first remove the
lens hood.
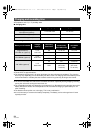
21 Remote control sensor (l 21)
22 Recording lamp (l 30)
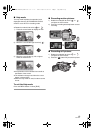
23 Tripod receptacle
This is a hole for attaching the unit to the optional
tripod. (For details on mounting the tripod, refer
to the operating instructions for the tripod.)
A Camera base
≥ The SD card cover cannot be opened when the
tripod is used.
Lens cover A
≥The lens cover opens in
HDD or SD card
recording mode. (l 28)
18
19
20
21 22
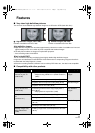
Be careful about the following.
When 2 lens accessories, such as the ND
filter and tele conversion lens, are fitted and
the zoom lever is pressed toward the W side,
the 4 corners of an image will be darkened.
(Vignetting)
(When fitting 2 lens accessories, first remove
the lens hood and then fit them.)
23
HDCHS9P-VQT1N74_ENG.book 18 ページ 2007年12月25日 火曜日 午後8時43分