


88
VQT2M51
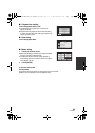
To complete editing
Press the MENU button.
≥ You can also delete scenes by pressing the MENU button, selecting [EDIT SCENE] #
[DELETE] # [ALL SCENES] or [SELECT].
≥ You can also delete still pictures by pressing the MENU button, selecting [PICT. SETUP] #
[DELETE] # [ALL SCENES] or [SELECT].
≥ During Face Highlight Playback, Highlight Playback, Intelligent Scene Selection, or Disc
Playback when connected to a DVD burner (optional), scenes/still pictures cannot be
deleted.
≥ Scenes/still pictures which cannot be played back (the thumbnails are displayed as )
cannot be deleted.
≥ In case of [ALL SCENES], the deletion may take time if there are many scenes or still
pictures.
≥ If you delete scenes recorded on other products or still pictures conforming to DCF
standard with this unit, all the data related to the scenes/still pictures may be deleted.
≥ When still pictures recorded on an SD card by other products are deleted, a still picture
(other than JPEG) that cannot be played back on this unit may be erased.
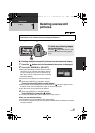
To delete an unnecessary portion of a scene, first divide the scene and then delete the
unnecessary portion.
≥ Change the mode to and touch the Play mode select icon to select desired
media to divide a scene. (l 40).
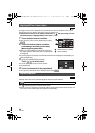
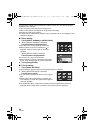
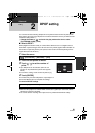
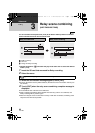
1 Select the menu.
2 Touch the scene to be divided.
3 Touch to set the dividing point.
≥ Using slow-motion playback or frame-by-frame
playback makes it easy to search for the point where
you want to divide the scene. (l 78)
≥ Touch [YES] to continue dividing the same scene. To
continue dividing other scenes, touch [NO] and
repeat steps 2-3.
4 Press the MENU button to complete dividing.
5 Delete the unnecessary scene. (l 87)
Dividing a scene to partially delete
: [EDIT SCENE] # [DIVIDE] # [SET]
MENU
0h00m00s0h00m00s0h00m00s
HDCSD60_TM60_HS60-P_PC-VQT2M51_eng.book 88 ページ 2010年1月18日 月曜日 午前11時33分