


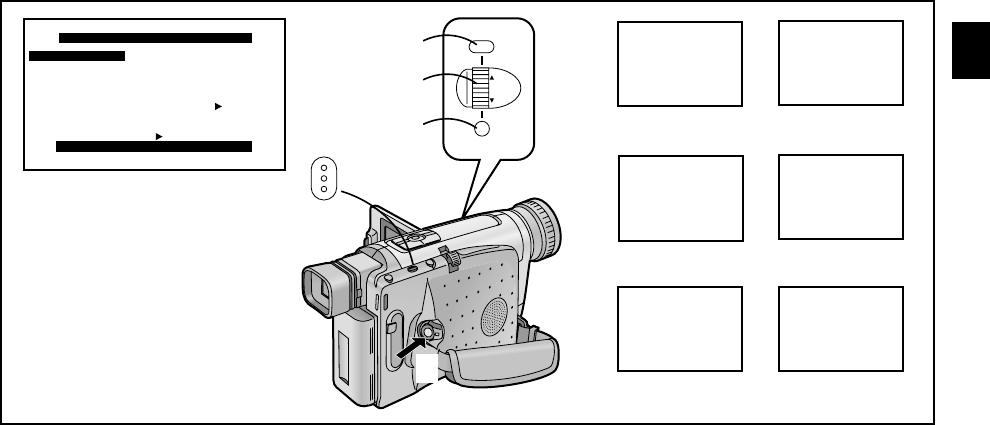
Recording with the Time and/or Date
Superimposed in the Picture
After displaying the [TITLE SETUP] Sub-Menu...
(l 16)
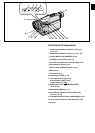
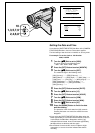
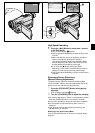
1 Turn the [
3434
3434
34] Dial to select [DATE/TITLE].
2 Press the [SET] Button to select the desired
indication.
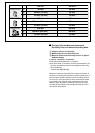
≥The indications change in the order 1 to 6.
1 Date and Time _>2 Date _>
3 Date, Time and Title _>4 Date and Title _>
5 Title _>6 Date and Time with seconds _>
≥If the button-type battery for the built-in clock is not
inserted into the Movie Camera or is exhausted, only
the title is displayed. (l 27)
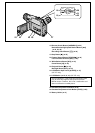
3 Press the [MENU] Button to exit the menu.
≥The selected Date/Time/Title Indication appears.
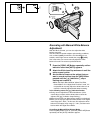
4 Press the Recording Start/Stop Button to start
recording.
∫ Deleting the Date/Time/Title Indication
5 During recording or when the Movie Camera is
in the Recording Pause Mode, press the
[DATE/TITLE] Button to make the Date/Time/
Title Indication disappear.
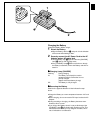
≥After turning the Movie Camera off and then on again, the
previously selected Date/Time/Title Indication is no longer
displayed. To make it appear again, press the [DATE/TITLE]
Button once.
≥Be sure to turn the Movie Camera off before removing the
Battery or disconnecting the AC Adaptor. Disconnecting the
power supply while the Movie Camera is on erases the Date/
Time/Title Indication (l 62) stored in memory.
OCT
15 2000
2:30
PM HOLIDAY
OCT
15 2000
2:30
PM
OCT
15 2000
1
2
3
4
5
OCT
15 2000
HOLIDAY
HOLIDAY
OCT
15 2000
2:30:15
PM
6
5
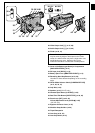
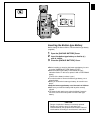
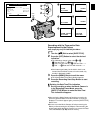
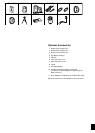
TITLE SETUP
PRESS MENU TO EXIT
DATE/TITLE
SIZE
DATE TIME
LANGUAGE
TITLE
FOR TITLE
NORMAL
HOLIDAY
RETURN ----
ENGLISH
DATE/
TITLE
MENU
FOCUS / SET
MF/
TRACKING
4
2
1
3