


- 2 -
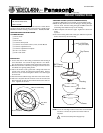
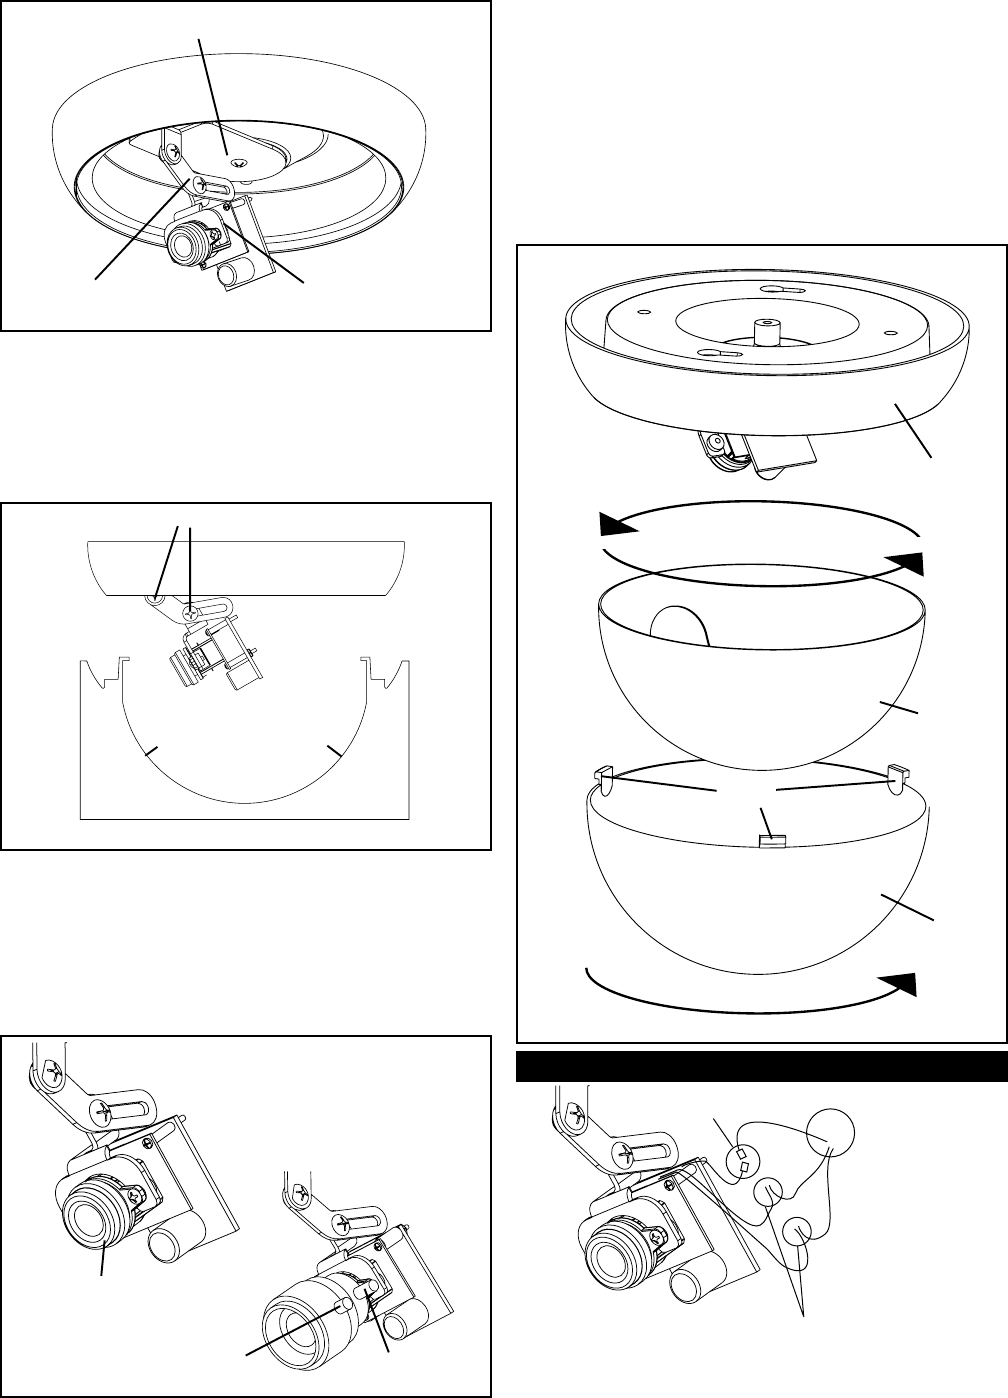
DOME REPLACEMENT
1. Rotate the liner inside the dome, so that when the dome is
secured to the base, the camera lens is in the center of the
viewing slot of the liner.
NOTE: It may be helpful to install the dome without the liner
the first time. This way you can visually determine
which direction the lens is pointing and adjust the liner
opening accordingly.
2. Align and insert the three tabs of the dome with the three tab
slots on the dome base. Rotate the dome clockwise until the
dome locks into place.
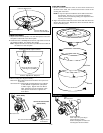
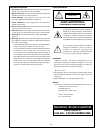
CAMERA ADJUSTMENT
1. Clip the tabs of the template onto the swivel plate so that the
template is attached to the swivel plate.
2. Loosen the two 4-40 Phillips head screws, adjust the camera to
the desired position, and tighten the screws.
Note: Adjust camera lens as close as possible to the outline of
the bottom of the template.
Camera swivel plate
Camera Adjustment
Arm
Camera Mount with
Camera and PC Board
Loosen screws to adjust camera
Tab
Tab
Place the lens as close to
this edge as possible
Camera Adjustment Template
Liner
Dome
Tabs
Base
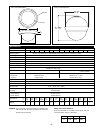
3. Fine focusing (see diagram below):
Fixed Lens: Manually rotate the lens until a clear picture is
achieved.
Vari-Focal Lens: First, adjust the Magnification Lock Screw
to the desired magnification (telephoto
to wide angle). Tighten the Lock Screw.
Next, adjust the Focus Lock Screw until a
clear picture is achieved. Tighten the
Lock Screw.
Fixed Lens Camera
(PCF2, PCF6)
Vari-Focal Lens Camera
(PCV2, PCV6)
Manual focus
Focus Lock Screw
Magnification
Lock Screw
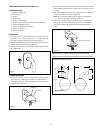
Video
BNC Connectors
Power Connections
NOTE: Splice wiring according to
standard electrical guidlines.
Positive and Negative connections are
interchangeable with this PC Board.
Connections