13
Getting Started
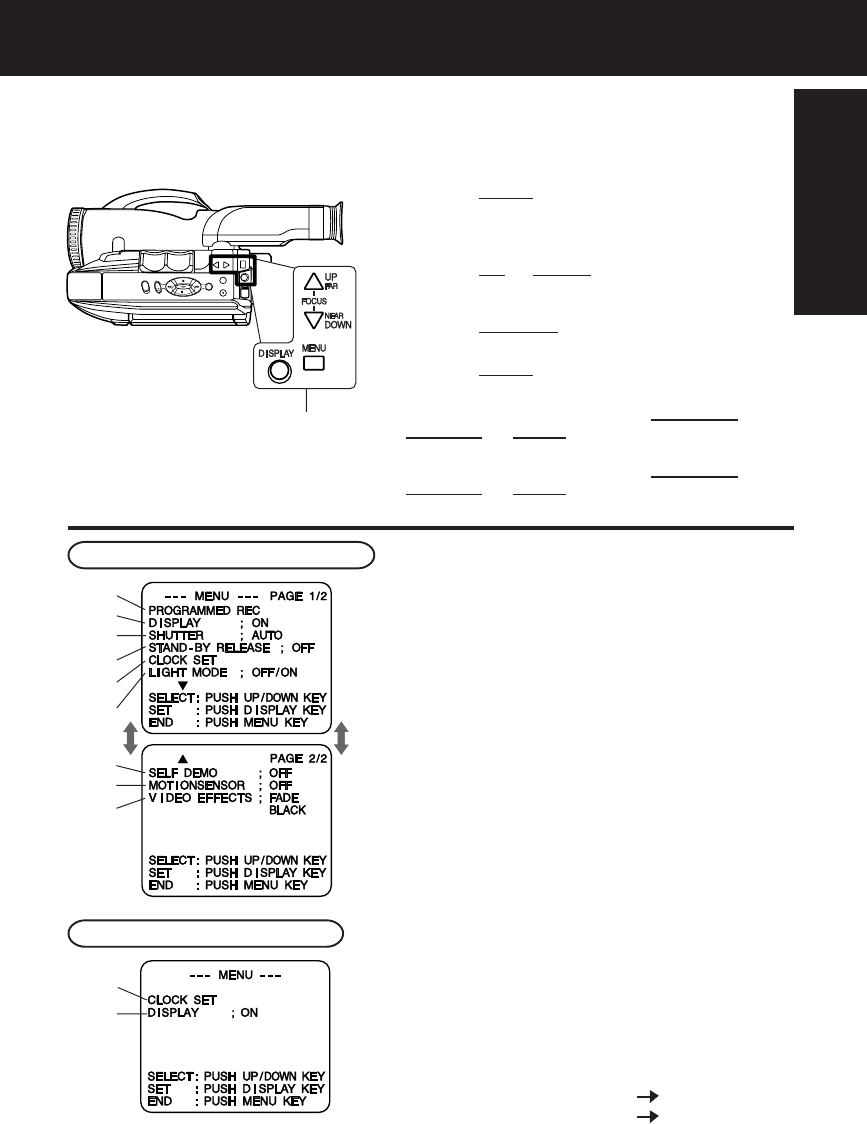
Using MENU Mode
Before you begin...
• Connect Camcorder to power source.
• Set POWER to CAMERA or VCR.
1Press MENU for MENU mode.
The CAMERA or VCR MENU screen (see below
left) appears when Menu mode is entered.
2Press UP or DOWN to highlight the
desired menu item.
3Press DISPLAY to set selection.
4Press MENU to exit.
Note:
• The Menu mode is canceled if UP/DOWN,
DISPLAY, or MENU are not pressed within
5 minutes when Self Demo mode is off.
• The Menu mode is canceled if UP/DOWN,
DISPLAY, or MENU are not pressed within
30 seconds when Self Demo mode is on.
1
2
3
4
5
6
7
8
9
MENU Mode (VCR) Screen
MENU Mode (CAMERA) Screen
1 PROGRAMMED REC (page 19).
Camcorder starts and stops recording at a
preset time.
2 DISPLAY (page 31).
ON : On-screen Display (OSD) screens are
displayed.
3 SHUTTER (page 25).
Select desired shutter speed.
4 STAND-BY RELEASE (page 18).
ON : Enables quick resumption of recording
from Stand-by mode.
5 CLOCK SET (pages 14, 15).
Select to set clock.
6 LIGHT MODE (page 16).
ON/OFF : Light can be set ON or OFF.
ON/OFF/AUTO : Light can be set ON, OFF, or AUTO.
7 SELF DEMO (page 7).
ON : SELF DEMO screen is displayed.
8 MOTIONSENSOR (page 30).
ON : Enables MotionSensor recording.
9 VIDEO EFFECTS (pages 26~27).
AUTO FADE : BLACK or WHITE
DIGITAL FADE : TYPE 7 types
COLOR
8 colors
5
2
1, 2, 3, 4
02.L552(E)Getting p09-16 01.12.10, 4:24 PM13


