


7
(ENG) LSQT1467
Preparation
Before using
1
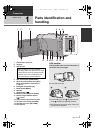
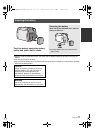
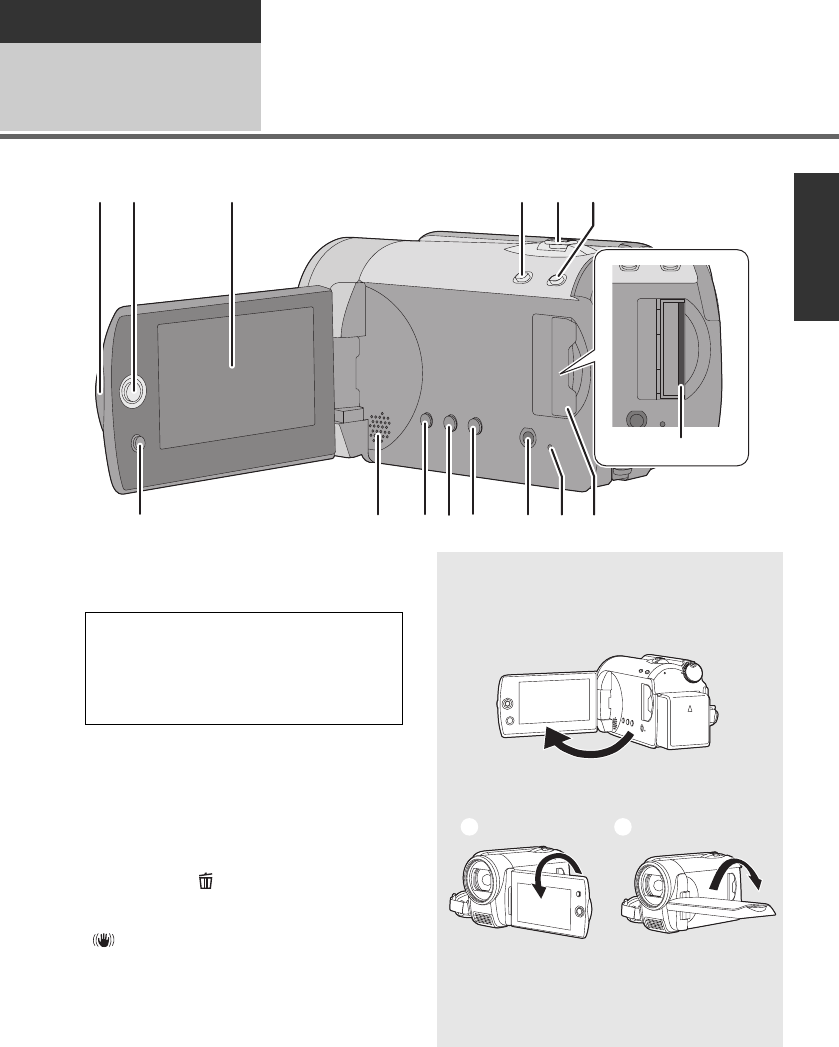
Parts identification and
handling
1 LCD monitor open part
2 Joystick
3 LCD monitor
4 Web mode button [WEB MODE]
5 When recording: Zoom lever [W/T]
When playing back: Volume lever
[sVOLr]
6 Intelligent auto button [iA]
7 Menu button [MENU]
8 Speaker
9 Delete button [ ]
10 Manual button [MANUAL AF/MF]
11 Optical image stabilizer button
[ , O.I.S.]
12 Audio-video output terminal [A/V]
13 SD Card access lamp [ACCESS]
14 SD Card slot cover [SD CARD]
15 SD card slot
8
6
7
9
10
11
12 13 14
12 3 54
15
Due to limitations in LCD production
technology, there may be some tiny bright
or dark spots on the LCD monitor screen.
However, this is not a malfunction and
does not affect the recorded picture.
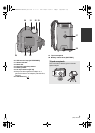
LCD monitor
Pull the LCD monitor out in the direction of
the arrow with your fingers.
≥ It can open up to 90o.
≥ It can rotate up to 180o A towards the lens
or 90o B towards the opposite direction.
≥ The brightness and colour level of the LCD
monitor can be adjusted.
SDR-H90&80EP-LSQT1467_mst.book 7 ページ 2008年12月2日 火曜日 午後2時32分