8 Pelco Manual C458M-B (1/98)
3.0 INSTALLATION
Proceed with the installation of the dome drive after you have installed the back
box.
If a camera/lens package has not been installed on your dome drive, you can install
the camera/lens either before you install the dome drive in the back box or after you
install the dome drive. If you want to install the camera/lens first, proceed to Sec-
tions 3.2, LENS WIRING, and 3.3, CAMERA/LENS INSTALLATION, then return to
Section 3.1, DOME DRIVE INSTALLATION.
3.1 DOME DRIVE INSTALLATION
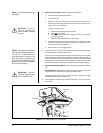
1. Refer to Figure 11 and remove the shipping stabilizer bracket (item 65).
2. If your dome drive has a integral receiver/driver installed, refer to the manual
for the receiver/driver and set the jumpers and switches as required for your
application.
3. Turn off the power to the back box.
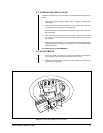
4. Remove the hairpin clips from the two latches inside the back box (refer to
Figure 1) and open the latches.
5. Insert the dome drive into the back box:
a. Refer to Figure 1 and line up the upper bracket on the dome drive so that:
The 25-pin connector on the dome drive will go into its mating connector
on the back box.
The latch pins on the sides of the upper bracket will go into the latches in
the back box.
The two guide pins on the back box will go into the bushings on the upper
bracket of the dome drive.
b. Push the dome drive into place and close the latches.
c. Reinstall the hairpin clips in the latches to prevent the latches from open-
ing.
Proceed to Sections 3.2, LENS WIRING, and 3.3, CAMERA/LENS INSTALLA-
TION, if you have not installed your camera/lens. Otherwise proceed to Sec-
tion 3.4, ADJUSTMENTS.
3.2 LENS WIRING
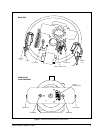
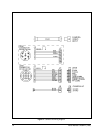
Make sure the lens has the correct connector to mate with the dome drive lens
connector and is wired according to the pinout diagram in Figure 2.
If connectors are not compatible, use the mating connector provided with the dome
drive and wire according to the pinout diagram in Figure 2.
Proceed to Section 3.3, CAMERA/LENS INSTALLATION.


