


Pelco Manual C439M (10/92) 3
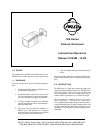
4.0 INSTALLATION
Note: Fasteners to secure the enclosure to a load-
bearing solid surface are not supplied.
To install the camera/lens, perform the following:
1. Using the mount as a template, mark and drill
holes in the mounting surface. (If you are
planning to conceal the wiring through the
mounting surface you will also need to mark
and drill the cable feedthrough hole at this
time.) Attach the enclosure with integral mount
securely to the mounting surface with fasten-
ers of a suitable size (1/4-20 screws recom-
mended, not supplied).
2. Gently pull the front of the housing to separate
the two halves of the enclosure.
3. Place the camera/lens onto the slotted camera
bracket and secure with the 1/4-20 screw
provided.
4. Route the coax through the cable feedthrough
hole located on the rear of the enclosure.
(If desired, the coax can also be routed through
the feedthrough hole on the mount to conceal
the wiring through the mounting surface.)
5. If necessary, shim up the camera/lens using
flat washers (not provided) to ensure the cam-
era/lens is in the center of the viewing win-
dow.
6. Adjust the camera/lens (front to back) so that
the lens is as close to the viewing window as
possible.
7. Replace front cover.