


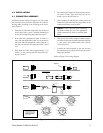
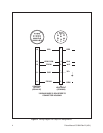
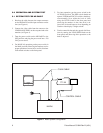
Pelco Manual C518M Rev B (4/91) 5
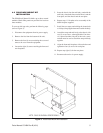
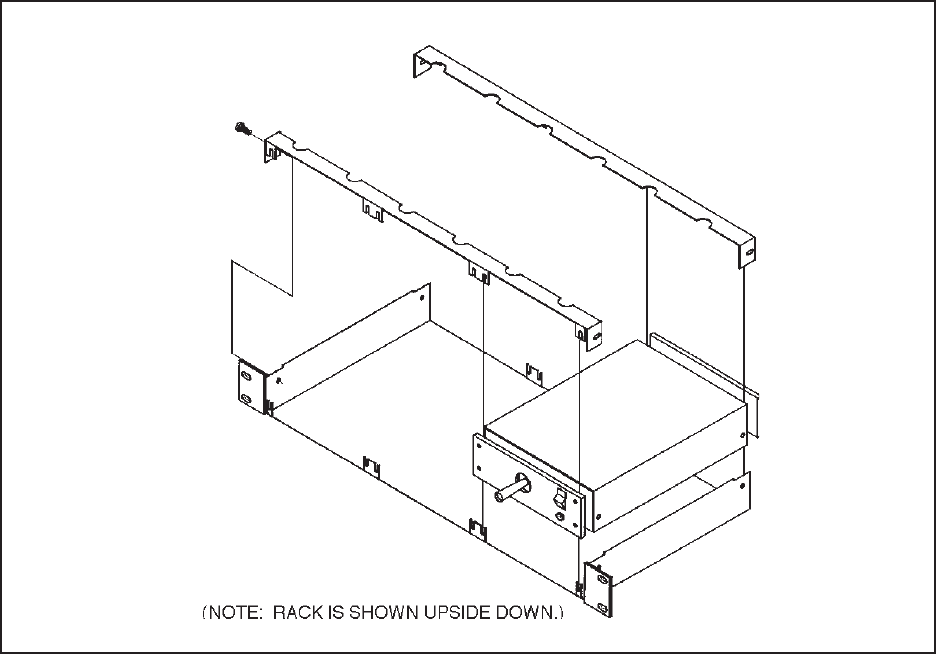
4.2 R300 RACK MOUNT KIT
INSTALLATION
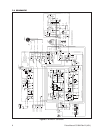
The R300 Rack Mount Kit holds up to three control
modules. Blank filler panels are provided for less than
three modules.
To convert desk top units, perform the following steps
(refer to Figure 3):
1. Disconnect the equipment from its power supply.
2. Remove the feet from the bottom of the unit.
3. Remove the four (4) screws retaining the cover and
remove the cover from the equipment.
4. Loosen the eight (8) screws retaining the front and
rear faceplates.
5. Insert the chassis into the rack body; sandwich the
rack body slotted tabs between the chassis and the
front plate, and the chassis and the rear plate.
6. Repeat steps 1-5 for other units or assembly of the
blank faceplate supplied.
7. Install the two straps sandwiching the slotted tabs
as in Step 4, keeping the bent ends outside the body.
8. Attach the straps and rack body to the chassis with
two (2) cover screws, when applicable. If no chas-
sis is placed in either side port of the rack, a screw
and nut must be used to attach the strap and body
together.
9. Align the front and faceplates with each other and
tighten the four (4) screws for each plate.
10. Repeat step eight (8) for the rear plates.
11. Reconnect the unit to its power supply.
Figure 3. R300 Rack Mount Kit Installation