


Pelco Manual C535M-B (8/98) 13
and on the monitor the following screen will appear:
NOTE:
Before programming a tour
for the
FIRST TIME
, it is recom-
mended that you clear the pro-
gramming area by pressing the
turbo button on the joystick (see
Figure 7).
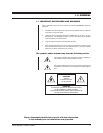
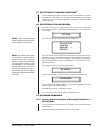
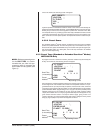
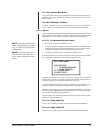
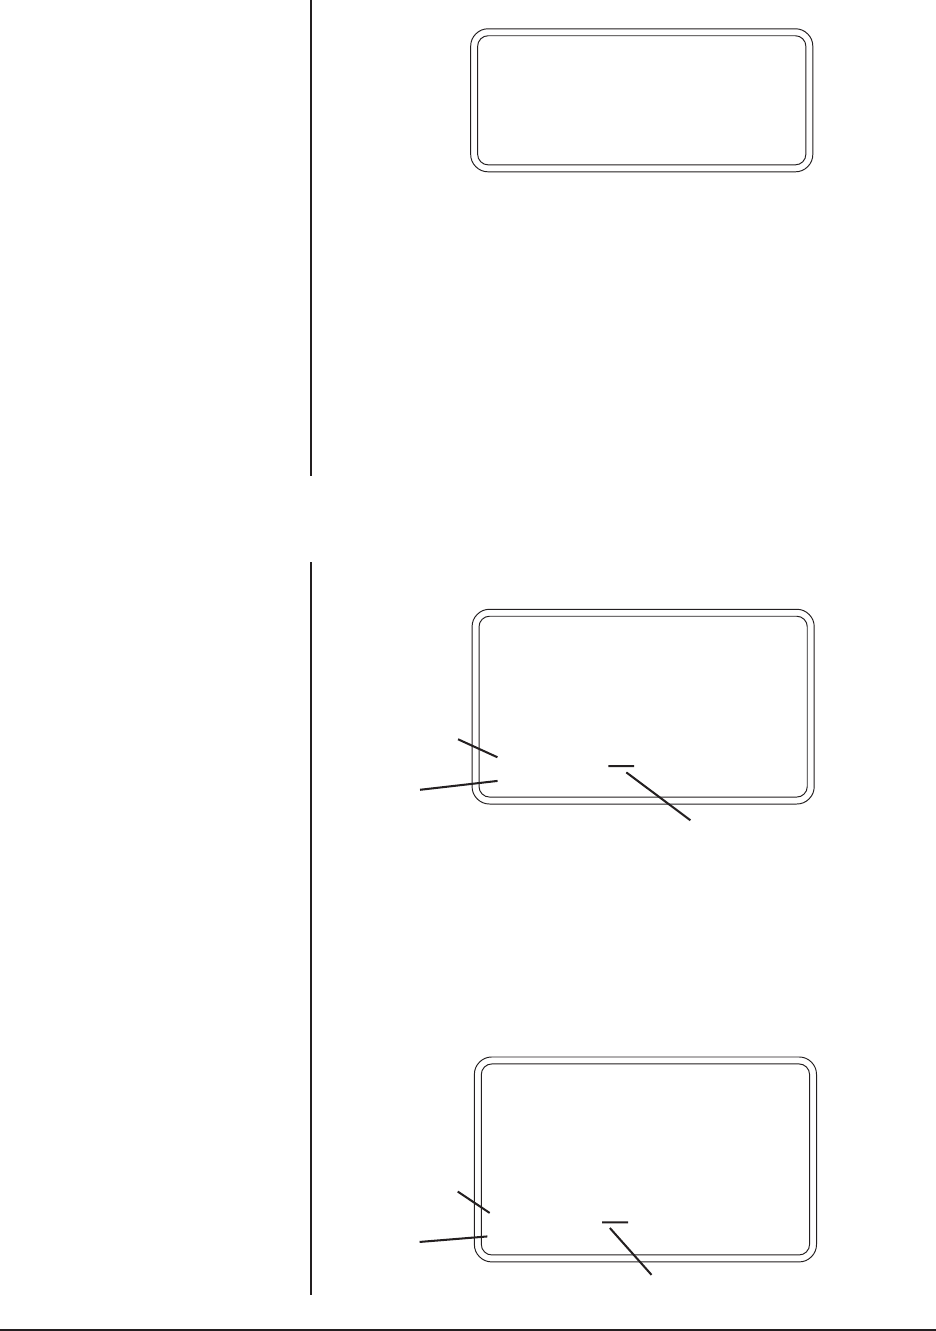
F1 TO EXIT
JOYSTICK
ENTER VALUE
F2 NEXT
STEP
1 2 3 4 5
DWL
PRE
Flashing Cursor
→
→
→
→
Dwell Time
(in seconds)
Preset
Address
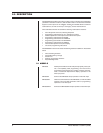
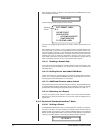
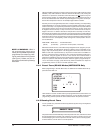
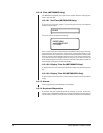
SET PRESET?
JOYSTICK
F1 TO EXIT
YES
NO
❊
→
→
Joystick operation for Standard Coaxitron
®
mode is the same as that already de-
scribed for Extended and RS-485 mode. If the PRESET SET key has been hit acci-
dentally and you wish to exit, use the joystick to position the * character in the “NO”
row and press the F1 key. If setting a preset was really intended then make sure the
* character is positioned in the “YES” row and press the F1 key. The preset is com-
plete. Continue to the next preset position and repeat this section to add more pre-
sets.
4.3.2.2 Preset Scans
The standard Coaxitron
®
Preset receiver will sequence through all of its available
presets at a predefined dwell. To evoke this option, key in the number from 5 up to
64 seconds. Next, press the PAN/AUTO key. The receiver will cycle through its pre-
sets in ascending order up to 360 cycles, then it will stop and need to be initiated
again for further sequencing.
4.3.3 Preset Tours (Standard or Extended Coaxitron
®
Modes)
MPT9500TD Only
To program a tour for a Coaxitron
®
receiver, press the number 4 key followed by the
F2 key. On the monitor, the following screen will appear:
Some preliminary remarks regarding preset tours and the terms used in the above
screen might be in order. Preset tours consist of the sequential execution of a pro-
grammed series of up to 65 previously set presets, viewed one at a time, at the end
of which the cycle repeats until interrupted. You will recall that there are 32 possible
preset addresses. When programming a “tour” any (up to 32) of the possible preset
address positions may be included in the tour since 65 preset positions (called
“steps”) are available in a tour. Only 5 programmable steps at a time appear on any
given screen and each screen of 5 steps is called a page, giving a total of 13
“pages”. Assuming you had programmed the first 5 steps, hitting the F2 key would
bring up page 2 (steps 6-10) which would appear as follows:
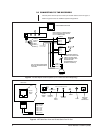
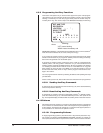
F1 TO EXIT
JOYSTICK
ENTER VALUE
F2 NEXT F3 PREV
STEP
6 7 8 9 10
DWL
PRE
→
→
→
→
Flashing Cursor
Dwell Time
(in seconds)
Preset
Address