


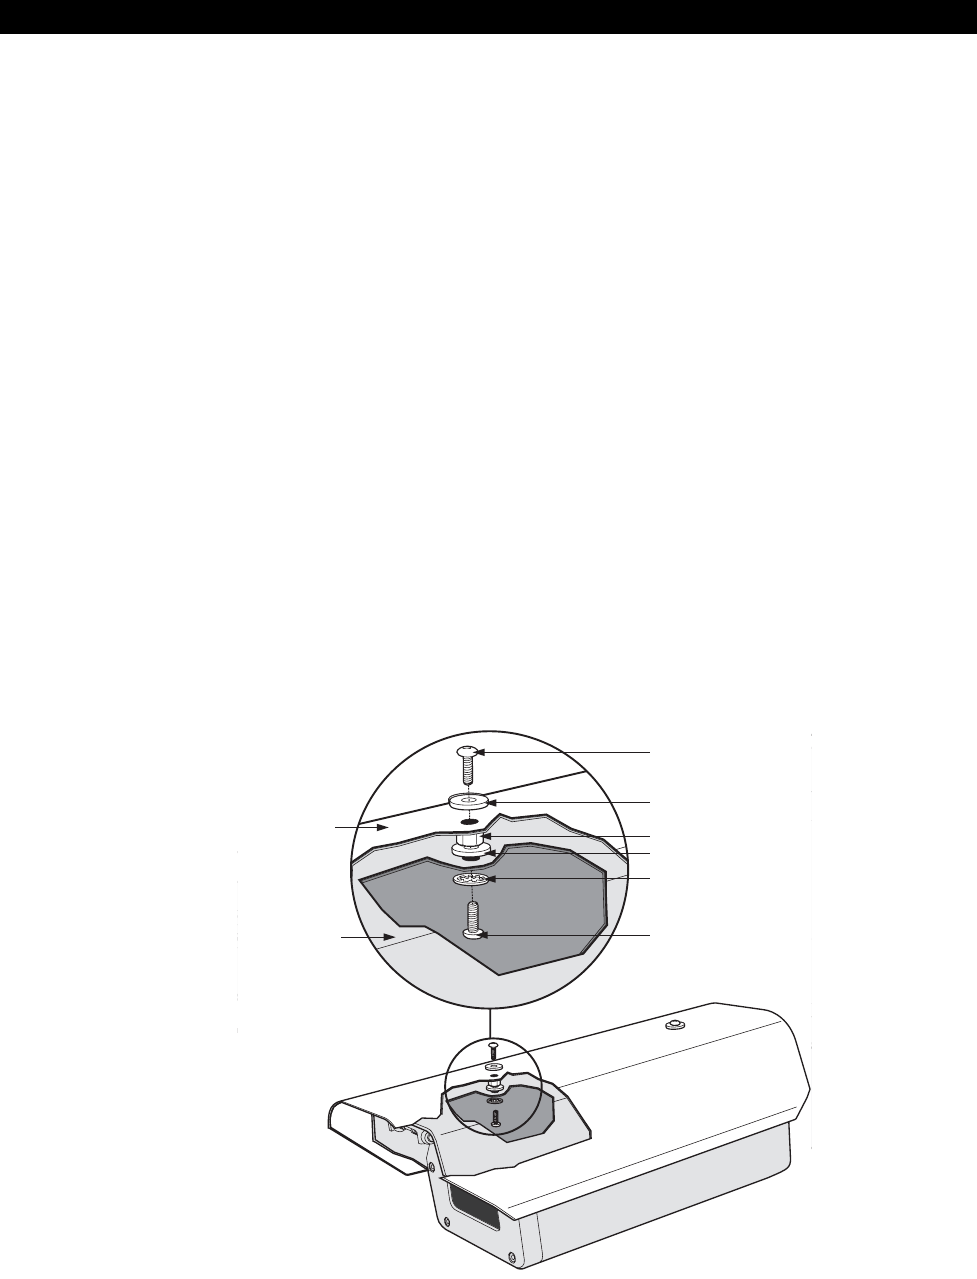
SCREW
NYLON WASHER
SPACER
NYLON WASHER
LOCK WASHER
SCREW
SUN SHROUD
ENCLOUSURE
INSTALLATION
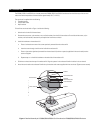
The SS3508, SS3512 and SS3515 sun shrouds protect the EH3508, EH3512 and EH3515 enclosures from the direct rays of the sun and
reduce the internal temperature of the enclosures approximately 10° F (-12.22° C).
The sun shroud is supplied with the following:
2 Threaded spacers
2 Phillips head screws
2 Nylon washers
To install the sun shroud refer to Figure 1 and do the following:
1. Unlatch and raise the lid of the enclosure.
2. Remove the two screws, nylon washers, nuts, and lock washers from the lid of the enclosure. Do not discard the screws, nylon
washers, and lock washers, because they are required to install the sun shroud.
3. Install the hardware on the enclosure lid:
a. Place a lock washer onto one of the screws previously removed from the enclosure lid.
b. Insert the screw through a hole from the inside of the enclosure lid.
c. Place a nylon washer (previously removed from the enclosure lid) and then a spacer (supplied with the sun shroud) onto the
screw and tighten.
d. Repeat steps a-c to install the hardware on the other side of the enclosure lid.
4. Slide the sun shroud over the top of the enclosure lid. Align the spacers in the enclosure lid with the holes in the sun shroud.
5. Attach the sun shroud to the enclosure lid with the nylon washers and screws supplied with the sun shroud. Tighten screws securely.
Figure 1. Detailed Assembly of a SS3508/SS3512/SS3515 Sun Shroud and an EH3508/EH3512/EH3515 Enclosure