


4 Pelco Manual C707M-B (11/96)
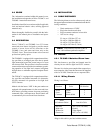
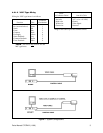
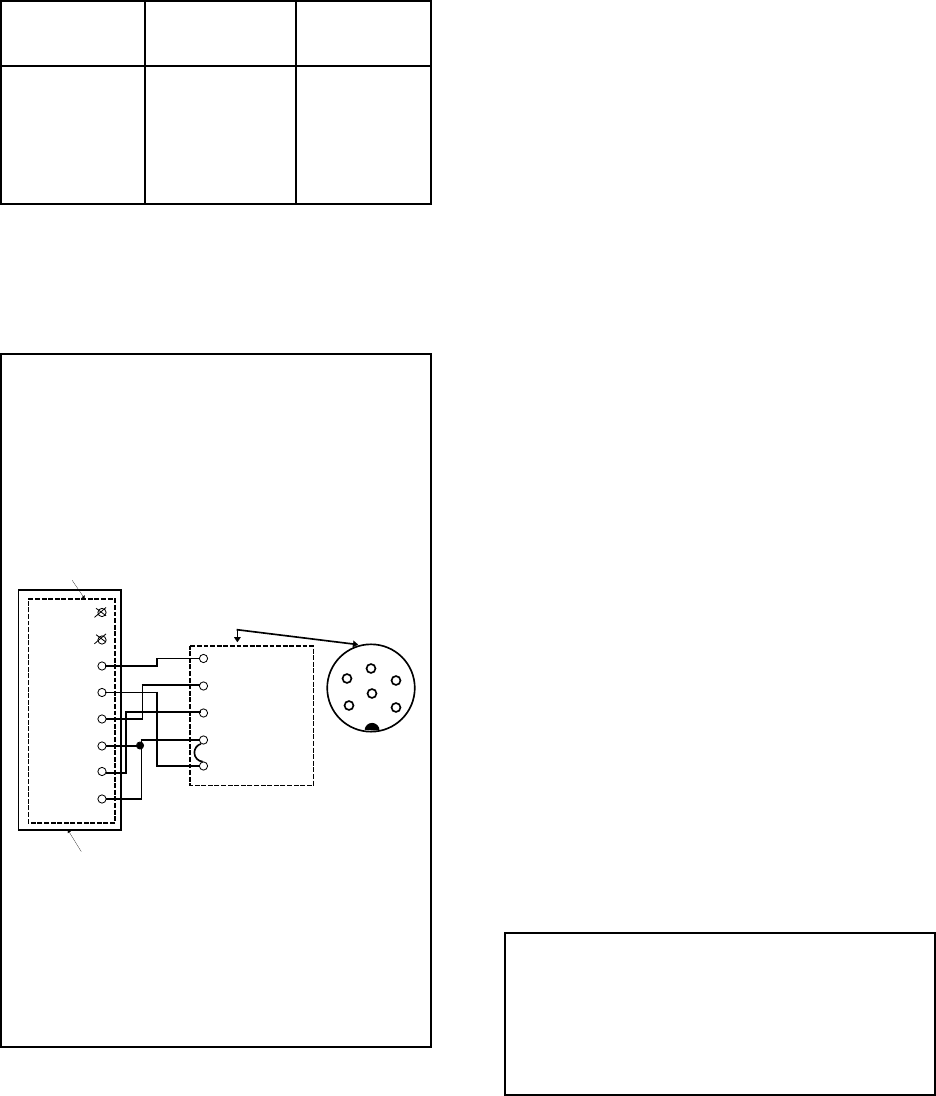
Figure 2. TVJ6MS-1 Connector Wiring
1
2
3
4
5
6
7
8
1
2
3
4
5
WHITE
GREEN
RED
BLACK
GREEN
BLACK
RED
WHITE
RED
GREEN
RED
BLACK & WHITE
BLACK
CN3
CONNECTOR
1
2
3
4
5
ZOOM LENS HOUSING
4.2.2 TVJ6MS-1 Motorized Zoom Lens
This lens has a tapered neutral density spot filter and
has fully controllable zoom, focus and iris functions.
4.2.2.1 Wiring Pinouts
Wiring is as follows:
Connector
Function Color Pin Number
Iris Red 1
Zoom Green 2
Focus Red 3
Common Black & White 4 (see note)
Iris Common Black 5 (see note)
NOTE: Pins 4 and 5 are jumpered together. (See
Figure 2.)
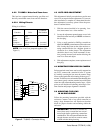
4.3 AUTO IRIS ADJUSTMENT
This adjustment is initially set at the factory and in most
cases will not require further adjustment. If, however,
after installation is complete it is determined that fur-
ther adjustment is necessary, please follow the proce-
dures as outlined below:
1. With the camera installed in its operating loca-
tion, interconnect it to a video monitor.
2. Locate the adjustment potentiometer access hole
identified on the lens body as LEVEL and remove
the dust plug.
3. Using a small standard or Phillips screwdriver,
adjust the LEVEL potentiometer while at the same
time viewing the picture on the video monitor, ro-
tating counterclockwise for a brighter picture or
clockwise for a darker picture. This adjustment
should be done in very small increments of rota-
tion, pausing between each rotation allowing the
auto iris to react and adjust.
4. With adjustment complete, ensure replacement of
dust plug.
4.4 MOUNTING ZOOM LENS ON CAMERA
Pelco motorized zoom lenses can be easily mounted on
any CCTV camera with a standard 16 mm “C” mount
by carefully screwing the lens onto the camera. These
lenses are designed with self-orienting friction type “C”
mounts. To obtain correct orientation after threading lens
onto camera, gently continue rotation beyond the point
where lens and camera threading rotation stops. At this
point you will feel the self-orienting action begin. Con-
tinue rotation until proper alignment is obtained.
5.0 MOUNTING THE LENS
IN AN ENCLOSURE
Follow the mounting instructions provided with the
enclosure. Cameras with a low optical centerline or
using a large diameter lens will require an elevation
block for proper elevation and mounting within the
enclosure.
IMPORTANT: Set focus for shortest dis-
tance (focus near) to extend the lens to maxi-
mum length before positioning camera/lens
combinations. This will ensure that the lens has
enough clearance and will not come in contact
with the window during focusing.