


GB
18
GB
19
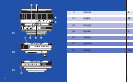
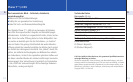
Attaching the lens
First, hold the lens at the grooves of the depthofeld ring.
Align the index mark in the middle of the depthofeld scale
with the marking on the camera body and insert the lens in
the camera‘s bayonet mount. Turn the lens clockwise until you
hear and feel it click into place. For Nikon models, turn the lens
counterclockwise until it clicks into place. ZS lenses should be
screwed clockwise onto the lens mount of the camera body until
secure. The index mark on the scale should then be at the top.
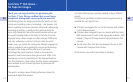
Removing the lens
To remove the lens, hold it at the grooves of the depthofeld
ring. Hold down the lens release knob on the camera while tur
ning the lens counterclockwise (or clockwise in the case of ZF
lenses) and remove the lens from the camera‘s bayonet mount.
To remove the ZS lens, hold it by the grooves of the depthof
eld ring. Unscrew the lens from the body by turning
it counterclockwise.
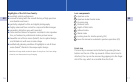
Attaching and removing lters, lens shade
Standard threaded lters can be attached to the front of the
lens. If you use more than one lter at a time mechanical
vignetting may occur.
To attach the shade in operation mode, align the white dot on
the shade with the shade index on the lens. Turn the shade
clockwise until it clicks into its locked position. To remove the
lens shade, push the lens shade towards the lens and turn it
counterclockwise. The shade can also be attached in reverse
mode for transportation and storage.
Fitting Instructions