


4
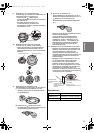
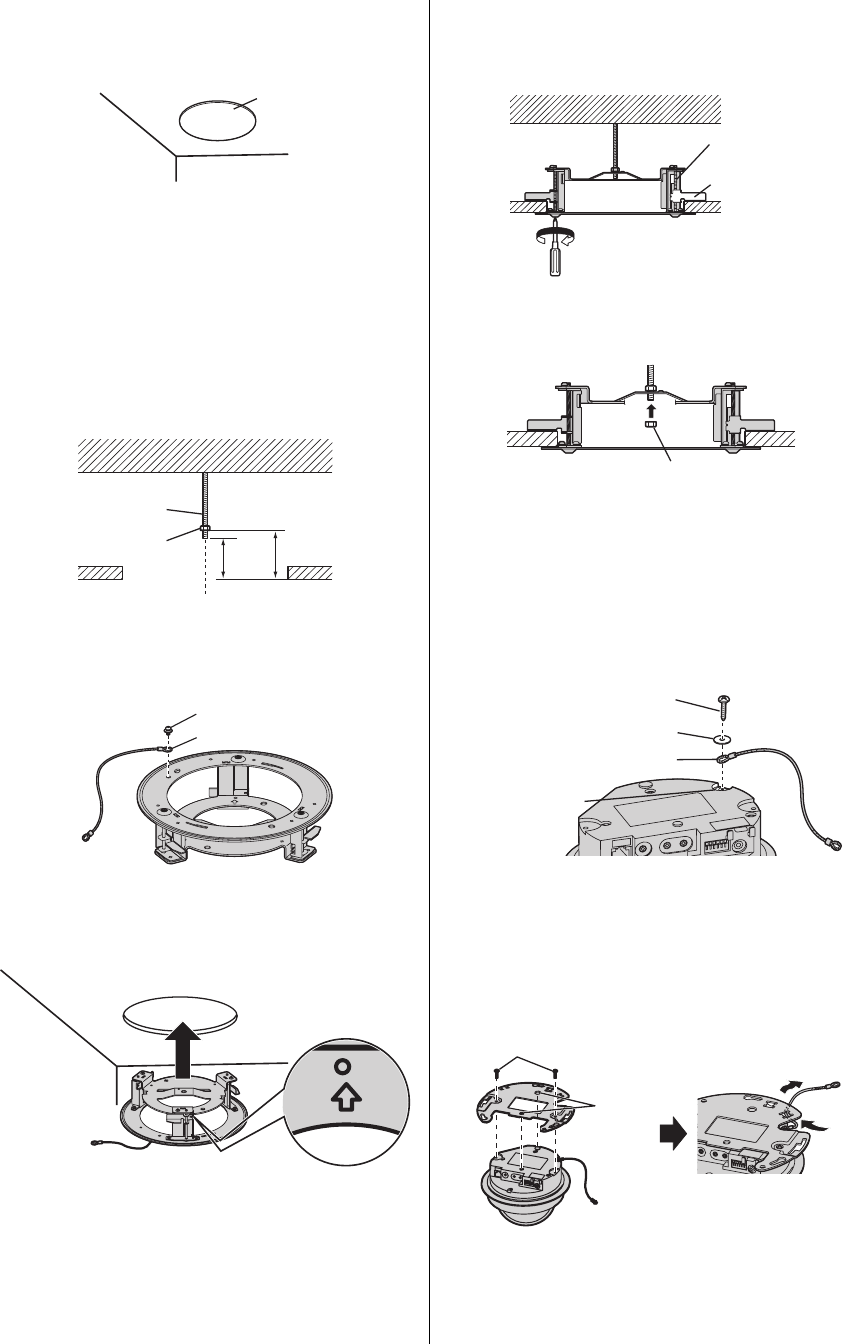
Mounting the Bracket and the Camera
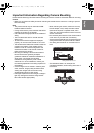
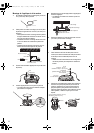
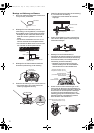
1. Using the included template as a guide, make a
hole (φ 240 mm) in the ceiling.
2. Drive an anchor bolt (not included) into the
original ceiling and attach a nut (not included) to
the bolt.
• Drive the anchor bolt into the original ceiling
directly above the center of the hole made in
step 1.
• The end of the anchor bolt should be 47 mm
above the bottom of the ceiling board.
• The bottom of the nut should be 61 mm above
the bottom of the ceiling board.
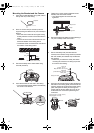
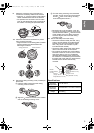
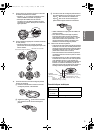
3. Secure the safety wire to the bracket using
screw B (included).
4. Insert the bracket into the hole in the ceiling.
• The camera will face the direction indicated by
the arrow on the bracket.
5. Tighten the 3 clamp screws (attached to the
bracket) and secure the bracket.
• The clamps tighten as the screws are
tightened.
6. Secure the bracket by attaching and tightening a
nut (not included) to the anchor bolt.
7. Secure the safety wire (included with the
camera) to the camera using screw B (included
with the camera) and washer B (included with
the camera).
• Make sure you attach the safety wire when
mounting the camera on a ceiling to prevent
the camera from falling.
8. Align the 2 round protrusions on the camera and
the holes on the ceiling plate (included with the
camera), tighten the screw to secure the ceiling
plate, then pass the safety wire through the
ceiling plate as shown. Make sure you do not
scratch the lens cover when performing this
procedure.
Template
Anchor bolt
Nut
Ceiling board
Bolt is above center of hole
61 mm
47 mm
Safety wire
Screw B
Clamp screw
Clamp
Ceiling board
Clockwise
Nut
Washer B
(Inside diameter: 2.6 mm)
Safety wire
Safety wire hole
Screw B
(Length: 10 mm,
Body diameter: 2.6 mm)
Holes
Screw A (2 pcs.) (Length: 20 mm,
Body diameter: 4.0 mm)
BB-HCA10CE_IG.book Page 4 Friday, February 15, 2008 8:10 PM