English
9
8
8
Lens connector specifications (rear view):
1 = 9VDC 40 mA max.
2 = N.C.
3 = Iris video 1Vp, 1kΩ
4 = Ground
5.1 LENS ADJUSTMENTS
Manual Iris Lenses
Set Lens iris to the required F. number when applicable.
Point camera at the scene.Adjust LVL (chap. 9.2.2) to desired video level.
DC Iris Lenses
Initial lens setting
Point the camera at a test chart or scene; avoid highlights for optimum results.
Ensure sufficient scene illumination (>200 lux);the camera does not allow lens adjustment
under low light conditions.
Push LVL button once, use +/- buttons until the OSD indication on the left [DC lens level]
reaches "0".
Note: the OSD counter on the right indicates the reference value for DC lenses only.
Camera/Lens Le
v
el Adjustment
Adjust the Video output level by pushing the LVL button again or twice if the OSD menu
has disappeared.
Use +/- buttons for adjusting desired video level (OSD indication on the right displays
video level).
Video Iris Lenses
Initial lens setting
Point the camera at a test chart or scene; avoid highlights for optimum results.
Ensure sufficient scene illumination (>200 lux);the camera does not allow lens adjustment
under low light conditions.
Set the Lens ALC potmeter to the central position.
Push LVL button once, adjust the ALC potmeter until the OSD indication on the left [VI
lens Level] reaches "0".
Camera/Lens Le
vel Adjustment
Adjust the Video output level by pushing the LVL button again or twice if the OSD menu
has disappeared.
Use +/- buttons for adjusting desired video level (OSD indication on the right displays
video level).
21
43
VIDEO IRIS
4
1
2
3
21
43
DC IRIS
4
1
2
3
1 = Damping coil -
2 = Damping coil +
3 = Drive coil + 40 mA max.
4 = Drive coil - Ground
5
Mounting the lens
The camera supports Manual Iris,Video Iris and DC Iris lenses. The use of Video or DC
Iris lenses is recommended for outdoor use to prevent bleaching of the CCD.
Lens mount, lens thread
The lens mount should be C mount or CS
mount (1”-32UN). No CS/C adapter is
required when using C mount lenses.
Auto Lens Detection
At power-up the camera automatically
detects the lens type in use and configures
itself.
Note: If auto detection fails while hot
plugging the connector to the camera, then
disconnect the camera power and re-power
again.
Heavy lenses
Heavy lenses need additional support from a housing or base plate in order to withstand
vibration or shocks. Use the correct spacer height to align supported lenses in order to
prevent torque damage of internal camera components.
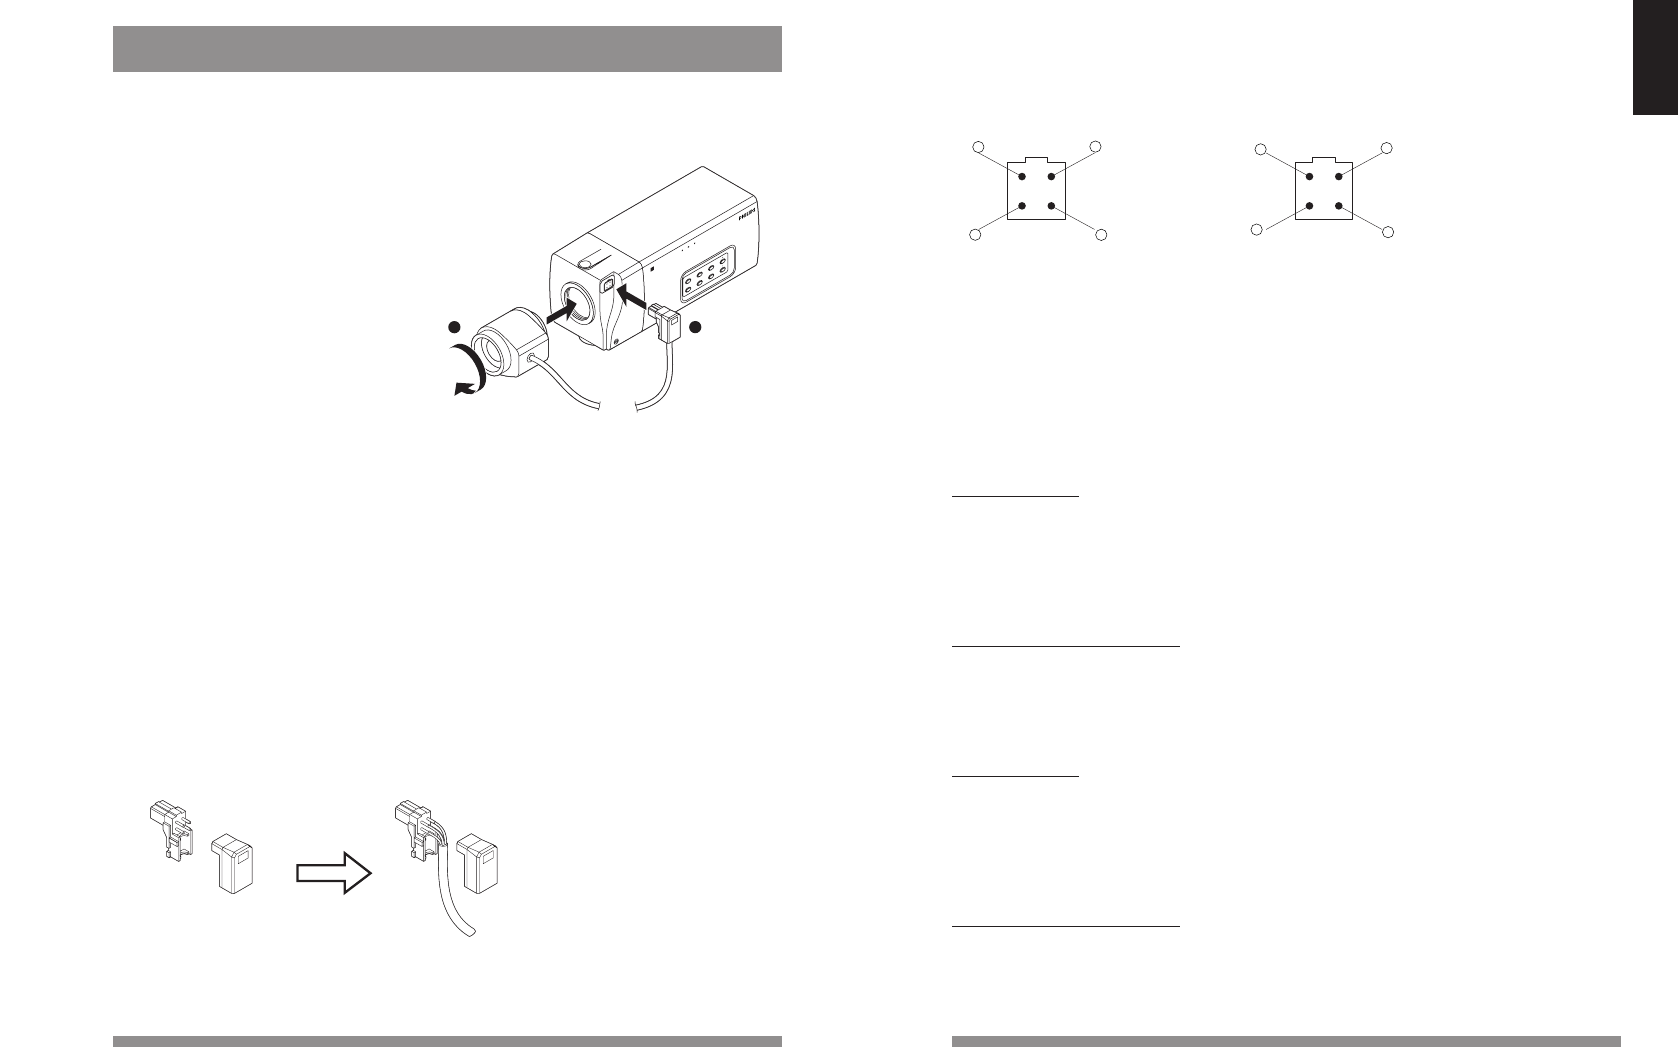
Follow these steps to mount a lens on the camera:
1) Remove the dust cap, and screw the lens into the lens mount.
2) Where applicable, connect the iris control cable for automatic iris control to the lens
connector.
3) You will need to adjust the back focus setting after fitting a new lens or replacing a lens.
NOTES:
• Lenses without plug or with a non-compatible plug should be wired in accordance
with the drawings.
• Lens outputs are short-circuit proof.
M
o
d
e
D
i
g
i
t
a
l
C
a
m
e
r
a
L
V
L
B
L
C
S
h
u
t
L
L
P
h
a
s
e
1
2


