


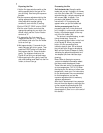
Compose your picture:
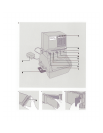
With the slide
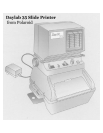
correctly oriented, insert the slide carrier
into the slide carrier slot (9) Set the
VIEW-OFF-PPINT
switch at
VIEW;
the viewing
light inside the Daylab 35 should now be
on. Open the image-preview door to view
your image projected onto the dark
Note
: As you set the filters to make color
adjustments, the Daylab 35 does not
show the effects of the adjustments as
you preview the image projected on the
dark slideviewing panel. Make test
exposures to gauge what effects you want
to achieve with color filtration.
slideviewing panel (10).
Note:
Adding filtration extends exposure
time. Use the exposure-adjustment dial to
compensate for these changes. Also note
that extending the exposure times can
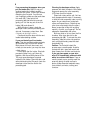
You can move the slide carrier from
side to side to center the image on the
dark slideviewing panel. Notice,
however,that you cannot print the full
result in further color shift.
format of your slide. You lose
Note:
Use no more than two filters at any
approximately 1/16 in. from the horizontal
one time.
dimension of the image.
Note:
You can also use the filters to add
or subtract tonal values to your
black-and-white prints.
Also, note that the Daylab 35 has
nonadjustable, fixed focusing.
Warning:
Never leave your slide under
the VIEW Iamp longer than necessary.
Heat from the lamp can damage your
slide.
The Daylab 35 has a built-in switch
that automatically shuts offthe VIEW lamp
after approximately 4 minutes. This
prevents the lamp from overheating and
damaging your slide. To turn the VIEW
lamp on again, set the VIEW-OFF-PRINT
switch at OFF; then move it back to VIEW.
Caution: After centering your image on
the dark slideviewing panel, be sure to
close the image-preview door. Leaving
the door open while you expose the film
fogs the print.
Preparing to make a print
Select a slide: The Daylab 35 Iets you
add creative effects to your slides, but it
cannot improve the photographic quality
of your original image. Choose a clean,
dust-free 35mm slide that is in sharp
focus, has an even exposure (neither too
light not too dark and accurately renders
the colors of your subject.
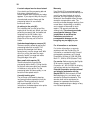
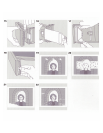
Orient your slide on the slide carrier
:
Holding the slide carrier with its long
edge facing you (the guides that hold the
slide in place face upward), lay your slide
emulsion-side-up /dull-side-up) on the
carrier so that it fits within the guides. Be
sure to orient the slide on the carrier so
the image is upside down and appears as
a mirror image on the dark slide/viewing
panel.
6